Lexus ES: Components
COMPONENTS
ILLUSTRATION
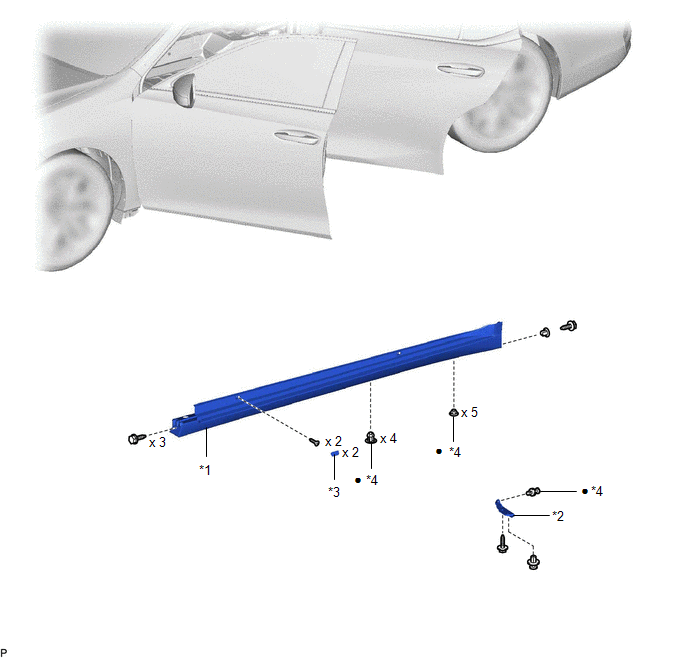
| *1 | BODY ROCKER PANEL MOULDING ASSEMBLY | *2 | NO. 2 ROCKER PANEL MOULDING PROTECTOR |
| *3 | ROCKER PANEL MOULDING COVER | *4 | CLIP |
| ● | Non-reusable part | - | - |
ILLUSTRATION
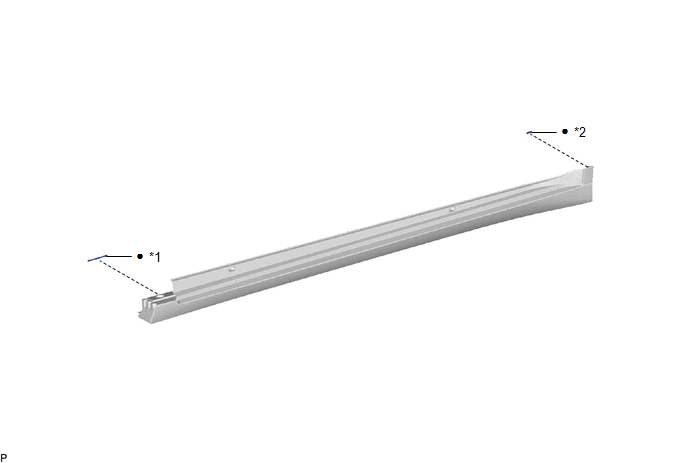
| *1 | NO. 4 ROCKER PANEL MOULDING PROTECTOR | *2 | NO. 5 ROCKER PANEL MOULDING PROTECTOR |
| ● | Non-reusable part | - | - |
READ NEXT:
 Removal
REMOVAL CAUTION / NOTICE / HINT HINT:
Use the same procedure for the RH side and LH side.
The following procedure is for the LH side.
PROCEDURE 1. REMOVE NO. 2 ROCKER PANEL MOULDING PROTECTOR
Disassembly
DISASSEMBLY PROCEDURE 1. REMOVE NO. 4 ROCKER PANEL MOULDING PROTECTOR (a) Remove the No. 4 rocker panel moulding protector. 2. REMOVE NO. 5 ROCKER PANEL MOULDING PROTECTOR (a) Remove
Reassembly
REASSEMBLY PROCEDURE 1. INSTALL NO. 5 ROCKER PANEL MOULDING PROTECTOR HINT: When installing the No. 5 rocker panel moulding protector, heat the body rocker panel moulding assembly using a heat light.
SEE MORE:
Inspection
INSPECTION PROCEDURE 1. INSPECT OIL PRESSURE CONTROL VALVE ASSEMBLY (a) Measure the resistance according to the value(s) in the table below. Standard Resistance: Tester Connection Condition Specified Condition 1 - 2 20°C (68°F) 6.2 to 8.2 Ω If the result is not as specified,
Lost Communication with Multi-axis Acceleration Sensor Module Missing Message (U012587,U012687,U012987,U014087,U029387)
DESCRIPTION When a malfunction is detected between various ECUs and sensors, these DTCs are stored. DTC No. Detection Item DTC Detection Condition Trouble Area U012587 Lost Communication with Multi-axis Acceleration Sensor Module Missing Message 3 seconds after the power switch is t
© 2016-2026 Copyright www.lexguide.net
