Lexus ES: Disassembly
Lexus ES (XZ10) Service Manual / Vehicle Exterior / Lighting (ext) / Rear Light Assembly / Disassembly
DISASSEMBLY
CAUTION / NOTICE / HINT
HINT:
- Use the same procedure for the RH side and LH side.
- The following procedure is for the LH side.
PROCEDURE
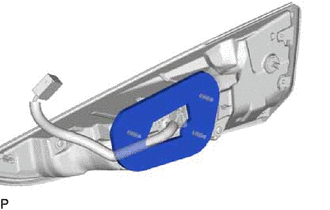
1. REMOVE REAR LIGHT GASKET
| (a) Remove the rear light gasket. NOTICE:
|
|
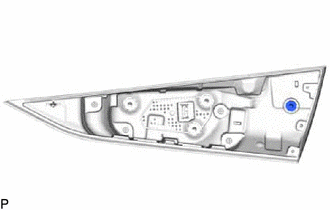
2. REMOVE REAR LIGHT PROTECTOR
| (a) Remove the rear light protector. NOTICE:
|
|
READ NEXT:
 Inspection
INSPECTION PROCEDURE 1. INSPECT REAR LIGHT ASSEMBLY LH *a Component without harness connected (Rear Light Assembly LH) (a) Apply auxiliary battery voltage to the rear light assembly LH and ch
Reassembly
REASSEMBLY CAUTION / NOTICE / HINT HINT:
Use the same procedure for the RH side and LH side.
The following procedure is for the LH side.
PROCEDURE 1. INSTALL REAR LIGHT PROTECTOR (a) Instal
Installation
INSTALLATION CAUTION / NOTICE / HINT HINT:
Use the same procedure for the RH side and LH side.
The following procedure is for the LH side.
PROCEDURE 1. INSTALL REAR LIGHT ASSEMBLY (a) Engag
SEE MORE:
Wheel Speed Sensor Malfunction (C164D)
DESCRIPTION This DTC is stored when the clearance warning ECU assembly receives a wheel speed sensor (front speed sensor RH or front speed sensor LH, rear speed sensor RH or rear speed sensor LH) abnormality signal from the electronically controlled brake system via CAN communication. DTC No. D
Installation
INSTALLATION
CAUTION / NOTICE / HINT
NOTICE:
This procedure includes the installation of small-head bolts. Refer to Small-Head
Bolts of Basic Repair Hint to identify the small-head bolts.
Click here
PROCEDURE
1. INSTALL SPARK PLUG
HINT:
Perform "Inspection After Repair" after r
© 2016-2026 Copyright www.lexguide.net
