Lexus ES: Components
Lexus ES (XZ10) Service Manual / Vehicle Exterior / Door / Hatch / Fuel Lid Opener Switch / Components
COMPONENTS
ILLUSTRATION
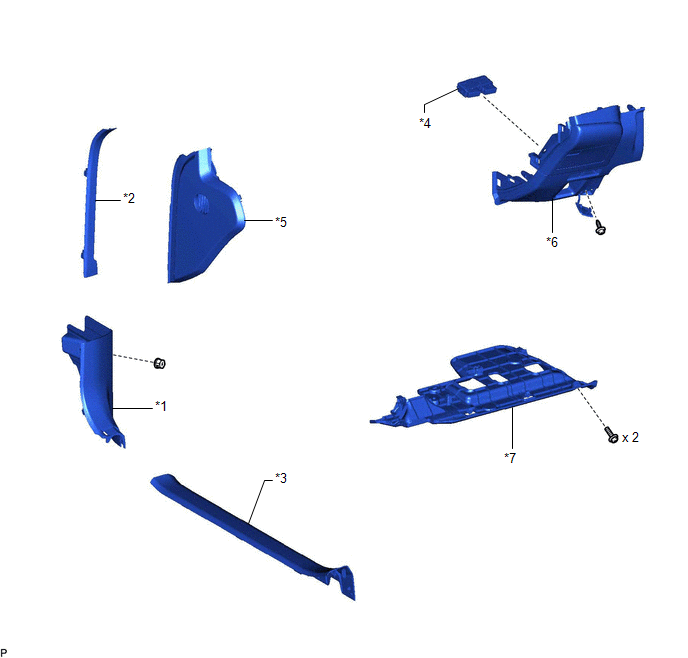
| *1 | COWL SIDE TRIM BOARD LH | *2 | FRONT DOOR OPENING TRIM COVER LH |
| *3 | FRONT DOOR SCUFF PLATE LH | *4 | FUEL LID OPENER SWITCH (TRUNK AND FUEL SWITCH ASSEMBLY) |
| *5 | INSTRUMENT SIDE PANEL LH | *6 | LOWER INSTRUMENT PANEL FINISH PANEL SUB-ASSEMBLY |
| *7 | NO. 1 INSTRUMENT PANEL UNDER COVER SUB-ASSEMBLY | - | - |
READ NEXT:
 Removal
REMOVAL PROCEDURE 1. REMOVE FRONT DOOR SCUFF PLATE LH Click here 2. REMOVE COWL SIDE TRIM BOARD LH Click here 3. REMOVE FRONT DOOR OPENING TRIM COVER LH Click here 4. REMOVE INSTRUMENT SIDE P
Inspection
INSPECTION PROCEDURE 1. INSPECT FUEL LID OPENER SWITCH (TRUNK AND FUEL SWITCH ASSEMBLY) (a) Check the switch. (1) Measure the resistance according to the value(s) in the table below. Standard Resis
Installation
INSTALLATION PROCEDURE 1. INSTALL FUEL LID OPENER SWITCH (TRUNK AND FUEL SWITCH ASSEMBLY) (a) Engage the 2 claws to install the fuel lid opener switch (trunk and fuel switch assembly) as shown in the
SEE MORE:
Terminals Of Ecu
TERMINALS OF ECU CHECK 4WD ECU ASSEMBLY (a) Measure the voltage and resistance of the connector. Terminal No. (Symbol) Wiring Color Terminal Description Condition Specified Condition G131-6 (CANH) - G131-5 (CANL) G - W HIGH-level CAN bus wire - LOW-level CAN bus wire Cable disc
Drive Motor Inverter Temperature Sensor "A" Circuit Short to Ground (P0AED11,P0AED15)
DESCRIPTION The motor generator control ECU (MG ECU), which is built into in the inverter with converter assembly, detects the temperature of the motor inverter using the motor inverter temperature sensor. The inverter cooling system operates independently of the engine cooling system. The motor gen
© 2016-2026 Copyright www.lexguide.net
