Lexus ES: Components
COMPONENTS
ILLUSTRATION
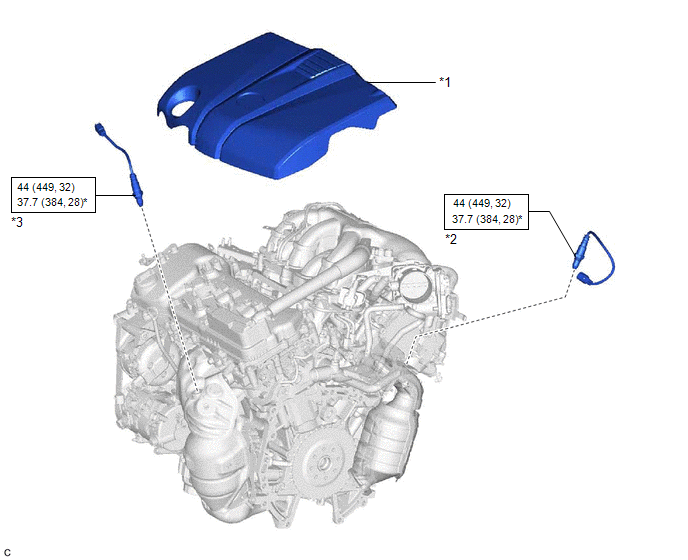
| *1 | V-BANK COVER SUB-ASSEMBLY | *2 | AIR FUEL RATIO SENSOR (for Bank 1) |
| *3 | AIR FUEL RATIO SENSOR (for Bank 2) | - | - |
.png) | N*m (kgf*cm, ft.*lbf): Specified torque | * | For use with SST |
READ NEXT:
 Removal
REMOVAL CAUTION / NOTICE / HINT The necessary procedures (adjustment, calibration, initialization or registration) that must be performed after parts are removed and installed, or replaced during air
Inspection
INSPECTION PROCEDURE 1. INSPECT AIR FUEL RATIO SENSOR (for Bank 1) (a) Measure the resistance according to the value(s) in the table below. Standard Resistance: Tester Connection Condition
Installation
INSTALLATION PROCEDURE 1. INSTALL AIR FUEL RATIO SENSOR (for Bank 1) HINT: Perform "Inspection After Repair" after replacing the air fuel ratio sensor. Click here (a) Using SST, install the air
SEE MORE:
How To Proceed With Troubleshooting
CAUTION / NOTICE / HINT HINT:
Use the following procedure to troubleshoot the wiper and washer system.
*: Use the Techstream.
PROCEDURE 1. VEHICLE BROUGHT TO WORKSHOP
NEXT 2. CUSTOMER PROBLEM ANALYSIS HINT:
In troubleshooting, confirm that the proble
Reassembly
REASSEMBLY PROCEDURE 1. INSTALL OIL PUMP REGULATOR RING (a) Install the oil pump regulator ring to the oil pump body. *1 Oil Pump Regulator Vane *2 Oil Pump Regulator Ring *3 Oil Pump Relief Valve Spring *4 Vane Spring (b) Install the 2 oil pump regulator
© 2016-2026 Copyright www.lexguide.net
