Lexus ES: Components
COMPONENTS
ILLUSTRATION
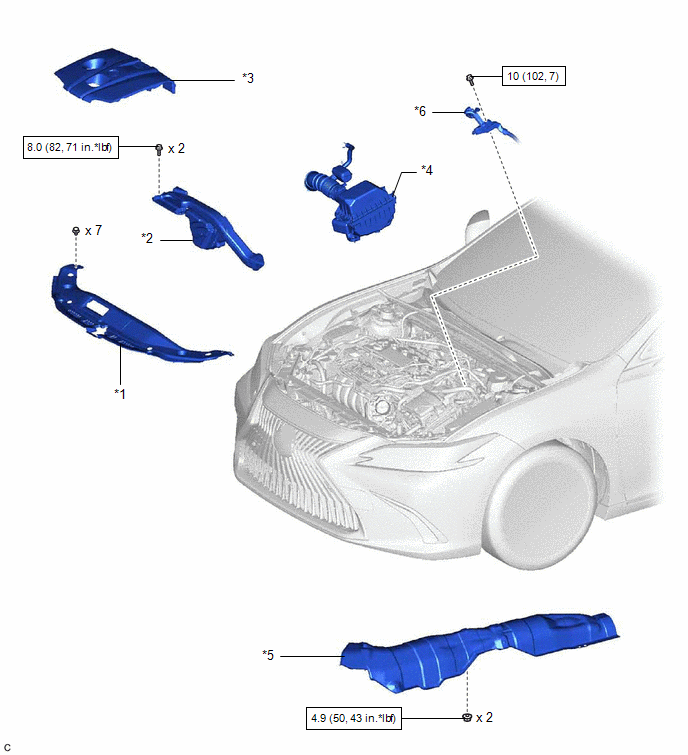
| *1 | COOL AIR INTAKE DUCT SEAL | *2 | INLET AIR CLEANER ASSEMBLY |
| *3 | NO. 1 ENGINE COVER SUB-ASSEMBLY | *4 | AIR CLEANER ASSEMBLY WITH AIR CLEANER HOSE |
| *5 | FRONT LOWER NO. 1 FLOOR HEAT INSULATOR | *6 | ENGINE ROOM MAIN WIRE |
.png) | N*m (kgf*cm, ft.*lbf): Specified torque | - | - |
ILLUSTRATION
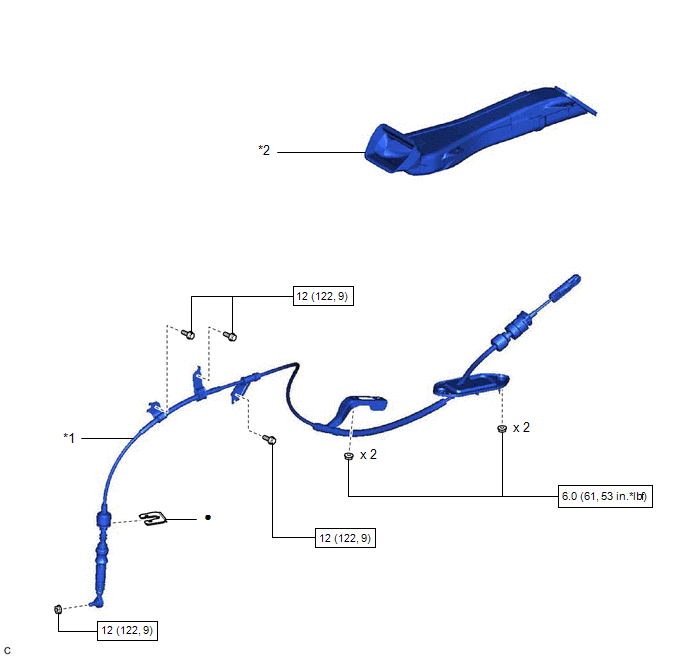
| *1 | TRANSMISSION CONTROL CABLE ASSEMBLY | *2 | NO. 1 CONSOLE BOX DUCT |
| | N*m (kgf*cm, ft.*lbf): Specified torque | ● | Non-reusable part |
READ NEXT:
 Installation
INSTALLATION PROCEDURE 1. INSTALL TRANSMISSION CONTROL CABLE ASSEMBLY (a) Turn the control shaft lever clockwise until it stops, then turn it counterclockwise 2 notches. (b) Engage the
Removal
REMOVAL CAUTION / NOTICE / HINT The necessary procedures (adjustment, calibration, initialization or registration) that must be performed after parts are removed and installed, or replaced during tran
SEE MORE:
How To Proceed With Troubleshooting
CAUTION / NOTICE / HINT HINT:
Use the following procedure to troubleshoot the telematics system.
*: Use the Techstream.
PROCEDURE 1. VEHICLE BROUGHT TO WORKSHOP
NEXT 2. CUSTOMER PROBLEM ANALYSIS HINT:
In troubleshooting, check that the problem symptoms h
Sound Quality is Bad Only when Disc is Played (Volume is Too Low)
CAUTION / NOTICE / HINT NOTICE:
Depending on the parts that are replaced during vehicle inspection or maintenance, performing initialization, registration or calibration may be needed. Refer to Precaution for Navigation System.
Click here
When replacing the radio receiver assembly, always re
© 2016-2026 Copyright www.lexguide.net
