
Lexus ES: Components
Lexus ES (XZ10) Service Manual / Drivetrain / P710 (hybrid Transmission / Transaxle) / Oil Cooler / Components
COMPONENTS
ILLUSTRATION
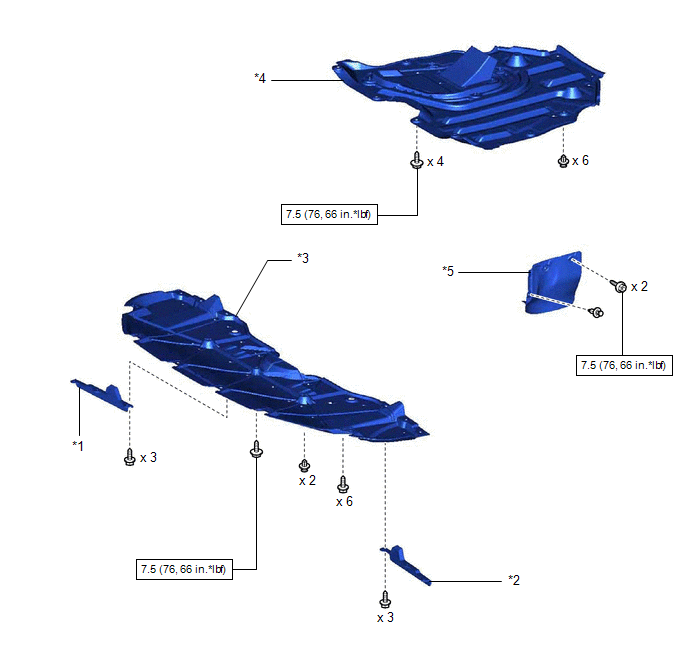
| *1 | FRONT WHEEL OPENING EXTENSION PAD RH | *2 | FRONT WHEEL OPENING EXTENSION PAD LH |
| *3 | NO. 1 ENGINE UNDER COVER | *4 | NO. 2 ENGINE UNDER COVER ASSEMBLY |
| *5 | FRONT FENDER APRON SEAL LH | - | - |
.png) | N*m (kgf*cm, ft.*lbf): Specified torque | - | - |
ILLUSTRATION
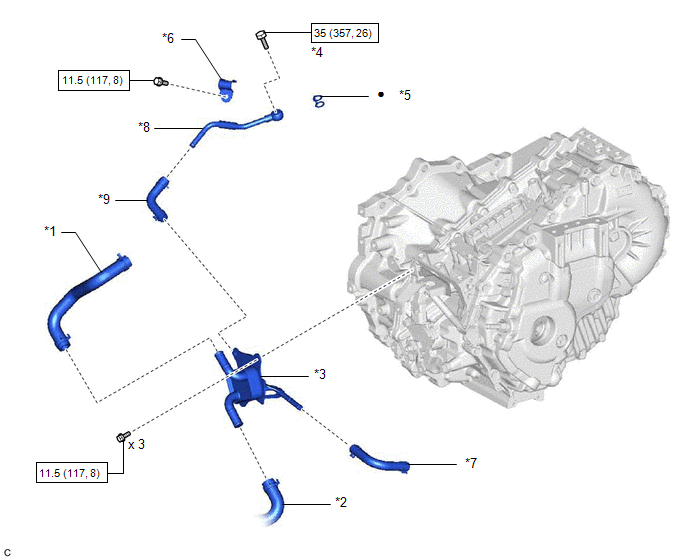
| *1 | NO. 1 INVERTER COOLING HOSE | *2 | NO. 5 INVERTER COOLING HOSE |
| *3 | MOTOR COOLING COOLER | *4 | OIL COOLER UNION BOLT |
| *5 | GASKET | *6 | NO. 1 OIL COOLER TUBE CLAMP |
| *7 | NO. 1 MOTOR COOLING HOSE | *8 | NO. 2 MOTOR COOLING PIPE |
| *9 | NO. 2 MOTOR COOLING HOSE | - | - |
| | N*m (kgf*cm, ft.*lbf): Specified torque | ● | Non-reusable part |
READ NEXT:
 Installation
INSTALLATION PROCEDURE 1. INSTALL NO. 1 MOTOR COOLING HOSE HINT: Perform this procedure only when replacement of the motor cooling cooler is necessary. (a) Coat the pipe of the motor cooling cooler wi
Removal
REMOVAL CAUTION / NOTICE / HINT The necessary procedures (adjustment, calibration, initialization, or registration) that must be performed after parts are removed and installed, or replaced during mot
Shift Lever Knob
ComponentsCOMPONENTS ILLUSTRATION *1 SHIFT LEVER KNOB SUB-ASSEMBLY - - InstallationINSTALLATION PROCEDURE 1. INSTALL SHIFT LEVER KNOB SUB-ASSEMBLY (a) Install the shift lever knob su
SEE MORE:
Components
COMPONENTS ILLUSTRATION *A for Driver Side *B for Front Passenger Side *1 COURTESY LIGHT ASSEMBLY *2 FRONT DOOR TRIM BOARD SUB-ASSEMBLY *3 MULTIPLEX NETWORK MASTER SWITCH ASSEMBLY WITH FRONT DOOR UPPER ARMREST BASE PANEL *4 NO. 2 DOOR TRIM PAD *5 POWER WINDOW REGU
Removal
REMOVAL CAUTION / NOTICE / HINT The necessary procedures (adjustment, calibration, initialization, or registration) that must be performed after parts are removed and installed, or replaced during rear door window frame moulding removal/installation are shown below. Necessary Procedure After Parts R
© 2016-2026 Copyright www.lexguide.net
