Lexus ES: Removal
REMOVAL
PROCEDURE
1. REMOVE RAIN SENSOR COVER
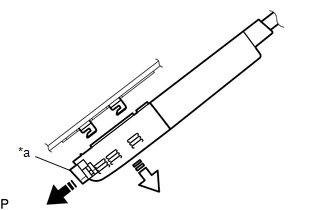
| *a | Stopper |
.png) | Remove in this Direction (1) |
.png) | Remove in this Direction (2) |
(a) Release the stopper by pulling it out and disconnect the rain sensor as indicated by the arrows, in the order shown in the illustration.
| (b) Disengage the 2 claws and guide to remove the rain sensor cover. |
|
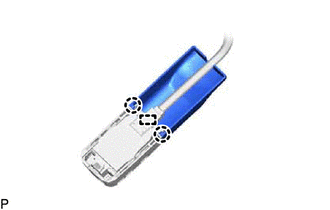
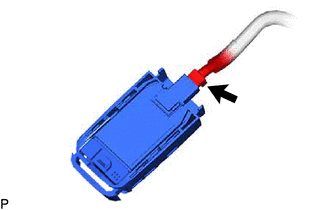
2. REMOVE RAIN SENSOR
| (a) Disconnect the connector to remove the rain sensor. |
|
READ NEXT:
 Installation
INSTALLATION PROCEDURE 1. INSTALL RAIN SENSOR TAPE HINT: The rain sensor tape is reusable. Only replace the tape if it is damaged or contaminated with foreign matter. (a) Clean the sensing portion of
Relay
On-vehicle InspectionON-VEHICLE INSPECTION PROCEDURE 1. INSPECT WIPER RELAY (a) Measure the resistance according to the value(s) in the table below. Standard Resistance: Tester Connection Co
SEE MORE:
Removal
REMOVAL CAUTION / NOTICE / HINT The necessary procedures (adjustment, calibration, initialization, or registration) that must be performed after parts are removed and installed, or replaced during antenna cord sub-assembly removal/installation are shown below. Necessary Procedure After Parts Removed
Dtc Check / Clear
DTC CHECK / CLEAR CHECK DTC (a) Connect the Techstream to the DLC3. (b) Turn the power switch on (IG). (c) Turn the Techstream on. (d) Enter the following menus: Body Electrical / (desired system) / Trouble Codes. Body Electrical > Grille Shutter > Trouble Codes Powertrain > Engine > Tro
© 2016-2026 Copyright www.lexguide.net
