Lexus ES: Headlight aim
Vertical movement adjusting bolts
Vehicles with single-beam headlights
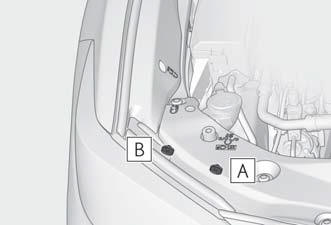
- Adjustment bolt A
- Adjustment bolt B
Vehicles with triple-beam headlights
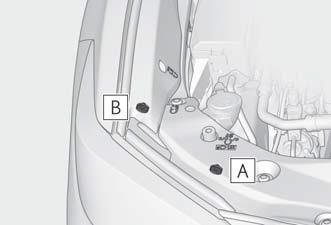
- Adjustment bolt A
- Adjustment bolt B
Before checking the headlight aim
- Make sure the vehicle has a full tank of gasoline and the area around the headlight is not deformed.
- Park the vehicle on level ground.
- Make sure the tire inflation pressure is at the specified level.
- Have someone sit in the driver's seat.
- Bounce the vehicle several times.
Adjusting the headlight aim
Vehicles with single-beam headlights
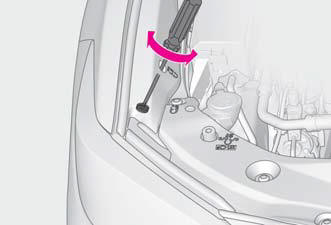
1. Using a Phillips-head screwdriver, turn bolt A in either direction.
Remember the turning direction and the number of turns.
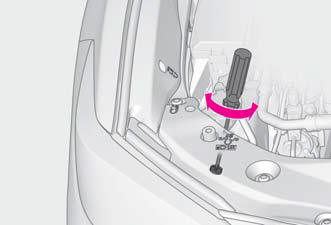
2. Turn bolt B the same number of turns and in the same direction as step 1.
If the headlight cannot be adjusted using this procedure, take the vehicle to your Lexus dealer to adjust the headlight aim.
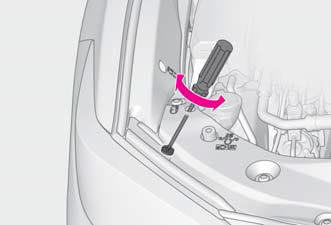
Vehicles with triple-beam headlights
1. Using a Phillips-head screwdriver, turn bolt A in either direction.
Remember the turning direction and the number of turns.

2. Turn bolt B the same number of turns and in the same direction as step 1.
If the headlight cannot be adjusted using this procedure, take the vehicle to your Lexus dealer to adjust the headlight aim.
READ NEXT:
 Light bulbs
You may replace the following bulb
by yourself. Before replacing,
check the wattage of the light bulb
to be replaced. As there is a danger
that components may be damaged,
we recommend that replac
Essential information
Emergency flashers
The emergency flashers are used to
warn other drivers when the vehicle
has to be stopped in the road due to
a breakdown, etc.
Operating instructions
Press the switch to flash
SEE MORE:
Display Malfunction (B15A6,B15B0)
DESCRIPTION These DTCs are stored when a malfunction occurs in the multi-display assembly. DTC No. Detection Item DTC Detection Condition Trouble Area B15A6 Display Malfunction When any of the following conditions is met:
RAM error
Drawing controller malfunction
Internal hard
Control Module Communication Bus OFF (U0073,U0126,U0142,U0182)
DESCRIPTION These DTCs are stored if a CAN communication malfunction occurs between the headlight ECU sub-assembly RH and other ECUs. for LED Type Turn Signal Light DTC No. Detection Item DTC Detection Condition Trouble Area DTC Output from U0073 Control Module Communication Bus OFF
