Lexus ES: Disassembly
Lexus ES (XZ10) Service Manual / Vehicle Interior / Exterior Panels / Trim / Rocker Panel Moulding / Disassembly
DISASSEMBLY
PROCEDURE
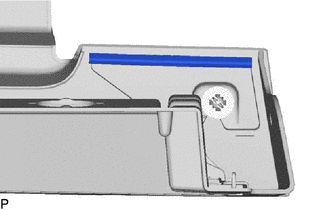
1. REMOVE NO. 4 ROCKER PANEL MOULDING PROTECTOR
| (a) Remove the No. 4 rocker panel moulding protector. |
|
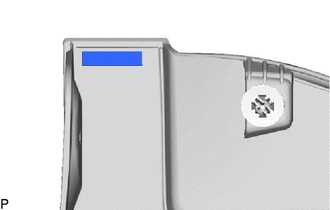
2. REMOVE NO. 5 ROCKER PANEL MOULDING PROTECTOR
| (a) Remove the No. 5 rocker panel moulding protector. |
|
READ NEXT:
 Reassembly
REASSEMBLY PROCEDURE 1. INSTALL NO. 5 ROCKER PANEL MOULDING PROTECTOR HINT: When installing the No. 5 rocker panel moulding protector, heat the body rocker panel moulding assembly using a heat light.
Installation
INSTALLATION CAUTION / NOTICE / HINT HINT:
Use the same procedure for the RH side and LH side.
The following procedure is for the LH side.
PROCEDURE 1. INSTALL BODY ROCKER PANEL MOULDING ASSEM
Roof Drip Side Finish Moulding
ComponentsCOMPONENTS ILLUSTRATION *1 CENTER ROOF DRIP SIDE FINISH MOULDING *2 NO. 1 ROOF DRIP SIDE FINISH MOULDING CLIP ● Non-reusable part - - RemovalREMOVAL CAUTION / NOTI
SEE MORE:
Removal
REMOVAL CAUTION / NOTICE / HINT The necessary procedures (adjustment, calibration, initialization, or registration) that must be performed after parts are removed and installed, or replaced during No. 2 clearance warning buzzer removal/installation are shown below. Necessary Procedure After Parts Re
Components
COMPONENTS ILLUSTRATION *A for Gasoline Model *B for RH Side *C for LH Side - - *1 NO. 1 FLOOR UNDER COVER *2 NO. 2 FLOOR UNDER COVER N*m (kgf*cm, ft.*lbf): Specified torque - - ILLUSTRATION *1 REAR COIL SPRING *2 REAR LOWER COIL SPRING INSULATOR
© 2016-2026 Copyright www.lexguide.net
