Lexus ES: Components
Lexus ES (XZ10) Service Manual / Vehicle Interior / Lighting (ext) / Rear Light Assembly / Components
COMPONENTS
ILLUSTRATION
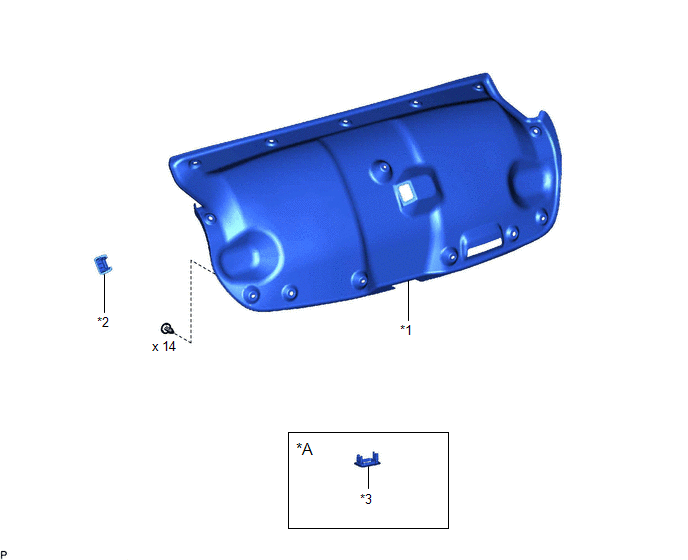
| *A | w/ Power Trunk Lid System | - | - |
| *1 | LUGGAGE COMPARTMENT DOOR COVER | *2 | LUGGAGE LOCK CONTROL CABLE PLATE |
| *3 | SWITCH BEZEL | - | - |
ILLUSTRATION
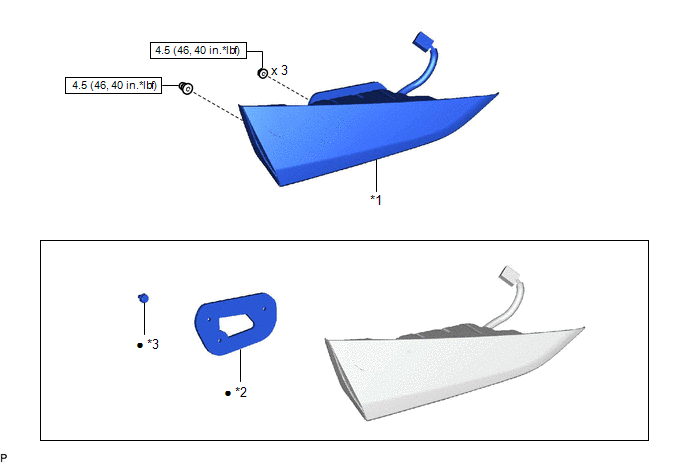
| *1 | REAR LIGHT ASSEMBLY | *2 | REAR LIGHT GASKET |
| *3 | REAR LIGHT PROTECTOR | - | - |
.png) | N*m (kgf*cm, ft.*lbf): Specified torque | ● | Non-reusable part |
READ NEXT:
 Removal
REMOVAL CAUTION / NOTICE / HINT HINT:
Use the same procedure for the RH side and LH side.
The following procedure is for the LH side.
PROCEDURE 1. REMOVE LUGGAGE LOCK CONTROL CABLE PLATE Click
Disassembly
DISASSEMBLY CAUTION / NOTICE / HINT HINT:
Use the same procedure for the RH side and LH side.
The following procedure is for the LH side.
PROCEDURE 1. REMOVE REAR LIGHT GASKET (a) Remove th
Inspection
INSPECTION PROCEDURE 1. INSPECT REAR LIGHT ASSEMBLY LH *a Component without harness connected (Rear Light Assembly LH) (a) Apply auxiliary battery voltage to the rear light assembly LH and ch
SEE MORE:
Crankshaft Position Sensor "A" No Signal (P033531)
DESCRIPTION This DTC is output when a malfunction has occurred in the engine pulse signal system from the ECM. DTC No. Detection Item DTC Detection Condition Trouble Area P033531 Crankshaft Position Sensor "A" No Signal Stereo component equalizer assembly detects malfunction in engi
Removal
REMOVAL CAUTION / NOTICE / HINT The necessary procedures (adjustment, calibration, initialization or registration) that must be performed after parts are removed and installed, or replaced during exhaust manifold (TWC: Front Catalyst) removal/installation are shown below. Necessary Procedures After
© 2016-2026 Copyright www.lexguide.net
