Lexus ES: Components
Lexus ES (XZ10) Service Manual / Vehicle Exterior / Exterior Panels / Trim / Grille Shutter / Components
COMPONENTS
ILLUSTRATION
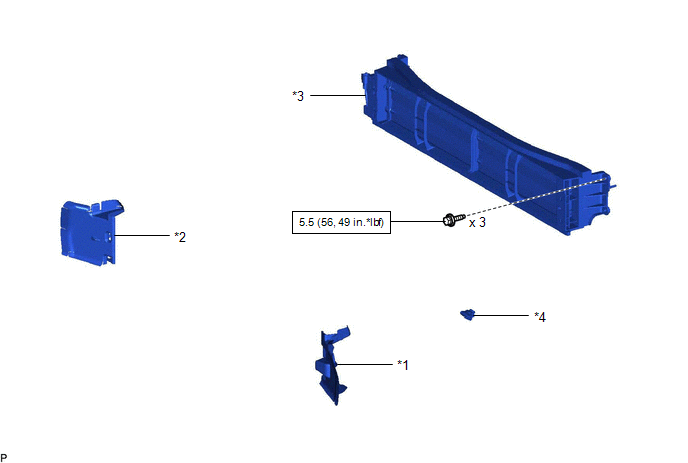
| *1 | FRONT RADIATOR SIDE AIR GUIDE PLATE LH | *2 | FRONT RADIATOR SIDE AIR GUIDE PLATE RH |
| *3 | RADIATOR SHUTTER SUB-ASSEMBLY | *4 | THERMISTOR ASSEMBLY |
.png) | N*m (kgf*cm, ft.*lbf): Specified torque | - | - |
ILLUSTRATION
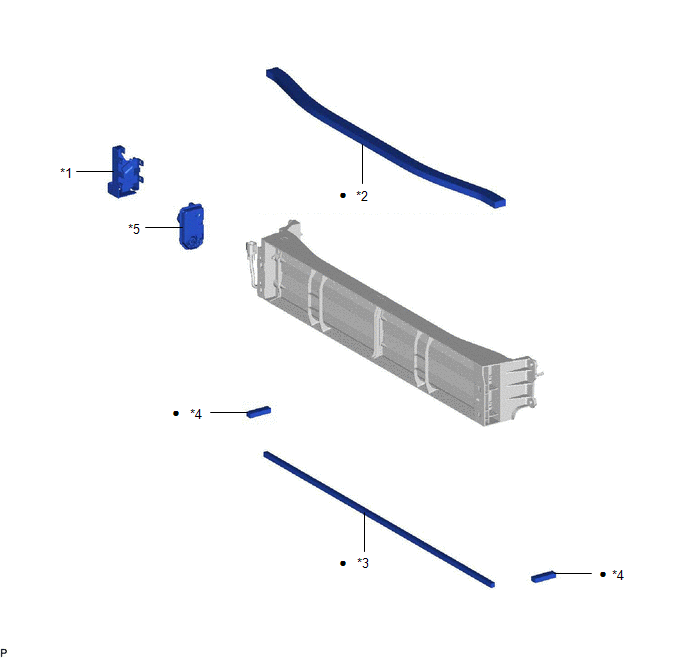
| *1 | MOTOR COVER | *2 | NO. 1 RADIATOR GRILLE SEAL |
| *3 | NO. 2 RADIATOR GRILLE SEAL | *4 | NO. 3 RADIATOR GRILLE SEAL |
| *5 | SWING GRILLE ACTUATOR ASSEMBLY | - | - |
| ● | Non-reusable part | - | - |
READ NEXT:
 Removal
REMOVAL CAUTION / NOTICE / HINT The necessary procedures (adjustment, calibration, initialization, or registration) that must be performed after parts are removed and installed, or replaced during gri
Disassembly
DISASSEMBLY PROCEDURE 1. REMOVE MOTOR COVER (a) Disconnect the connector. (b) Disengage the 2 clamps. (c) Disengage the 4 claws to remove the motor cover as shown in the illustration.
Reassembly
REASSEMBLY PROCEDURE 1. INSTALL NO. 2 RADIATOR GRILLE SEAL HINT: When installing the No. 2 radiator grille seal, heat the radiator shutter using a heat light. Heating Temperature Item Temperature
SEE MORE:
Diagnosis System
DIAGNOSIS SYSTEM DESCRIPTION (a) Sliding roof system data and Diagnostic Trouble Codes (DTCs) can be read through the vehicle Data Link Connector 3 (DLC3). When the system seems to be malfunctioning, use the Techstream to check for malfunctions and perform repairs. CHECK DLC3 (a) Check the DLC3. Cli
Camshaft Position Sensor "B" Bank 1 Signal Stuck in Range (P03652A,P036531,P039031)
DESCRIPTION Refer to DTC P036511. Click here DTC No. Detection Item DTC Detection Condition Trouble Area MIL Memory Note P03652A Camshaft Position Sensor "B" Bank 1 Signal Stuck in Range No VVT sensor (for exhaust camshaft of bank 1) signal to ECM while engine cranking (1 tr
© 2016-2026 Copyright www.lexguide.net
