Lexus ES: Components
COMPONENTS
ILLUSTRATION
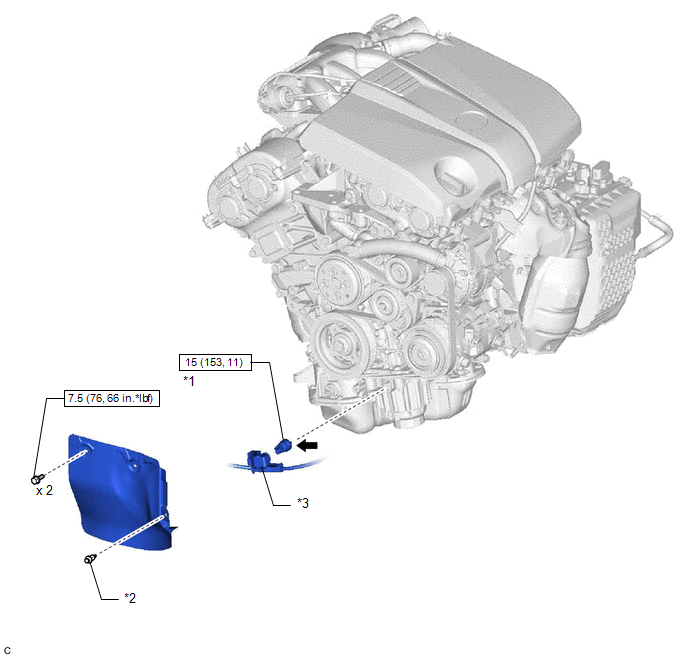
| *1 | ENGINE OIL PRESSURE SWITCH ASSEMBLY | *2 | FRONT FENDER APRON SEAL RH |
| *3 | WIRE HARNESS PROTECTOR | - | - |
.png) | N*m (kgf*cm, ft*lbf): Specified torque | .png) | Adhesive 1344 |
| ★ | Precoated part | - | - |
READ NEXT:
 Removal
REMOVAL PROCEDURE 1. REMOVE FRONT FENDER APRON SEAL RH Click here 2. DRAIN ENGINE OIL Click here 3. REMOVE ENGINE OIL PRESSURE SWITCH ASSEMBLY (a) Disengage the clamp to disconnect the wire
Inspection
INSPECTION PROCEDURE 1. INSPECT ENGINE OIL PRESSURE SWITCH ASSEMBLY (a) Disengage the clamp to disconnect the wire harness protector. *1 Wire Harness Protector (b) Disconnec
Installation
INSTALLATION PROCEDURE 1. INSTALL ENGINE OIL PRESSURE SWITCH ASSEMBLY (a) Apply adhesive to 2 or 3 threads of the engine oil pressure switch assembly. Adhesive: Toyota Genuine Adhesive 1344, Three
SEE MORE:
Starting System
Parts LocationPARTS LOCATION ILLUSTRATION *1 STARTER ASSEMBLY *2 ECM *3 PARK/NEUTRAL POSITION SWITCH ASSEMBLY *4 ENGINE ROOM RELAY BLOCK AND JUNCTION BLOCK ASSEMBLY - ST RELAY - ST NO. 1 FUSE - FL MAIN FUSE ILLUSTRATION *1 ENGINE SWITCH *2 CERTIFICATION ECU (SMART K
Parts Location
PARTS LOCATION ILLUSTRATION *1 TELEPHONE MICROPHONE ASSEMBLY *2 INSTRUMENT PANEL JUNCTION BLOCK ASSEMBLY - ECU-ACC FUSE - ECU-IG1 NO. 4 FUSE - PANEL FUSE - METER-IG2 FUSE - ECU-IG2 NO. 3 FUSE (w/ Manual (SOS) Switch) - ECU-B NO. 2 FUSE - DCM FUSE (w/ Manual (SOS) Switch) - ECU-DCC NO. 2 FU
© 2016-2026 Copyright www.lexguide.net
