Lexus ES: Components
COMPONENTS
ILLUSTRATION
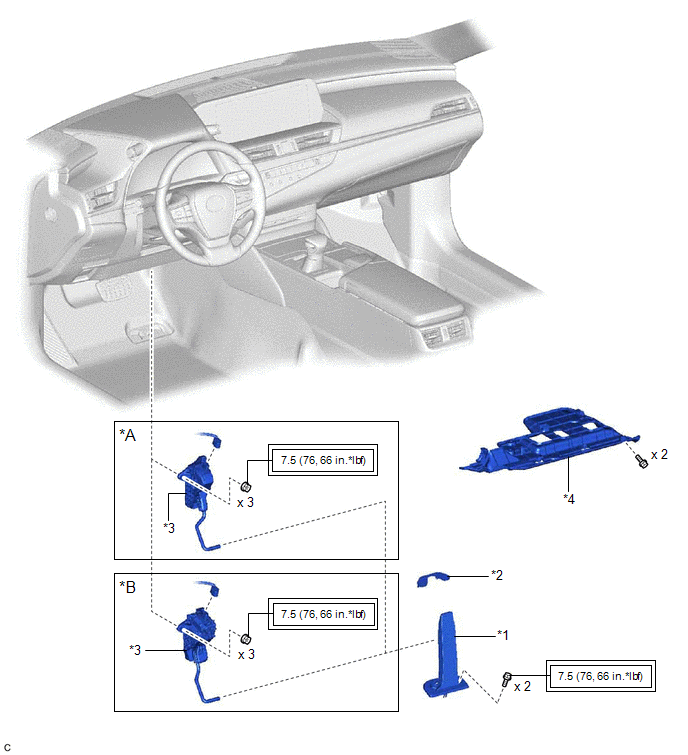
| *A | for TMK Made | *B | for TMMK Made |
| *1 | ACCELERATOR PEDAL ASSEMBLY | *2 | ACCELERATOR PEDAL PAD |
| *3 | ACCELERATOR PEDAL SENSOR ASSEMBLY | *4 | NO. 1 INSTRUMENT PANEL UNDER COVER SUB-ASSEMBLY |
.png) | Tightening torque for "Major areas involving basic vehicle performance such as moving/turning/stopping": N*m (kgf*cm, ft.*lbf) | - | - |
READ NEXT:
 On-vehicle Inspection
ON-VEHICLE INSPECTION PROCEDURE 1. INSPECT ACCELERATOR PEDAL SENSOR ASSEMBLY (a) Connect the Techstream to the DLC3. (b) Turn the engine switch on (IG). (c) Turn the Techstream on. (d) Enter the follo
Removal
REMOVAL PROCEDURE 1. REMOVE NO. 1 INSTRUMENT PANEL UNDER COVER SUB-ASSEMBLY Click here 2. REMOVE ACCELERATOR PEDAL(W/SENSOR) ROD ASSEMBLY NOTICE:
Avoid physical shock to the accelerator pedal se
Installation
INSTALLATION PROCEDURE 1. INSTALL ACCELERATOR PEDAL ASSEMBLY (a) Engage the claw to install the accelerator pedal assembly. (b) Install the 2 bolts. Torque: 7.5 N·m {76 kgf·cm, 66 in
SEE MORE:
Lost Communication with Body Control Module Missing Message (U014087,U015587,U016387)
DESCRIPTION These DTCs are stored when a malfunction occurs in the CAN communication circuit. DTC No. Detection Item DTC Detection Condition Trouble Area U014087 Lost Communication with Body Control Module Missing Message CAN reception error CAN communication system U015587
High Temperature Adjustment
HIGH TEMPERATURE ADJUSTMENT CAUTION / NOTICE / HINT The necessary procedures (adjustment, calibration, initialization or registration) that must be performed after parts are removed and installed, or replaced during automatic transaxle fluid adjustment are shown below. Necessary Procedures After Par
© 2016-2026 Copyright www.lexguide.net
