Lexus ES: Reassembly
REASSEMBLY
PROCEDURE
1. CLEAN VACUUM PUMP HOUSING
(a) Clean the inside surface of the vacuum pump housing.
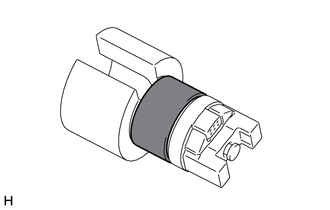
2. INSTALL VACUUM PUMP ROTOR
(a) Clean the vacuum pump rotor.
(b) Apply engine oil to the areas of the vacuum pump rotor shown in the illustration.
.png) | Engine Oil |
(c) Install the vacuum pump rotor to the vacuum pump housing.
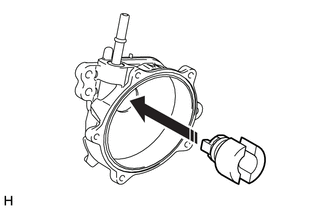
.png) | Install in this Direction |
3. INSTALL VACUUM PUMP VANE AND VACUUM PUMP VANE CAP
(a) Apply engine oil to a new vacuum pump vane and 2 new vacuum pump vane caps and install the vacuum pump vane caps to the vacuum pump vane.
(b) Apply engine oil to the vacuum pump vane with the 2 vacuum pump vane caps and install it to the vacuum pump housing.
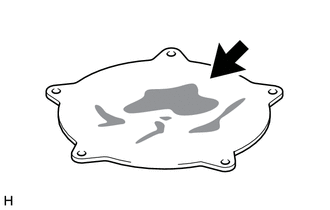
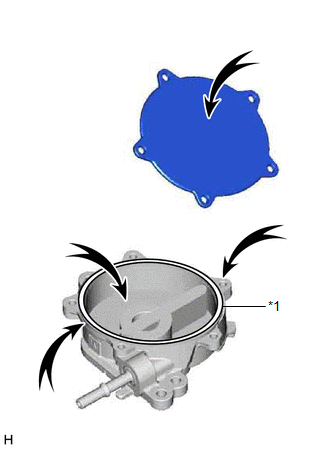
4. INSTALL END COVER
| (a) Clean the inside surface of the end cover. |
|
| (b) Install a new vacuum pump cover O-ring to the vacuum pump housing. NOTICE:
|
|
(c) Using a T30 "TORX" socket wrench, install the end cover with 5 new screws.
Torque:
7.5 N·m {76 kgf·cm, 66 in·lbf}
NOTICE:
- Hold the pump so that the pump installation surface and fitting parts will not be damaged.
- As the housing deforms when force is applied, do not secure the housing with a tool such as a vise.
- Securely fit the T30 "TORX" socket wrench to the screws.
-
After installing the end cover, check that the vacuum pump cover O-ring is not caught.
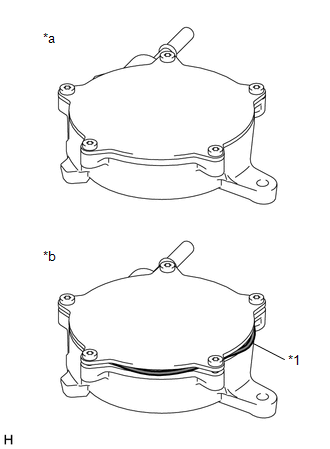
*1
Vacuum Pump Cover O-ring
*a
Correct
*b
Incorrect
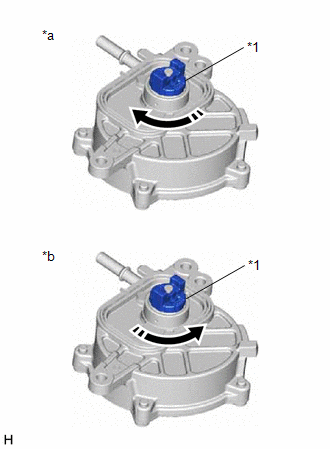
5. INSPECT VACUUM PUMP ASSEMBLY
| (a) While looking from the coupling side of the vacuum pump assembly, rotate the coupling clockwise. Standard: Rotates without locking. NOTICE:
|
|
READ NEXT:
 Removal
REMOVAL CAUTION / NOTICE / HINT NOTICE: This procedure includes the removal of small-head bolts. Refer to Small-Head Bolts of Basic Repair Hint to identify the small-head bolts. Click here PROCEDURE
Components
COMPONENTS ILLUSTRATION *1 ENGINE WIRE *2 NO. 2 SURGE TANK STAY *3 EARTH WIRE - - Tightening torque for "Major areas involving basic vehicle performance such as moving/turni
SEE MORE:
Replacement
REPLACEMENT PROCEDURE 1. REPLACE INTAKE VALVE GUIDE BUSH (a) Heat the cylinder head sub-assembly to between 80 and 100°C (176 and 212°F). (b) Place the cylinder head sub-assembly on wooden blocks. CAUTION: Be sure to wear protective gloves. (c) Using SST and a hammer, tap out the intake valve g
Generator Phase U-V-W Current Sensor Signal Compare Failure (P0DFA62,P1C691F)
DTC SUMMARY MALFUNCTION DESCRIPTION These DTCs indicate that the current sensor value is abnormal. The cause of this malfunction may be one of the following: Internal inverter malfunction
Current sensor malfunction
Inverter with converter assembly internal circuit malfunction
DESCRIPTION
