
Lexus ES: Fuel Tank Cap
Lexus ES (XZ10) Service Manual / Engine & Hybrid System / 2gr-fks (emission Control) / Fuel Tank Cap
Inspection
INSPECTION
PROCEDURE
1. INSPECT FUEL TANK CAP ASSEMBLY
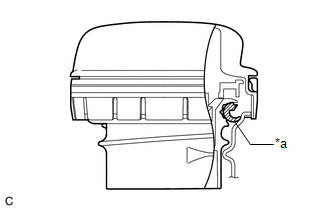
| (a) Visually check that the fuel tank cap assembly and gasket are not deformed or damaged. If the result is not as specified, replace the fuel tank cap assembly. |
|
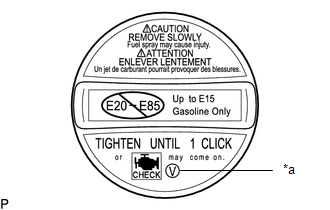
| (b) Confirm that ID mark V is printed on the fuel tank cap assembly. CAUTION: Make sure to use a fuel tank cap assembly that has the same ID mark, or a malfunction may occur in the fuel system. |
|
READ NEXT:
 Pcv Valve
ComponentsCOMPONENTS ILLUSTRATION *1 PCV VALVE (VENTILATION VALVE SUB-ASSEMBLY) *2 V-BANK COVER SUB-ASSEMBLY *3 VENTILATION HOSE - - N*m (kgf*cm, ft.*lbf): Specified torque
Purge Valve
ComponentsCOMPONENTS ILLUSTRATION *1 PURGE VALVE (PURGE VSV) *2 V-BANK COVER SUB-ASSEMBLY *3 FUEL VAPOR FEED HOSE *4 NO. 1 FUEL VAPOR FEED HOSE N*m (kgf*cm, ft.*lbf): Speci
SEE MORE:
Washer Motor Circuit
DESCRIPTION When the windshield washer motor and pump assembly receives signals from the windshield wiper switch assembly it operates to spray washer fluid from the washer nozzle sub-assemblies. WIRING DIAGRAM CAUTION / NOTICE / HINT NOTICE:
Inspect the fuses for circuits related to this system
Disposal
DISPOSAL PROCEDURE 1. DISPOSE OF LUGGAGE COMPARTMENT DOOR SUPPORT ASSEMBLY (a) Secure the luggage compartment door support assembly horizontally in a vise with the piston rod pulled out. (b) Wearing safety glasses, gradually cut a part within the area (a) shown in the illustration usi
© 2016-2026 Copyright www.lexguide.net
