Lexus ES: Components
COMPONENTS
ILLUSTRATION
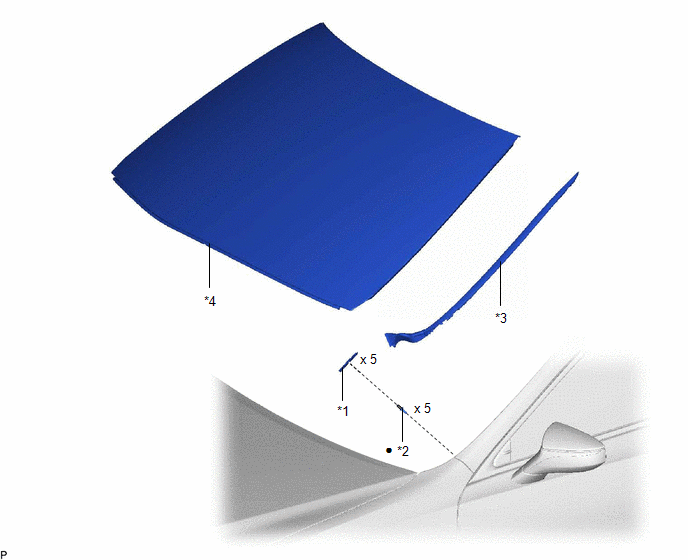
| *1 | NO. 1 WINDSHIELD OUTSIDE MOULDING CLIP | *2 | NO. 3 WINDSHIELD OUTSIDE MOULDING CLIP |
| *3 | WINDSHIELD OUTSIDE MOULDING | *4 | WINDSHIELD GLASS SUB-ASSEMBLY |
| ● | Non-reusable part | - | - |
READ NEXT:
 Removal
REMOVAL CAUTION / NOTICE / HINT HINT:
Use the same procedure for the RH side and LH side.
The following procedure is for the LH side.
PROCEDURE 1. REMOVE WINDSHIELD OUTSIDE MOULDING LH (a) App
Installation
INSTALLATION CAUTION / NOTICE / HINT HINT:
Use the same procedure for the RH side and LH side.
The following procedure is for the LH side.
PROCEDURE 1. INSTALL NO. 3 WINDSHIELD OUTSIDE MOULDIN
SEE MORE:
Precaution
PRECAUTION PRECAUTION FOR DISCONNECTING CABLE FROM NEGATIVE BATTERY TERMINAL NOTICE: When disconnecting the cable from the negative (-) battery terminal, initialize the following system(s) after the cable is reconnected. System See Procedure Lane Control System (for Gasoline Model)
Check Mode Procedure
CHECK MODE PROCEDURE HINT: Compared to normal mode, check mode is more sensitive to malfunctions. Therefore, check mode can detect malfunctions that cannot be detected in normal mode. NOTICE: All the stored DTCs and freeze frame data are cleared if: 1) the ECM is changed from normal mode to check mo
© 2016-2026 Copyright www.lexguide.net
