Lexus ES: Components
COMPONENTS
ILLUSTRATION
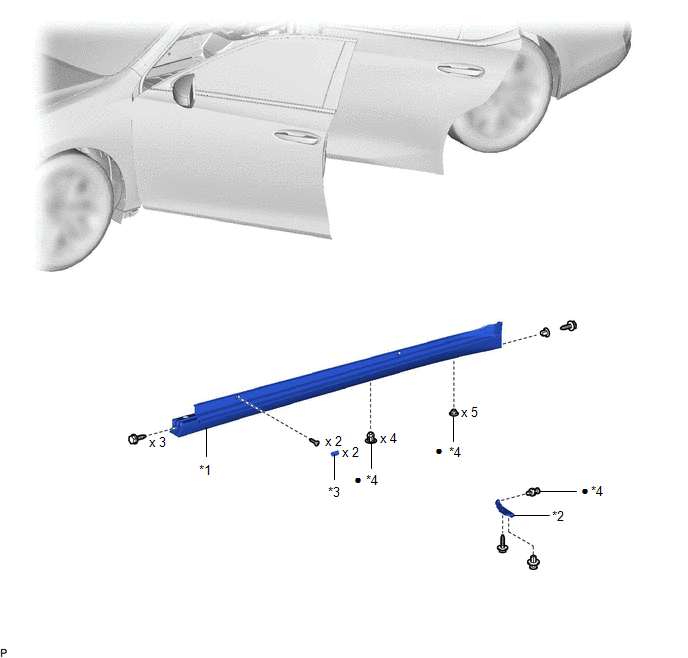
| *1 | BODY ROCKER PANEL MOULDING ASSEMBLY | *2 | NO. 2 ROCKER PANEL MOULDING PROTECTOR |
| *3 | ROCKER PANEL MOULDING COVER | *4 | CLIP |
| ● | Non-reusable part | - | - |
ILLUSTRATION
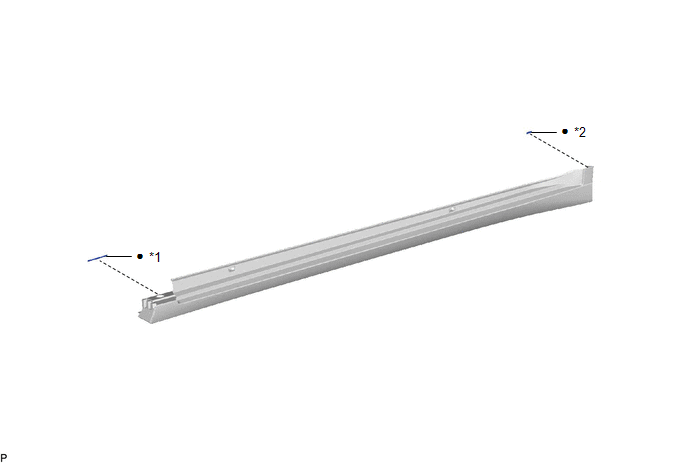
| *1 | NO. 4 ROCKER PANEL MOULDING PROTECTOR | *2 | NO. 5 ROCKER PANEL MOULDING PROTECTOR |
| ● | Non-reusable part | - | - |
READ NEXT:
 Removal
REMOVAL CAUTION / NOTICE / HINT HINT:
Use the same procedure for the RH side and LH side.
The following procedure is for the LH side.
PROCEDURE 1. REMOVE NO. 2 ROCKER PANEL MOULDING PROTECTOR
Disassembly
DISASSEMBLY PROCEDURE 1. REMOVE NO. 4 ROCKER PANEL MOULDING PROTECTOR (a) Remove the No. 4 rocker panel moulding protector. 2. REMOVE NO. 5 ROCKER PANEL MOULDING PROTECTOR (a) Remove
Reassembly
REASSEMBLY PROCEDURE 1. INSTALL NO. 5 ROCKER PANEL MOULDING PROTECTOR HINT: When installing the No. 5 rocker panel moulding protector, heat the body rocker panel moulding assembly using a heat light.
SEE MORE:
Power Supply Drive Circuit (C1257)
DESCRIPTION The skid control ECU (brake booster with master cylinder assembly) detects a drop in accumulator pressure according to the signals from the accumulator pressure sensor, then operates and stops the motor relay as well as the pump motor. The skid control ECU (brake booster with master cyli
Removal
REMOVAL CAUTION / NOTICE / HINT The necessary procedures (adjustment, calibration, initialization, or registration) that must be performed after parts are removed and installed, or replaced during telephone and GPS antenna cord removal/installation are shown below. Necessary Procedure After Parts Re
© 2016-2026 Copyright www.lexguide.net
