Lexus ES: Components
Lexus ES (XZ10) Service Manual / Vehicle Interior / Exterior Panels / Trim / Grille Shutter / Components
COMPONENTS
ILLUSTRATION
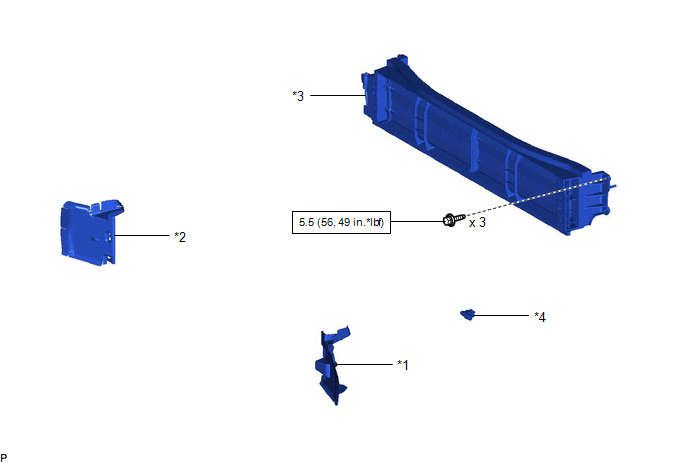
| *1 | FRONT RADIATOR SIDE AIR GUIDE PLATE LH | *2 | FRONT RADIATOR SIDE AIR GUIDE PLATE RH |
| *3 | RADIATOR SHUTTER SUB-ASSEMBLY | *4 | THERMISTOR ASSEMBLY |
.png) | N*m (kgf*cm, ft.*lbf): Specified torque | - | - |
ILLUSTRATION
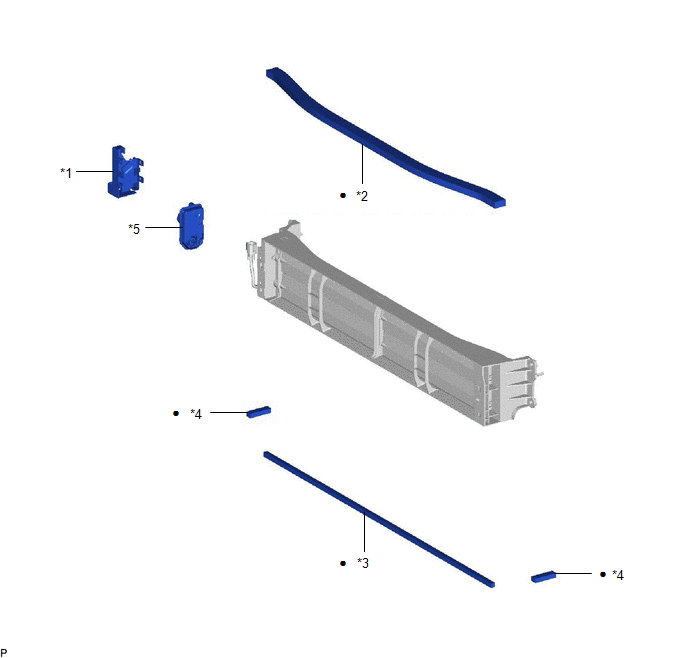
| *1 | MOTOR COVER | *2 | NO. 1 RADIATOR GRILLE SEAL |
| *3 | NO. 2 RADIATOR GRILLE SEAL | *4 | NO. 3 RADIATOR GRILLE SEAL |
| *5 | SWING GRILLE ACTUATOR ASSEMBLY | - | - |
| ● | Non-reusable part | - | - |
READ NEXT:
 Removal
REMOVAL CAUTION / NOTICE / HINT The necessary procedures (adjustment, calibration, initialization, or registration) that must be performed after parts are removed and installed, or replaced during gri
Disassembly
DISASSEMBLY PROCEDURE 1. REMOVE MOTOR COVER (a) Disconnect the connector. (b) Disengage the 2 clamps. (c) Disengage the 4 claws to remove the motor cover as shown in the illustration.
Reassembly
REASSEMBLY PROCEDURE 1. INSTALL NO. 2 RADIATOR GRILLE SEAL HINT: When installing the No. 2 radiator grille seal, heat the radiator shutter using a heat light. Heating Temperature Item Temperature
SEE MORE:
Vehicle Control History
VEHICLE CONTROL HISTORY NOTICE: Make sure to record any output Vehicle Control History codes before clearing them and checking the Vehicle Control History again. CHECK VEHICLE CONTROL HISTORY NOTICE: Depending on the parts that are replaced during vehicle inspection or maintenance, performing initia
Sound of Portable Player cannot be Heard from Speakers or Sound is Low
PROCEDURE 1. CHECK PORTABLE PLAYER SETTINGS (a) Check the portable player settings. (1) Check that the volume is not set to "0". (2) Check that mute is off. (b) Check that the sound of the portable player can be heard from the speakers. OK: Sound of the portable player can be heard from th
© 2016-2026 Copyright www.lexguide.net
