Lexus ES: Components
COMPONENTS
ILLUSTRATION
.png)
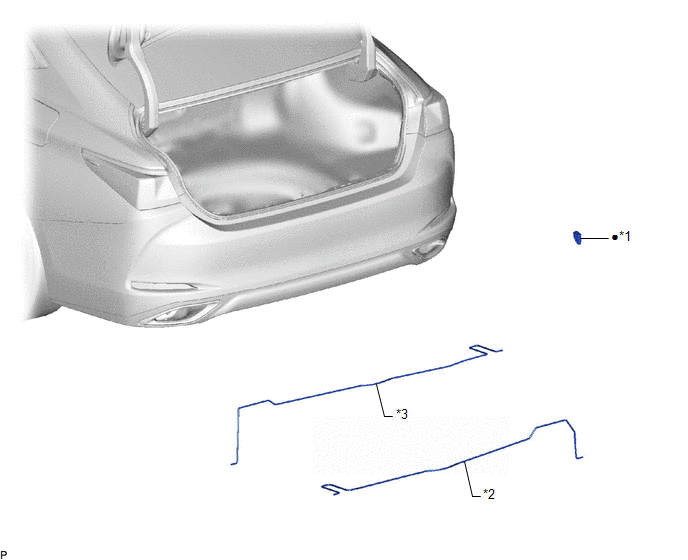
| *1 | LUGGAGE COMPARTMENT FLOOR MAT | *2 | SPARE WHEEL COVER TRAY |
ILLUSTRATION
.png)
| *1 | REAR FLOOR FINISH PLATE | *2 | LUGGAGE HOLD BELT STRIKER ASSEMBLY |
ILLUSTRATION
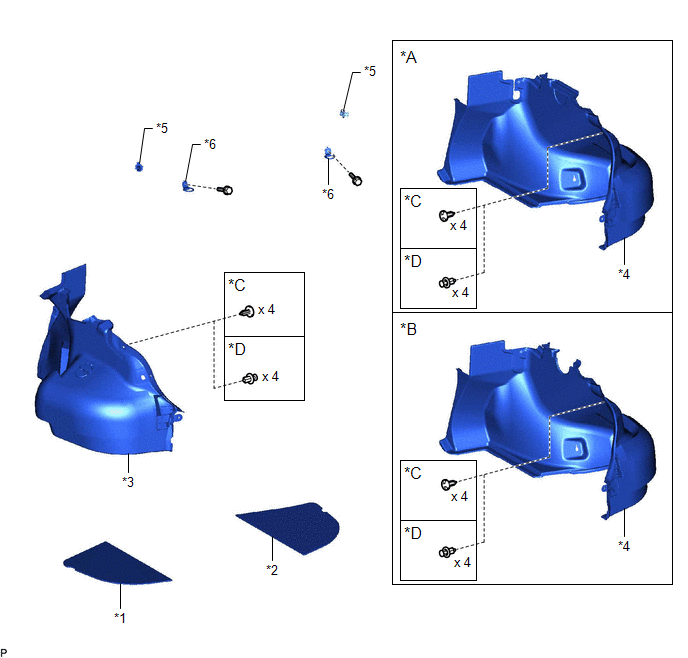
| *A | w/o Power Trunk Lid System | *B | w/ Power Trunk Lid System |
| *C | for Type A | *D | for Type B |
| *1 | LUGGAGE COMPARTMENT TRIM COVER LH | *2 | LUGGAGE COMPARTMENT TRIM COVER RH |
| *3 | LUGGAGE COMPARTMENT TRIM INNER COVER LH | *4 | LUGGAGE COMPARTMENT TRIM INNER COVER RH |
| *5 | ROPE HOOK | *6 | LUGGAGE HOLD BELT STRIKER ASSEMBLY |
ILLUSTRATION
| *A | w/ Power Trunk Lid System | - | - |
| *1 | LUGGAGE COMPARTMENT DOOR COVER | *2 | LUGGAGE LOCK CONTROL CABLE PLATE |
| *3 | SWITCH BEZEL | - | - |
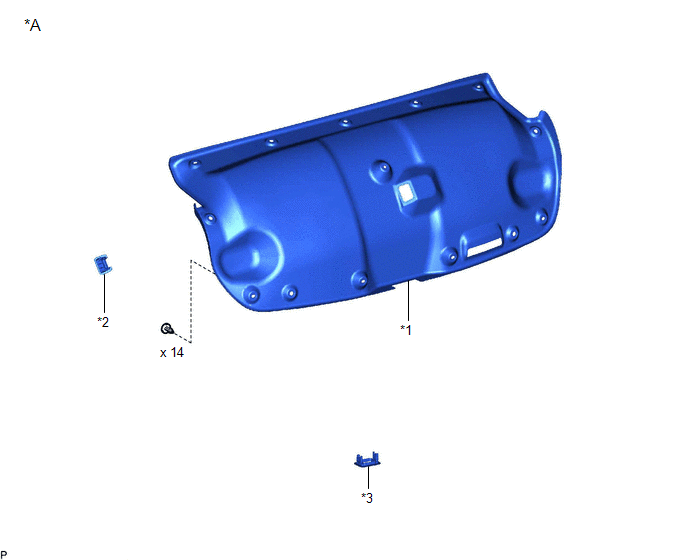
ILLUSTRATION
| *A | w/ Power Trunk Lid System | - | - |
| *1 | LUGGAGE CLOSER MOTOR ASSEMBLY | *2 | LUGGAGE COMPARTMENT DOOR HINGE COVER RH |
.png) | N*m (kgf*cm, ft.*lbf): Specified torque | - | - |
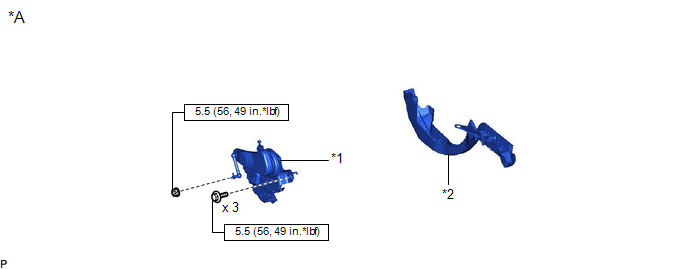
ILLUSTRATION
| *1 | LUGGAGE COMPARTMENT DOOR TORSION BAR SUPPORT | *2 | LUGGAGE DOOR HINGE TORSION BAR LH |
| *3 | LUGGAGE DOOR HINGE TORSION BAR RH | - | - |
| ● | Non-reusable part | - | - |
READ NEXT:
 Removal
REMOVAL CAUTION / NOTICE / HINT The necessary procedures (adjustment, calibration, initialization, or registration) that must be performed after parts are removed and installed, or replaced during lug
Installation
INSTALLATION CAUTION / NOTICE / HINT NOTICE: After installing the luggage door hinge torsion bar, use your hand to open and close the luggage door. Make sure the luggage door can open and close smooth
SEE MORE:
Components
COMPONENTS ILLUSTRATION *1 PROPELLER SHAFT HEAT INSULATOR *2 NO. 1 PROPELLER SHAFT HEAT INSULATOR BRACKET SUB-ASSEMBLY *3 REAR ENGINE MOUNTING BRACKET SUB-ASSEMBLY *4 TRANSFER ASSEMBLY Tightening torque for "Major areas involving basic vehicle performance such as moving/tu
Components
COMPONENTS ILLUSTRATION *1 STEERING WHEEL ASSEMBLY - - Tightening torque for "Major areas involving basic vehicle performance such as moving/turning/stopping": N*m (kgf*cm, ft.*lbf) - - ILLUSTRATION *1 HEATED STEERING WHEEL CONTROLLER (STEERING VIBRATION ECU) *2 STE
