
Lexus ES: Components
Lexus ES (XZ10) Service Manual / Suspension / Suspension Control / Suspension Control Ecu / Components
COMPONENTS
ILLUSTRATION
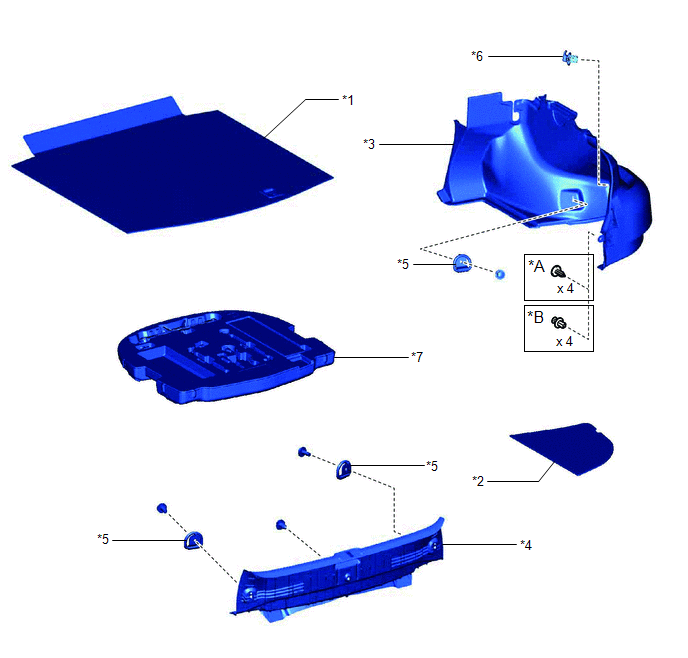
| *A | for Type A | *B | for Type B |
| *1 | LUGGAGE COMPARTMENT FLOOR MAT | *2 | LUGGAGE COMPARTMENT TRIM COVER RH |
| *3 | LUGGAGE COMPARTMENT TRIM INNER COVER RH | *4 | REAR FLOOR FINISH PLATE |
| *5 | LUGGAGE HOLD BELT STRIKER ASSEMBLY | *6 | ROPE HOOK |
| *7 | SPARE WHEEL COVER TRAY | - | - |
ILLUSTRATION
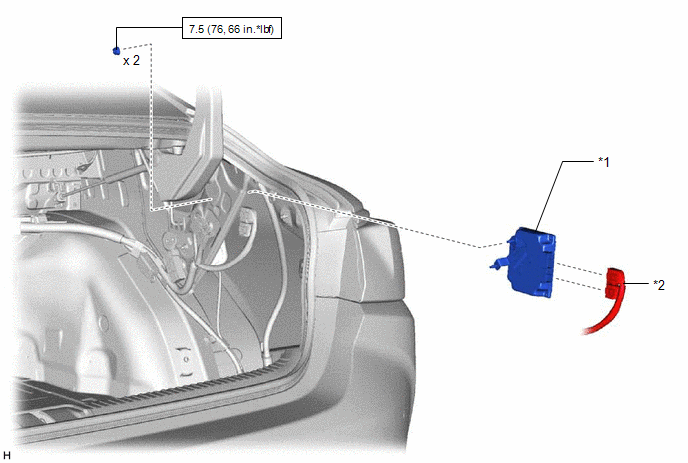
| *1 | ABSORBER CONTROL ECU | *2 | CONNECTOR |
.png) | N*m (kgf*cm, ft.*lbf): Specified torque | - | - |
READ NEXT:
 Removal
REMOVAL CAUTION / NOTICE / HINT The necessary procedures (adjustment, calibration, initialization or registration) that must be performed after parts are removed and installed, or replaced during abso
Installation
INSTALLATION PROCEDURE 1. INSTALL ABSORBER CONTROL ECU (a) Install the absorber control ECU with the 2 nuts. Torque: 7.5 N·m {76 kgf·cm, 66 in·lbf} NOTICE:
Avoid any impact to the absorber cont
SEE MORE:
Dtc Check / Clear
DTC CHECK / CLEAR CHECK DTC (a) Connect the Techstream to the DLC3. (b) Turn the power switch on (IG). (c) Turn the Techstream on. (d) Enter the following menus: Chassis > Front Recognition Camera > Trouble Codes (e) Check for DTCs (Test Failed / Pending / Confirmed). Techstream Display D
Cannot Switch to Automatic ID Registration Mode
DESCRIPTION When "Change Wheel Set" is selected on the multi-information display and the "OK" switch (steering pad switch assembly) is pushed and held, the system enters ID registration mode and the tire pressure warning light blinks 3 times. The main body ECU (multiplex network body ECU) receives s
© 2016-2026 Copyright www.lexguide.net
