
Lexus ES: Components
COMPONENTS
ILLUSTRATION
.png)
| *A | for Gasoline Model | *B | for RH Side |
| *C | for LH Side | - | - |
| *1 | NO. 1 FLOOR UNDER COVER | *2 | NO. 2 FLOOR UNDER COVER |
.png) | N*m (kgf*cm, ft.*lbf): Specified torque | - | - |
ILLUSTRATION
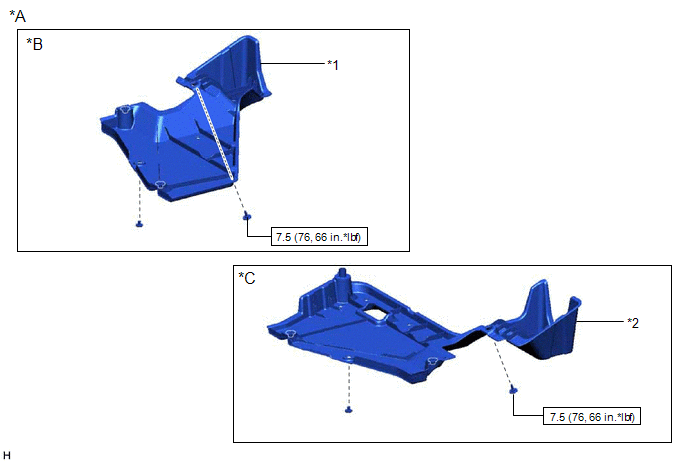
| *A | for HV Model | *B | for RH Side |
| *C | for LH Side | - | - |
| *1 | NO. 1 FLOOR UNDER COVER | *2 | NO. 2 FLOOR UNDER COVER |
| | N*m (kgf*cm, ft.*lbf): Specified torque | - | - |
ILLUSTRATION
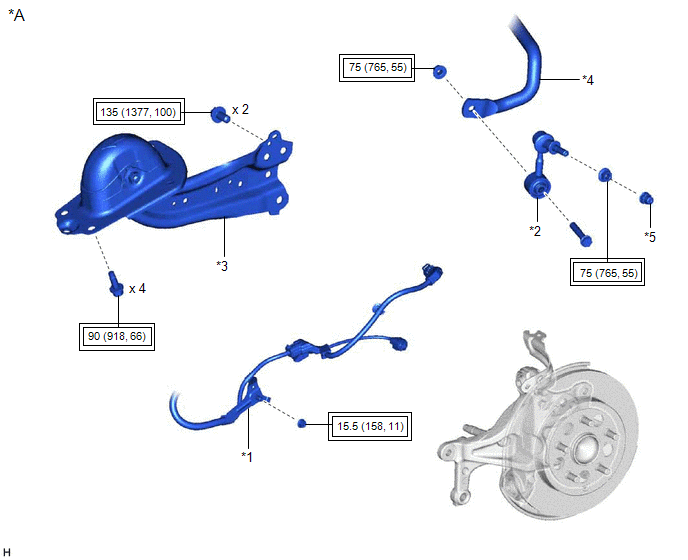
| *A | w/o AVS | - | - |
| *1 | NO. 2 PARKING BRAKE WIRE ASSEMBLY | *2 | REAR STABILIZER LINK ASSEMBLY |
| *3 | REAR TRAILING ARM ASSEMBLY | *4 | REAR STABILIZER BAR |
| *5 | CAP | - | - |
.png) | Tightening torque for "Major areas involving basic vehicle performance such as moving/turning/stopping": N*m (kgf*cm, ft.*lbf) | - | - |
ILLUSTRATION
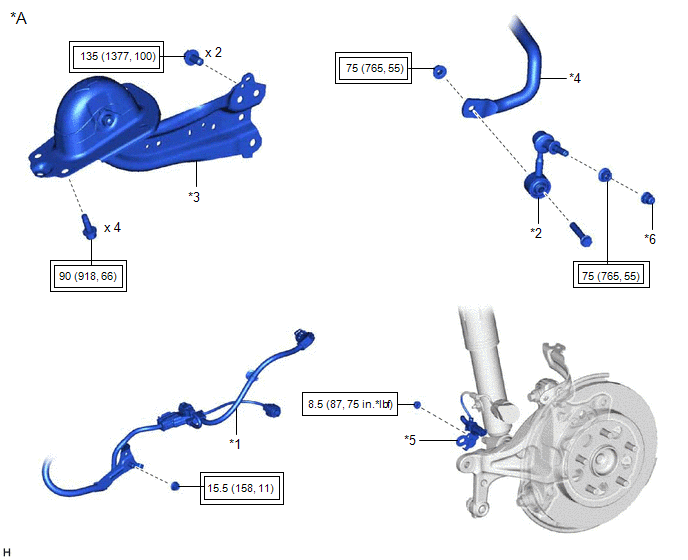
| *A | w/ AVS | - | - |
| *1 | NO. 2 PARKING BRAKE WIRE ASSEMBLY | *2 | REAR STABILIZER LINK ASSEMBLY |
| *3 | REAR TRAILING ARM ASSEMBLY | *4 | REAR STABILIZER BAR |
| *5 | WIRE HARNESS BRACKET | *6 | CAP |
| | Tightening torque for "Major areas involving basic vehicle performance such as moving/turning/stopping": N*m (kgf*cm, ft.*lbf) | | N*m (kgf*cm, ft.*lbf): Specified torque |
ILLUSTRATION

| *1 | REAR SUSPENSION ARM BRACKET | *2 | REAR SUSPENSION ARM COVER |
| *3 | REAR TRAILING ARM ASSEMBLY | - | - |
| | Tightening torque for "Major areas involving basic vehicle performance such as moving/turning/stopping": N*m (kgf*cm, ft.*lbf) | - | - |
READ NEXT:
 Components
COMPONENTS ILLUSTRATION *A for Gasoline Model 2WD *B for RH Side *C for LH Side - - *1 NO. 1 FLOOR UNDER COVER *2 NO. 2 FLOOR UNDER COVER N*m (kgf*cm, ft.*lbf): Sp
Removal
REMOVAL CAUTION / NOTICE / HINT The necessary procedures (adjustment, calibration, initialization, or registration) that must be performed after parts are removed and installed, or replaced during rea
Removal
REMOVAL CAUTION / NOTICE / HINT The necessary procedures (adjustment, calibration, initialization, or registration) that must be performed after parts are removed and installed, or replaced during rea
SEE MORE:
Steering Pad Switch Circuit
DESCRIPTION The forward recognition camera receives LTA main switch signals from the steering pad switch assembly. WIRING DIAGRAM CAUTION / NOTICE / HINT NOTICE: The vehicle is equipped with a Supplemental Restraint System (SRS) which includes components such as airbags. Before servicing (including
Operation Panel Disconnected (B15D9)
DESCRIPTION The air conditioning control assembly and multi-display assembly are connected by an AVC-LAN communication line. When an AVC-LAN communication error occurs between the multi-display assembly and air conditioning control assembly, these DTCs will be stored. DTC No. Detection Item D
