Lexus ES: Components
COMPONENTS
ILLUSTRATION
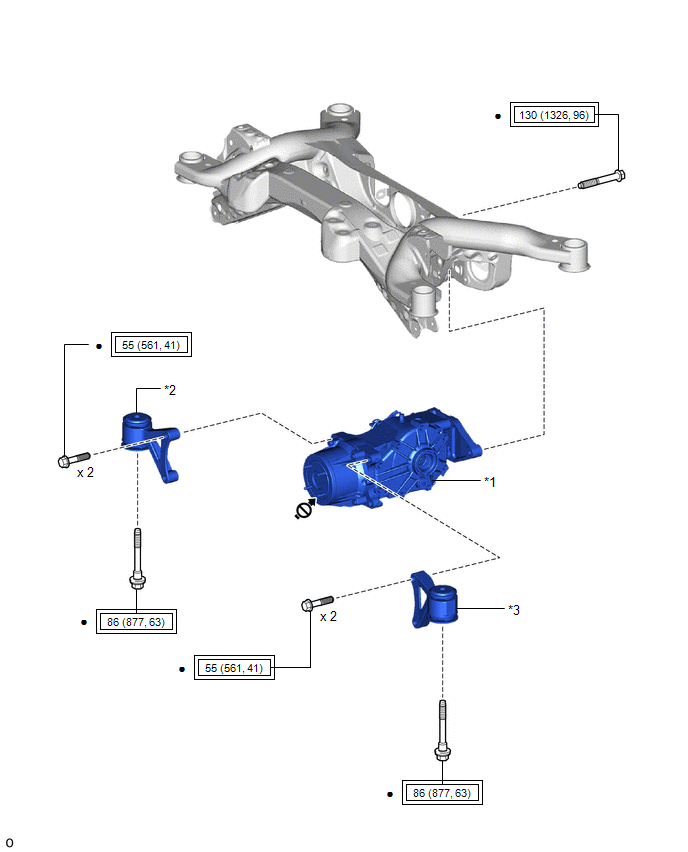
| *1 | REAR DIFFERENTIAL CARRIER ASSEMBLY | *2 | REAR NO. 1 DIFFERENTIAL SUPPORT |
| *3 | REAR NO. 2 DIFFERENTIAL SUPPORT | - | - |
.png) | Tightening torque for "Major areas involving basic vehicle performance such as moving/turning/stopping": N*m (kgf*cm, ft.*lbf) | ● | Non-reusable part |
.png) | Do not apply lubricants to the threaded parts | - | - |
ILLUSTRATION
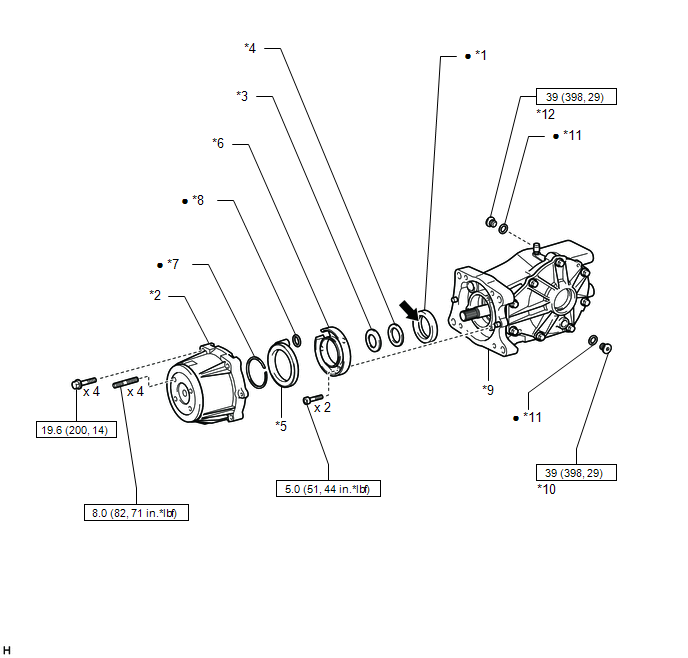
| *1 | DIAPHRAGM OIL SEAL | *2 | TRANSMISSION COUPLING ASSEMBLY |
| *3 | TRANSMISSION COUPLING CONICAL SPRING WASHER | *4 | TRANSMISSION COUPLING SHIM |
| *5 | 4WD LINEAR SOLENOID | *6 | YOKE |
| *7 | SNAP RING | *8 | O-RING |
| *9 | REAR DIFFERENTIAL CARRIER SUB-ASSEMBLY | *10 | REAR DIFFERENTIAL DRAIN PLUG |
| *11 | GASKET | *12 | REAR DIFFERENTIAL FILLER PLUG |
.png) | N*m (kgf*cm, ft.*lbf): Specified torque | ● | Non-reusable part |
.png) | MP grease | - | - |
READ NEXT:
 Replacement
REPLACEMENT CAUTION / NOTICE / HINT The necessary procedures (adjustment, calibration, initialization, or registration) that must be performed after parts are removed and installed, or replaced during
Components
COMPONENTS ILLUSTRATION *1 REAR DRIVE SHAFT OIL SEAL LH - - ● Non-reusable part MP grease
SEE MORE:
Removal
REMOVAL CAUTION / NOTICE / HINT The necessary procedures (adjustment, calibration, initialization or registration) that must be performed after parts are removed and installed, or replaced during transmission wire removal/installation are shown below. Necessary Procedures After Parts Removed/Install
Portable Player cannot be Registered
CAUTION / NOTICE / HINT HINT: Some versions of "Bluetooth" compatible audio players may not function properly, or the functions may be limited using the radio receiver assembly, even if the portable audio player itself can play files. Click here PROCEDURE 1. CHECK THAT PORTABLE PLAYER IS "B
© 2016-2026 Copyright www.lexguide.net
