
Lexus ES: Components
COMPONENTS
ILLUSTRATION
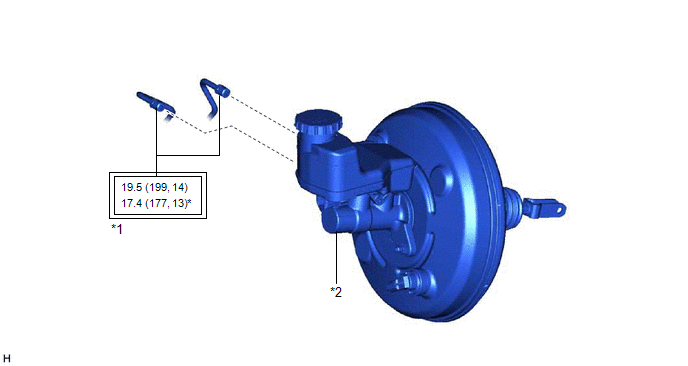
| *1 | BRAKE LINE | *2 | BRAKE MASTER CYLINDER SUB-ASSEMBLY |
.png) | Tightening torque for "Major areas involving basic vehicle performance such as moving/turning/stopping" : N*m (kgf*cm, ft.*lbf) | * | For use with a union nut wrench |
ILLUSTRATION
.png)
| *1 | NO. 1 INSTRUMENT PANEL UNDER COVER SUB-ASSEMBLY | - | - |
ILLUSTRATION
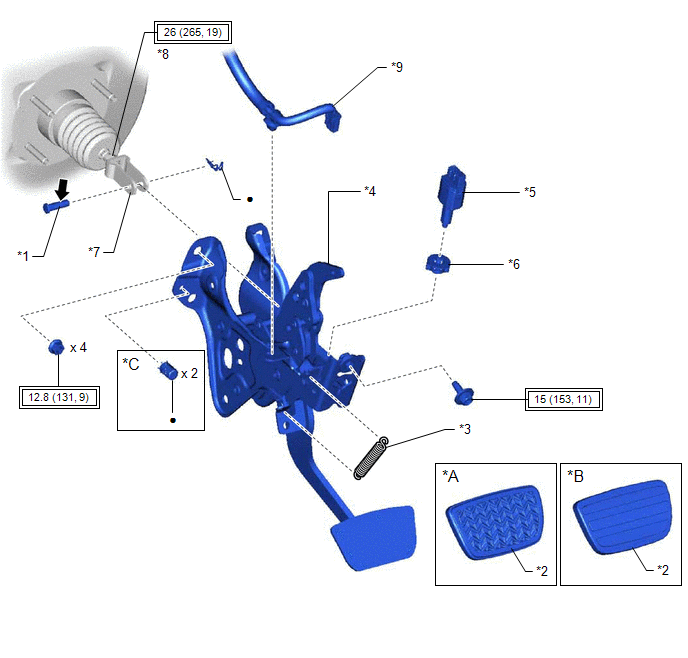
| *A | w/ Rubber Pad | *B | w/ Aluminum Pad |
| *C | for TMC Made | - | - |
| *1 | BRAKE PEDAL LINK PIN | *2 | BRAKE PEDAL PAD |
| *3 | BRAKE PEDAL RETURN SPRING | *4 | BRAKE PEDAL SUPPORT ASSEMBLY |
| *5 | STOP LIGHT SWITCH ASSEMBLY | *6 | STOP LIGHT SWITCH MOUNTING ADJUSTER |
| *7 | BRAKE MASTER CYLINDER PUSH ROD CLEVIS | *8 | LOCK NUT |
| *9 | WIRE HARNESS | - | - |
| | Tightening torque for "Major areas involving basic vehicle performance such as moving/turning/stopping" : N*m (kgf*cm, ft.*lbf) | ● | Non-reusable part |
.png) | Lithium soap base glycol grease | - | - |
READ NEXT:
 Installation
INSTALLATION PROCEDURE 1. INSTALL BRAKE PEDAL PAD (a) Install the brake pedal pad to the brake pedal support assembly. HINT: Installation is easier after applying a small amount of soapy water. 2. INS
Removal
REMOVAL CAUTION / NOTICE / HINT The necessary procedures (adjustment, calibration, initialization or registration) that must be performed after parts are removed and installed, or replaced during brak
SEE MORE:
Diagnosis System
DIAGNOSIS SYSTEM CHECK WARNING LIGHT NOTICE:
When there is a problem with the tire pressure warning system, the tire pressure warning light blinks at 0.5 second intervals, and illuminates after 1 minute.
When the malfunction has been corrected, the tire pressure warning light goes off.
When t
Installation
INSTALLATION PROCEDURE 1. INSTALL FUEL PIPE PLUG SUB-ASSEMBLY (a) Install a new O-ring, No. 1 fuel injector back-up ring, No. 2 fuel injector back-up ring and No. 3 fuel injector back-up ring to the fuel pipe plug sub-assembly as shown in the illustration. *1 Fuel Pipe Plug Sub-assembly *2
