Lexus ES: Removal
REMOVAL
CAUTION / NOTICE / HINT
HINT:
- Use the same procedure for the RH side and LH side.
- The following procedure is for the LH side.
PROCEDURE
1. REMOVE WASHER NOZZLE SUB-ASSEMBLY
(a) Using a screwdriver with its tip wrapped with protective tape, disengage the 2 claws as shown in the illustration to separate the washer nozzle sub-assembly.
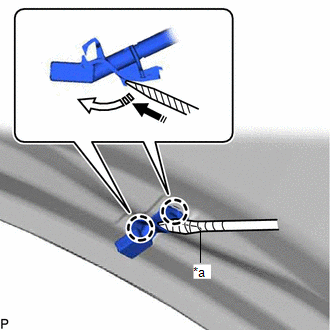
| *a | Protective Tape |
.png) | Remove in this Direction (1) |
.png) | Remove in this Direction (2) |
NOTICE:
Be careful not to damage the windshield glass.
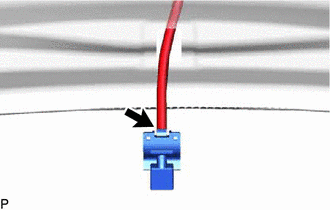
| (b) Disconnect the washer hose to remove the washer nozzle sub-assembly. NOTICE: Washer nozzle sub-assemblies cannot be reused. |
|
READ NEXT:
 Adjustment
ADJUSTMENT PROCEDURE 1. REMOVE WASHER NOZZLE SUB-ASSEMBLY Click here 2. ADJUST WASHER NOZZLE SUB-ASSEMBLY (a) Select a washer nozzle sub-assembly so the position the washer fluid hits the windshield
Installation
INSTALLATION CAUTION / NOTICE / HINT HINT:
Use the same procedure for the RH side and LH side.
The following procedure is for the LH side.
PROCEDURE 1. INSTALL WASHER NOZZLE SUB-ASSEMBLY (a) C
SEE MORE:
Data List / Active Test
DATA LIST / ACTIVE TEST DATA LIST NOTICE: In the table below, the values listed under "Normal Condition" are reference values. Do not depend solely on these reference values when deciding whether a part is faulty or not. HINT: Using the Techstream to read the Data List allows the values or states of
Precaution
PRECAUTION PRECAUTION FOR DISCONNECTING CABLE FROM NEGATIVE AUXILIARY BATTERY TERMINAL NOTICE: When disconnecting the cable from the negative (-) auxiliary battery terminal, initialize the following systems after the cable is reconnected. System Name See Procedure Lane Control System (for H
© 2016-2026 Copyright www.lexguide.net
