Lexus ES: Removal
REMOVAL
PROCEDURE
1. REMOVE FRONT WHEEL RH
Click here .gif)
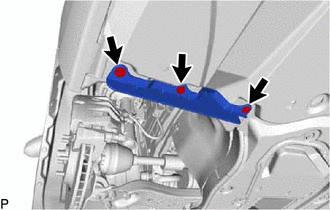
2. REMOVE FRONT WHEEL OPENING EXTENSION PAD RH
| (a) Remove the 3 screws and front wheel opening extension pad RH. |
|
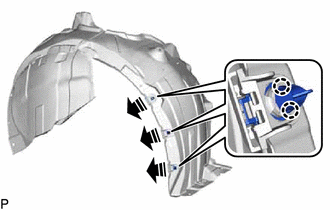
3. REMOVE REAR FENDER SPLASH SHIELD SUB-ASSEMBLY RH
(a) Using a screwdriver with its tip wrapped with protective tape, disengage the 3 claws as shown in the illustration.
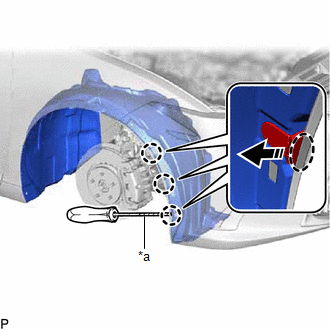
| *a | Protective Tape |
.png) | Insert Screwdriver Here |
.png) | Remove in this Direction |
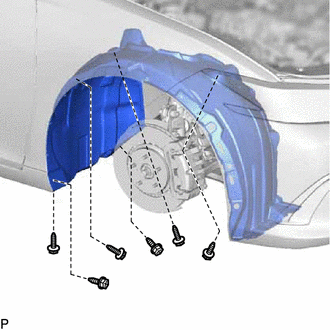
| (b) Remove the 6 screws. |
|
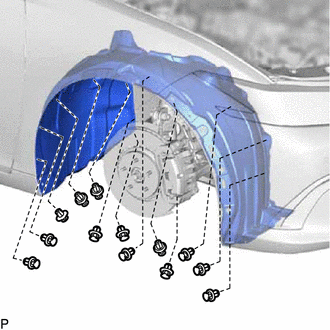
| (c) Remove the 13 clips and rear fender splash shield sub-assembly RH. |
|
4. REMOVE PIN HOLD CLIP
(a) Disengage the 6 claws to remove the 3 pin hold clips as shown in the illustration.
| | Remove in this Direction |
5. REMOVE FRONT FENDER LINER RETAINER
HINT:
Use the same procedure for the RH side and LH side.
Click here
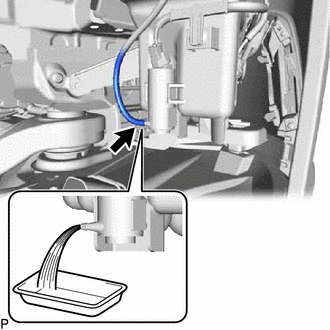
6. DRAIN WASHER FLUID
| (a) Disconnect the washer hose from the windshield washer motor and pump assembly, and drain the washer fluid. HINT: Use a container to collect the washer fluid. |
|
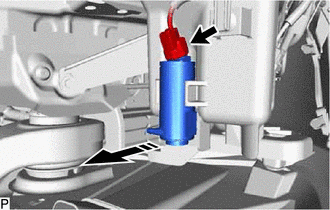
7. REMOVE WINDSHIELD WASHER MOTOR AND PUMP ASSEMBLY
(a) Disconnect the connector.
| | Remove in this Direction |
(b) Remove the windshield washer motor and pump assembly as shown in the illustration.
READ NEXT:
 Inspection
INSPECTION PROCEDURE 1. INSPECT WINDSHIELD WASHER MOTOR AND PUMP ASSEMBLY *a Component without harness connected (Windshield Washer Motor and Pump Assembly) (a) Remove the washer jar. (b) Dis
Installation
INSTALLATION PROCEDURE 1. INSTALL WINDSHIELD WASHER MOTOR AND PUMP ASSEMBLY (a) Install the windshield washer motor and pump assembly as shown in the illustration. Install in this Direction
SEE MORE:
Customize Parameters
CUSTOMIZE PARAMETERS CUSTOMIZE HEATED STEERING WHEEL SYSTEM (a) Customizing with the Techstream. NOTICE:
When the customer requests a change in a function, first make sure that the function can be customized.
Be sure to make a note of the current settings before customizing.
When troubleshoot
Sensor (Motor) Failure (B2341,B2344)
DESCRIPTION When the sliding roof ECU (sliding roof drive gear sub-assembly) detects a motor malfunction and the sliding roof operation is stopped, DTC B2341 is stored. When the sliding roof ECU (sliding roof drive gear sub-assembly) detects a gear position malfunction and the sliding roof operation
