Lexus ES: Removal
REMOVAL
CAUTION / NOTICE / HINT
The necessary procedures (adjustment, calibration, initialization, or registration) that must be performed after parts are removed and installed, or replaced during DCM (telematics transceiver) removal/installation are shown below.
Necessary Procedure After Parts Removed/Installed/Replaced (for HV Model)| Replaced Part or Performed Procedure | Necessary Procedure | Effect/Inoperative Function when Necessary Procedure not Performed | Link |
|---|---|---|---|
| *: for Lexus Enform Remote Compatible Type | |||
| DCM (Telematics Transceiver) | DCM activation | Safety Connect System | |
| DCM (Telematics Transceiver)* | Code registration (Smart access system with push-button start (for Start Function)) | Telematics System | |
| Replaced Part or Performed Procedure | Necessary Procedure | Effect/Inoperative Function when Necessary Procedure not Performed | Link |
|---|---|---|---|
| *: for Lexus Enform Remote Compatible Type | |||
| DCM (Telematics Transceiver) | DCM activation | Safety Connect System | |
| DCM (Telematics Transceiver)* | Code registration (Smart access system with push-button start (for Start Function)) | Telematics System | |
PROCEDURE
1. PRECAUTION
for HV Model: Click here .gif)
for Gasoline Model: Click here .gif)
2. REMOVE INSTRUMENT PANEL FINISH PANEL END LH
Click here .gif)
3. REMOVE INSTRUMENT PANEL FINISH PANEL END RH
Click here .gif)
4. REMOVE CENTER INSTRUMENT CLUSTER FINISH PANEL SUB-ASSEMBLY
Click here .gif)
5. REMOVE SHIFT LEVER KNOB SUB-ASSEMBLY
for UA80E: Click here .gif)
for P710: Click here .gif)
6. REMOVE REAR UPPER CONSOLE PANEL SUB-ASSEMBLY
Click here .gif)
7. REMOVE UPPER CONSOLE PANEL SUB-ASSEMBLY
Click here .gif)
8. REMOVE LOWER INSTRUMENT PANEL
Click here .gif)
9. REMOVE FRONT DOOR SCUFF PLATE RH
HINT:
Use the same procedure as for the LH side.
Click here .gif)
10. REMOVE COWL SIDE TRIM BOARD RH
HINT:
Use the same procedure as for the LH side.
Click here .gif)
11. REMOVE FRONT DOOR OPENING TRIM COVER RH
HINT:
Use the same procedure as for the LH side.
Click here .gif)
12. REMOVE INSTRUMENT SIDE PANEL RH
Click here .gif)
13. REMOVE NO. 2 INSTRUMENT PANEL UNDER COVER SUB-ASSEMBLY
Click here .gif)
14. REMOVE LOWER INSTRUMENT PANEL LH
Click here .gif)
15. REMOVE LOWER INSTRUMENT PANEL SUB-ASSEMBLY
Click here .gif)
16. REMOVE RADIO RECEIVER ASSEMBLY WITH SWITCH
Click here .gif)
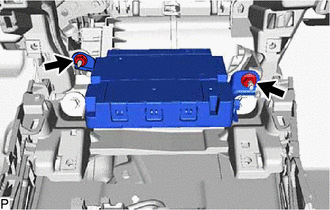
17. REMOVE DCM (TELEMATICS TRANSCEIVER) WITH BRACKET
| (a) Remove the 2 nuts. |
|
(b) Disconnect each connector and remove the DCM (telematics transceiver) with bracket.
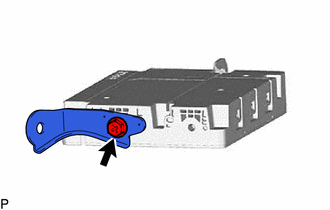
18. REMOVE TELEPHONE BRACKET
| (a) Remove the screw and telephone bracket. |
|
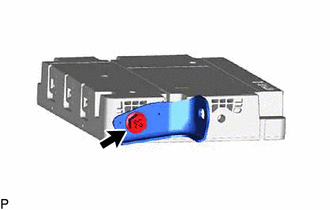
19. REMOVE NO. 1 TELEPHONE BRACKET
| (a) Remove the screw and No. 1 telephone bracket. |
|
20. REMOVE DCM (TELEMATICS TRANSCEIVER)


