Lexus ES: Parts Location
Lexus ES (XZ10) Service Manual / Vehicle Exterior / Sliding Roof / Convertible / Panoramic Moon Roof System / Parts Location
PARTS LOCATION
ILLUSTRATION
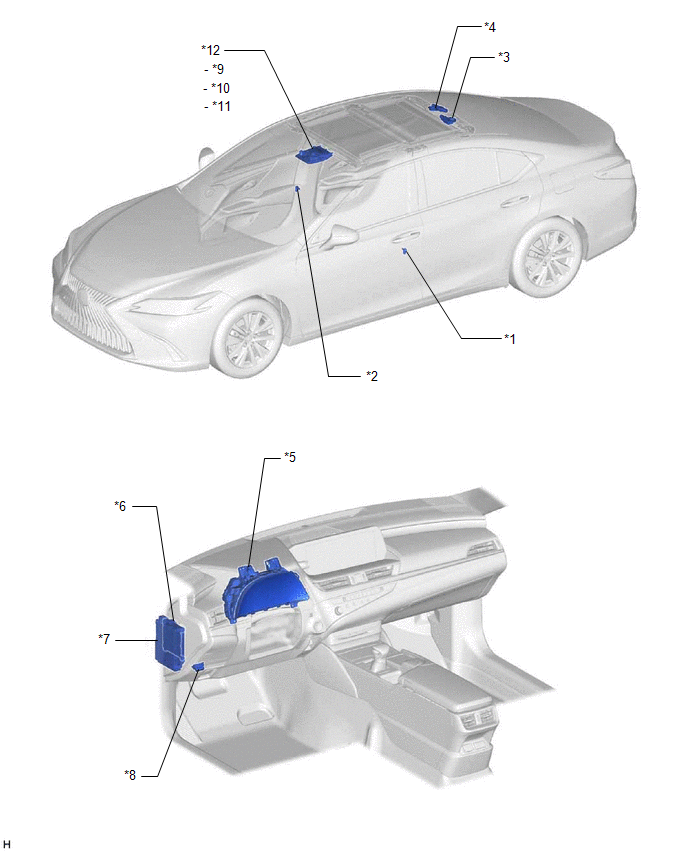
| *1 | FRONT DOOR COURTESY LIGHT SWITCH ASSEMBLY (for LH) | *2 | FRONT DOOR COURTESY LIGHT SWITCH ASSEMBLY (for RH) |
| *3 | ROOF SUNSHADE ECU (SLIDING ROOF DRIVE GEAR ASSEMBLY) | *4 | SLIDING ROOF ECU (SLIDING ROOF DRIVE GEAR ASSEMBLY) |
| *5 | COMBINATION METER ASSEMBLY | *6 | MAIN BODY ECU (MULTIPLEX NETWORK BODY ECU) |
| *7 | INSTRUMENT PANEL JUNCTION BLOCK ASSEMBLY - S/ROOF FUSE | *8 | DLC3 |
| *9 | SLIDING ROOF SWITCH | *10 | ROOF SUNSHADE SWITCH |
| *11 | TILT SWITCH | *12 | PANORAMIC MOON ROOF SWITCH (MAP LIGHT SUB-ASSEMBLY) |
READ NEXT:
 System Diagram
SYSTEM DIAGRAM Communication Table Sender Receiver Signal Line Main Body ECU (Multiplex Network Body ECU) Sliding Roof ECU (Sliding Roof Drive Gear Assembly)
Sliding roof operati
System Description
SYSTEM DESCRIPTION PANORAMIC MOON ROOF SYSTEM DESCRIPTION (a) The panoramic moon roof system controls the sliding roof operation using the sliding roof ECU (sliding roof drive gear assembly) and roof
How To Proceed With Troubleshooting
CAUTION / NOTICE / HINT HINT:
Use the following procedure to troubleshoot the panoramic moon roof system.
*: Use the Techstream.
PROCEDURE 1. VEHICLE BROUGHT TO WORKSHOP
NEXT
SEE MORE:
Key information
Keys
Key types
The following keys are provided with
the vehicle.
Electronic keys
Operating the smart access system with
push-button start
Operating the wireless remote control
function
Mechanical keys
Key number plate
■When riding in an aircraft
When bringing an
Diagnosis System
DIAGNOSIS SYSTEM DLC3 (Data Link Connector 3) (a) Check the DLC3. Click here AUXILIARY BATTERY VOLTAGE Standard Voltage: Switch Condition Specified Condition Power switch on (IG) 11 to 14 V
If voltage is below 11 V, recharge or replace the auxiliary battery. NOTICE: After turning
© 2016-2026 Copyright www.lexguide.net
