Lexus ES: Parts Location
PARTS LOCATION
ILLUSTRATION
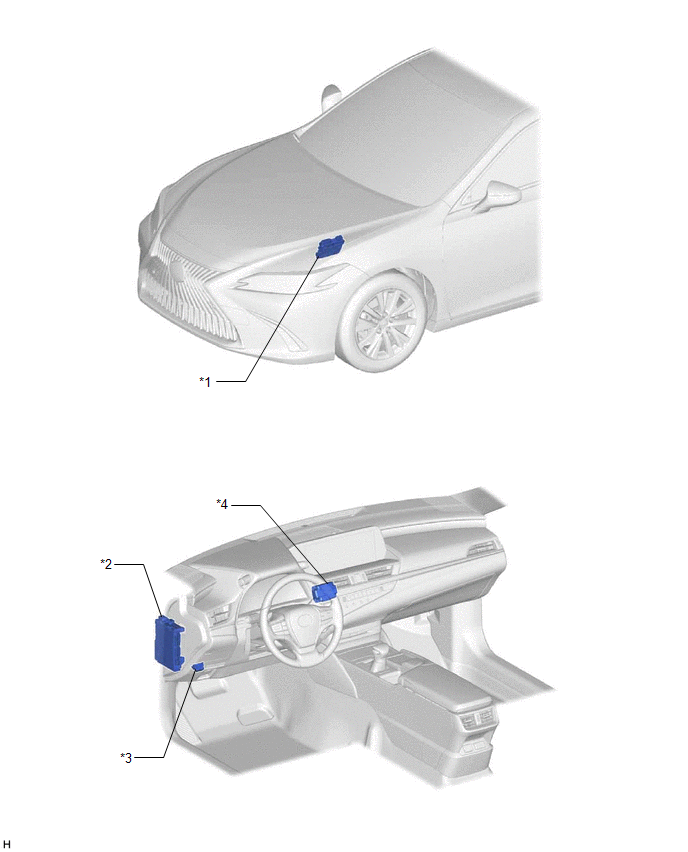
| *1 | ECM | *2 | INSTRUMENT PANEL JUNCTION BLOCK ASSEMBLY - ECU-B NO. 2 FUSE - ECU-IG1 NO. 4 FUSE - ECU-ACC FUSE |
| *3 | DLC3 | *4 | STEREO COMPONENT EQUALIZER ASSEMBLY |
ILLUSTRATION
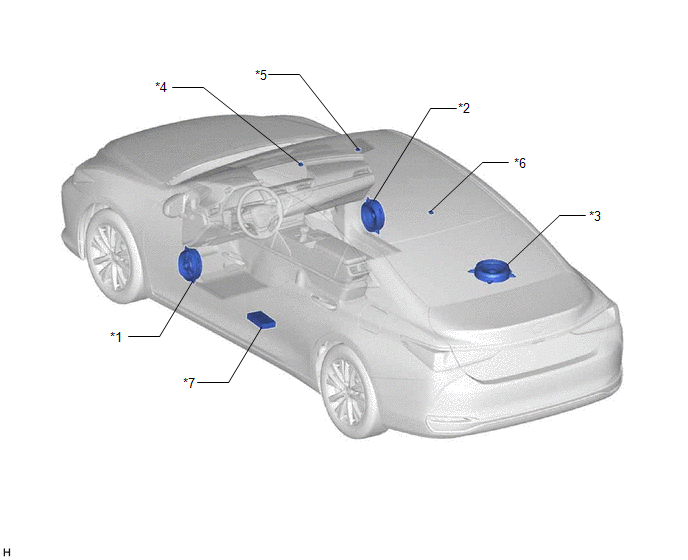
| *1 | FRONT NO. 1 SPEAKER ASSEMBLY LH | *2 | FRONT NO. 1 SPEAKER ASSEMBLY RH |
| *3 | SPEAKER ASSEMBLY WITH BRACKET | *4 | NO. 1 ACTIVE NOISE CONTROL MICROPHONE |
| *5 | NO. 2 ACTIVE NOISE CONTROL MICROPHONE | *6 | NO. 3 ACTIVE NOISE CONTROL MICROPHONE |
| *7 | STEREO COMPONENT AMPLIFIER ASSEMBLY | - | - |
READ NEXT:
 Power Source Circuit
DESCRIPTION This circuit is the power source circuit for the stereo component equalizer assembly. WIRING DIAGRAM CAUTION / NOTICE / HINT NOTICE: Inspect the fuses and relays for circuits related to t
Precaution
PRECAUTION PRECAUTION FOR ACTIVE NOISE CONTROL SYSTEM (a) If the active noise control microphone garnish hole is blocked, clean away the blockage and perform diagnosis. (b) If heavy objects are loaded
Problem Symptoms Table
PROBLEM SYMPTOMS TABLE NOTICE:
Before checking parts for malfunctions, check that the audio system operates normally.
Use the table below to help determine the cause of problem symptoms. If multi
SEE MORE:
Barometric Pressure Sensor "A" Circuit Short to Ground (P222611,P222615)
DESCRIPTION The atmospheric pressure sensor is built into the ECM. The ECM provides optimal control in response to atmospheric pressure fluctuations. DTC No. Detection Item DTC Detection Condition Trouble Area MIL Memory Note P222611 Barometric Pressure Sensor "A" Circuit Short
Diagnosis System
DIAGNOSIS SYSTEM DESCRIPTION (a) When troubleshooting a vehicle with a diagnosis system, the only difference from the usual troubleshooting procedure is connecting the Techstream to the vehicle and reading various data output from the clearance warning ECU assembly. The clearance warning ECU assembl
© 2016-2026 Copyright www.lexguide.net
