Lexus ES: Parts Location
Lexus ES (XZ10) Service Manual / Brake / Parking Brake / Electric Parking Brake System (for Gasoline Model) / Parts Location
PARTS LOCATION
ILLUSTRATION
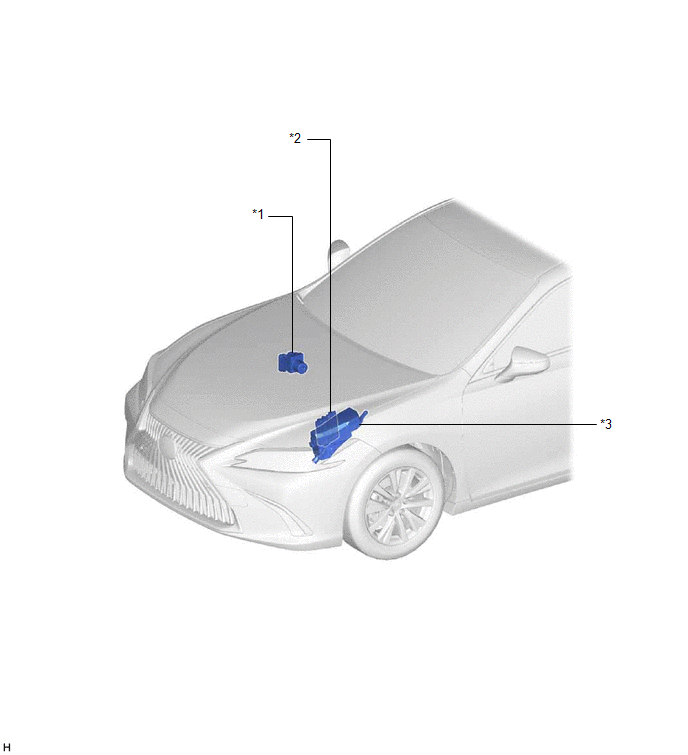
| *1 | BRAKE ACTUATOR ASSEMBLY - SKID CONTROL ECU | *2 | ECM |
| *3 | NO. 1 ENGINE ROOM RELAY BLOCK AND NO. 1 JUNCTION BLOCK ASSEMBLY - ABS NO. 2 FUSE | - | - |
ILLUSTRATION
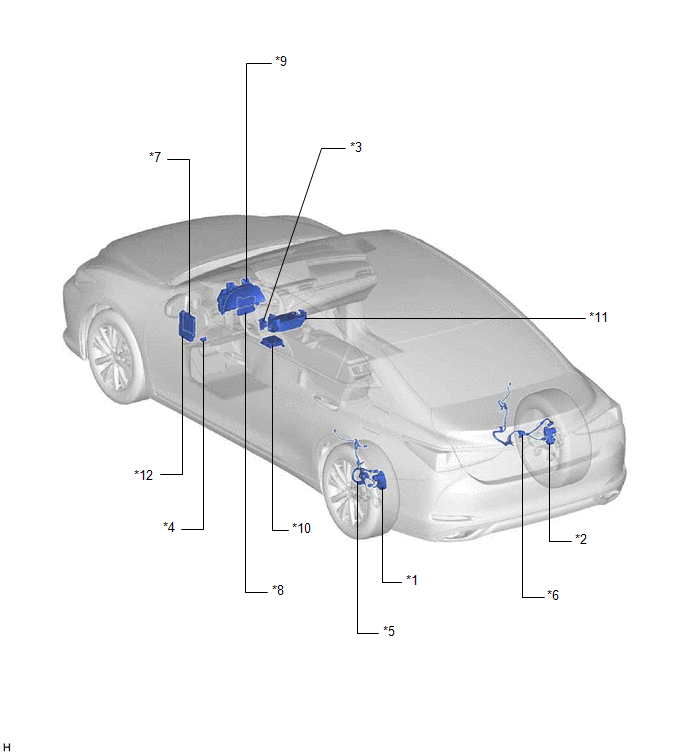
| *1 | PARKING BRAKE ACTUATOR ASSEMBLY LH | *2 | PARKING BRAKE ACTUATOR ASSEMBLY RH |
| *3 | ELECTRIC PARKING BRAKE SWITCH ASSEMBLY | *4 | DLC3 |
| *5 | NO. 2 PARKING BRAKE WIRE ASSEMBLY | *6 | NO. 1 PARKING BRAKE WIRE ASSEMBLY |
| *7 | MAIN BODY ECU (MULTIPLEX NETWORK BODY ECU) | *8 | AIR CONDITIONING AMPLIFIER ASSEMBLY |
| *9 | COMBINATION METER ASSEMBLY | *10 | DECELERATION SENSOR (AIR BAG SENSOR ASSEMBLY) |
| *11 | RADIO RECEIVER ASSEMBLY | *12 | INSTRUMENT PANEL JUNCTION BLOCK ASSEMBLY - ECU-IG1 NO. 2 FUSE |
READ NEXT:
 Precaution
PRECAUTION PRECAUTION FOR DISCONNECTING CABLE FROM NEGATIVE BATTERY TERMINAL NOTICE: When disconnecting the cable from the negative (-) battery terminal, initialize the following system(s) after the c
Problem Symptoms Table
PROBLEM SYMPTOMS TABLE HINT:
Use the table below to help determine the cause of problem symptoms. If multiple suspected areas are listed, the potential causes of the symptoms are listed in order of
System Diagram
SYSTEM DIAGRAM
SEE MORE:
Operation Check
OPERATION CHECK CHECK NAVIGATION SYSTEM NORMAL CONDITION (a) If the cause of a symptom is any of the following, the corresponding symptom is normal; it is not due to a malfunction. Symptom Answer A longer route than expected is chosen. Depending on the road conditions, the navigation ECU
Problem Symptoms Table
PROBLEM SYMPTOMS TABLE HINT:
Use the table below to help determine the cause of problem symptoms. If multiple suspected areas are listed, the potential causes of the symptoms are listed in order of probability in the "Suspected Area" column of the table. Check each symptom by checking the suspect
© 2016-2026 Copyright www.lexguide.net
