
Lexus ES: Oil And Oil Filter
Lexus ES (XZ10) Service Manual / Engine & Hybrid System / A25a-fks (lubrication) / Oil And Oil Filter
Components
COMPONENTS
ILLUSTRATION
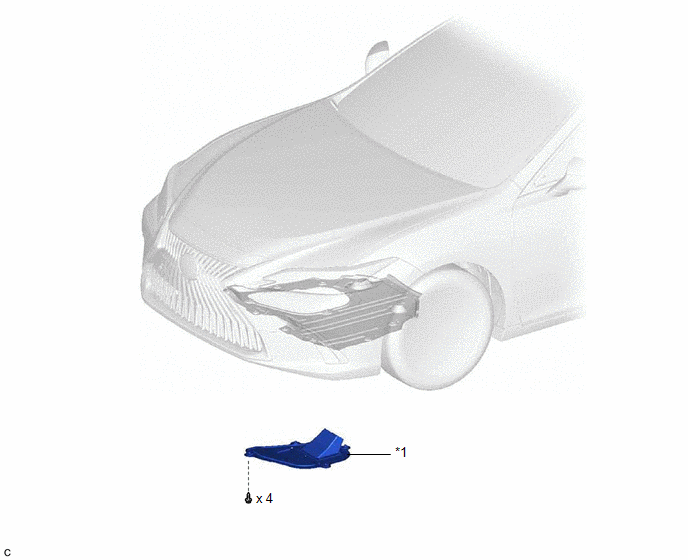
| *1 | CENTER NO. 4 ENGINE UNDER COVER | - | - |
ILLUSTRATION
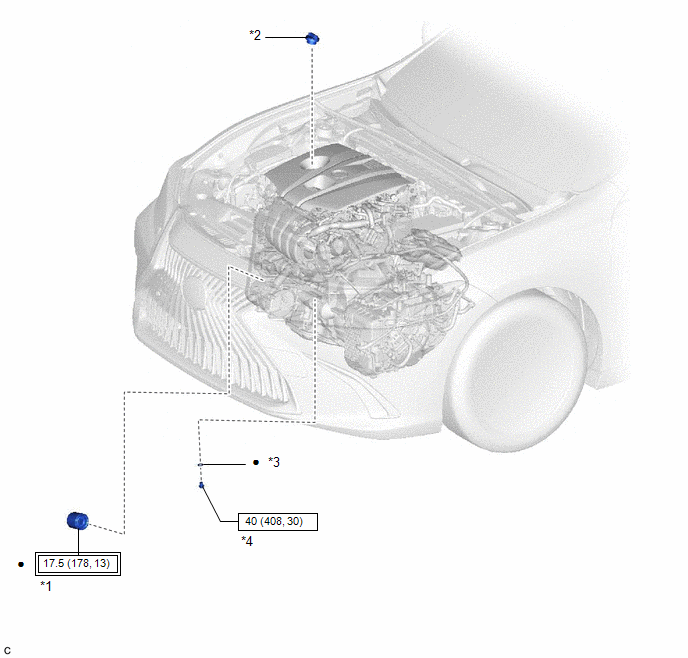
| *1 | OIL FILTER SUB-ASSEMBLY | *2 | OIL FILLER CAP SUB-ASSEMBLY |
| *3 | GASKET | *4 | OIL PAN DRAIN PLUG |
 | Tightening torque for "Major areas involving basic vehicle performance such as moving/turning/stopping": N*m (kgf*cm, ft.*lbf) |  | N*m (kgf*cm, ft.*lbf): Specified torque |
| ● | Non-reusable part | - | - |
READ NEXT:
 Components
COMPONENTS ILLUSTRATION *1 FRONT WHEEL OPENING EXTENSION PAD LH *2 FRONT WHEEL OPENING EXTENSION PAD RH *3 NO. 1 ENGINE UNDER COVER *4 NO. 2 ENGINE UNDER COVER ASSEMBLY N*m
Removal
REMOVAL CAUTION / NOTICE / HINT NOTICE: This procedure includes the removal of small-head bolts. Refer to Small-Head Bolts of Basic Repair Hint to identify the small-head bolts. Click here PROCEDURE
SEE MORE:
Installation
INSTALLATION CAUTION / NOTICE / HINT NOTICE: This procedure includes the installation of small-head bolts. Refer to Small-Head Bolts of Basic Repair Hint to identify the small-head bolts. Click here PROCEDURE 1. INSTALL FUEL PRESSURE SENSOR HINT: Perform "Inspection After Repair" after replacing t
Dtc Check / Clear
DTC CHECK / CLEAR CHECK DTC (a) Connect the Techstream to the DLC3. (b) Turn the power switch on (IG). (c) Turn the Techstream on. (d) Enter the following menus: Body Electrical / (desired system) / Trouble Codes. Body Electrical > Master Switch > Trouble Codes Body Electrical > D-Door Moto
© 2016-2026 Copyright www.lexguide.net
