Lexus ES: Luggage Compartment Door Outside Garnish
Components
COMPONENTS
ILLUSTRATION
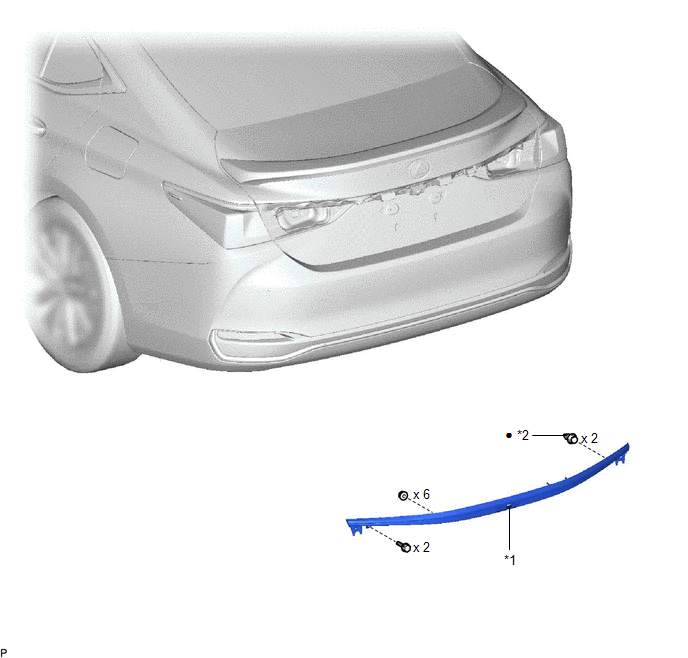
| *1 | LUGGAGE COMPARTMENT DOOR OUTSIDE GARNISH SUB-ASSEMBLY | *2 | CLIP |
| ● | Non-reusable part | - | - |
Removal
REMOVAL
PROCEDURE
1. REMOVE REAR LIGHT ASSEMBLY LH
Click here .gif)
2. REMOVE REAR LIGHT ASSEMBLY RH
HINT:
Use the same procedure as for the LH side.
3. REMOVE LUGGAGE COMPARTMENT DOOR OUTSIDE GARNISH SUB-ASSEMBLY
| (a) Remove the 2 screws. |
|
| (b) Remove the 6 nuts. |
|
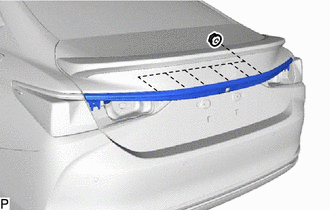
(c) Apply protective tape around the luggage compartment door outside garnish sub-assembly.
.png) | Protective Tape |
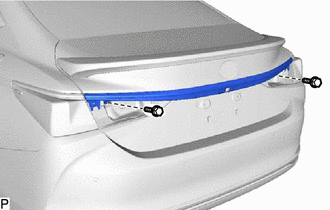
(d) Disengage the 2 clips and remove the luggage compartment door outside garnish sub-assembly as shown in the illustration.
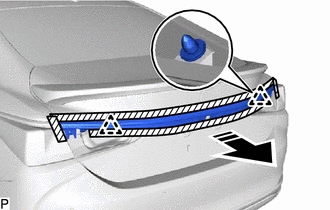
.png) | Remove in this Direction |
(e) When reusing the luggage compartment door outside garnish sub-assembly:
(1) Remove the 2 clips from the luggage compartment door outside garnish sub-assembly.
Installation
INSTALLATION
PROCEDURE
1. INSTALL LUGGAGE COMPARTMENT DOOR OUTSIDE GARNISH SUB-ASSEMBLY
(a) When reusing the luggage compartment door outside garnish sub-assembly:
(1) Install 2 new clips to the luggage compartment door outside garnish sub-assembly.
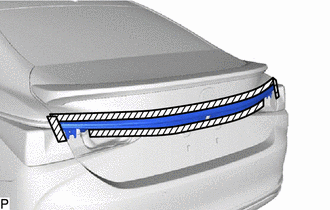
(b) Engage the 2 clips as shown in the illustration.

.png) | Install in this Direction |
(c) Install the 6 nuts.
(d) Install the luggage compartment door outside garnish sub-assembly with the 2 screws.
2. INSTALL REAR LIGHT ASSEMBLY LH
Click here .gif)
3. INSTALL REAR LIGHT ASSEMBLY RH
HINT:
Use the same procedure as for the LH side.
READ NEXT:
 Components
COMPONENTS ILLUSTRATION *A for Gasoline Model *B for Mesh Type Radiator Grille *1 NO. 3 LUGGAGE COMPARTMENT DOOR PLATE *2 SYMBOL EMBLEM ● Non-reusable part - - ILLUS
Removal
REMOVAL CAUTION / NOTICE / HINT HINT: When removing a name plate or emblem, heat the vehicle body and name plate or emblem using a heat light. Heating Temperature Item Temperature Vehicle Bod
SEE MORE:
Diagnostic Trouble Code Chart
DIAGNOSTIC TROUBLE CODE CHART Sliding Roof System DTC No. Detection Item Link B2341 Sensor (Motor) Failure B2342 Switch Failure B2343 Position Initialization Incomplete B2344 Position Failure
Parts Location
PARTS LOCATION ILLUSTRATION *1 VEHICLE APPROACHING SPEAKER ASSEMBLY *2 SKID CONTROL ECU (BRAKE BOOSTER WITH MASTER CYLINDER ASSEMBLY) ILLUSTRATION *1 HYBRID VEHICLE CONTROL ECU *2 VEHICLE APPROACHING SPEAKER CONTROLLER *3 MAIN BODY ECU (MULTIPLEX NETWORK BODY ECU) *4
