Lexus ES: Installation
Lexus ES (XZ10) Service Manual / Vehicle Interior / Mirror (ext) / Outer Rear View Mirror Glass / Installation
INSTALLATION
CAUTION / NOTICE / HINT
HINT:
- Use the same procedure for the RH side and LH side.
- The following procedure is for the LH side.
PROCEDURE
1. INSTALL OUTER MIRROR
(a) w/o Blind Spot Monitor System:
(1) Connect the connector.
(2) Engage the claw.
(3) Engage the clamp.
(4) Connect the 2 connectors.
(5) Engage the clamp.
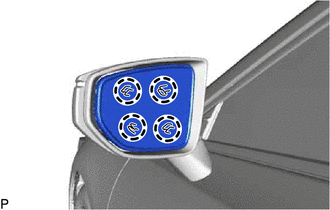
| (6) Engage the 4 claws to install the outer mirror. NOTICE: Do not push the outer mirror with excessive force. Doing so may break the mirror surface. |
|
(b) w/ Blind Spot Monitor System:
(1) Connect the connector.
(2) Engage the claw.
(3) Engage the clamp.
(4) Connect the connector.
(5) Engage the claw.
(6) Engage the clamp.
(7) Connect the 2 connectors.
(8) Engage the clamp.
| (9) Engage the 4 claws to install the outer mirror. NOTICE: Do not push the outer mirror with excessive force. Doing so may break the mirror surface. |
|
READ NEXT:
 Precaution
PRECAUTION PRECAUTION FOR DISCONNECTING CABLE FROM NEGATIVE BATTERY TERMINAL NOTICE: When disconnecting the cable from the negative (-) battery terminal, initialize the following systems after the cab
Parts Location
PARTS LOCATION ILLUSTRATION *1 OUTER REAR VIEW MIRROR ASSEMBLY (DRIVER DOOR) *2 OUTER REAR VIEW MIRROR ASSEMBLY (FRONT PASSENGER DOOR) *3 OUTER MIRROR (DRIVER DOOR) *4 OUTER MIRROR
SEE MORE:
System Diagram
SYSTEM DIAGRAM Communication Table Transmitting ECU Receiving ECU Signal Communication Method Certification ECU (smart key ECU assembly) Main body ECU (multiplex network body ECU) Luggage electrical key switch signal CAN Combination meter assembly Main body ECU (multiplex
Freeze Frame Data
FREEZE FRAME DATA FREEZE FRAME DATA (a) Whenever a lighting system DTC is stored, the headlight ECU sub-assembly and forward recognition camera stores the current vehicle state as freeze frame data. CHECK FREEZE FRAME DATA (a) Connect the Techstream to the DLC3. (b) Turn the engine switch on (IG). (
© 2016-2026 Copyright www.lexguide.net
