Lexus ES: Installation
INSTALLATION
PROCEDURE
1. INSTALL STEERING WHEEL SWITCH HOUSING
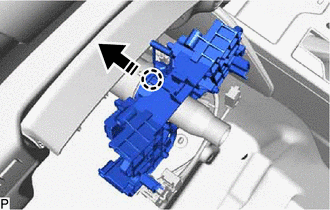
(a) When reusing the steering wheel switch housing:
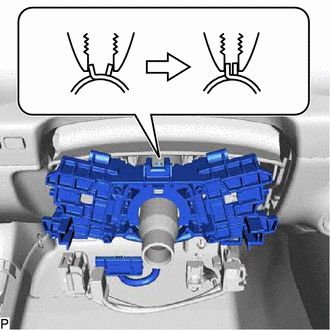
| (1) Using pliers, expand the clamp and temporarily install the steering wheel switch housing as shown in the illustration. |
|
(2) While holding the clamp expanded, engage the claw as shown in the illustration.
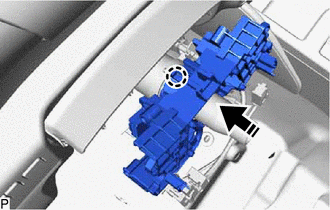
.png) | Install in this Direction |
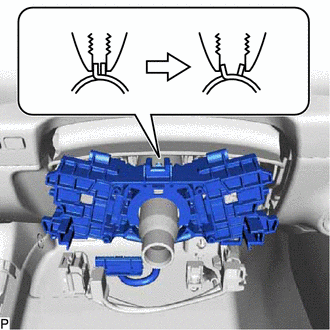
| (3) Release the clamp to install the steering wheel switch housing as shown in the illustration. |
|
(b) When installing a new steering wheel switch housing:
| (1) Temporarily install the steering wheel switch housing. |
|
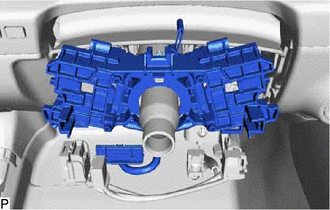
(2) Engage the claw as shown in the illustration.
| | Install in this Direction |
(3) Remove the pin to install the steering wheel switch housing as shown in the illustration.
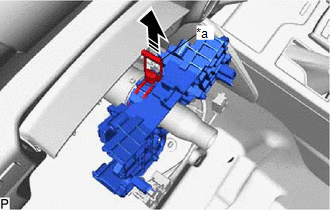
| *a | Pin |
| | Remove in this Direction |
2. INSTALL TURN SIGNAL SWITCH
Click here .gif)
3. INSTALL WINDSHIELD WIPER SWITCH ASSEMBLY
Click here
4. INSTALL TILT AND TELESCOPIC SWITCH (for Power Tilt and Power Telescopic Steering Column)
Click here
5. INSTALL SPIRAL CABLE WITH SENSOR SUB-ASSEMBLY
Click here
READ NEXT:
 Components
COMPONENTS ILLUSTRATION *A for Driver Side *B for Front Passenger Side *1 COURTESY LIGHT ASSEMBLY *2 FRONT DOOR TRIM BOARD SUB-ASSEMBLY *3 MULTIPLEX NETWORK MASTER SWITCH ASS
SEE MORE:
Main Microcomputer in Front Radar Sensor Calibration/Parameter Memory Failure (C1A8C46,C1A8D1C,C1A9000,C1A9100)
DESCRIPTION When an internal malfunction is detected in the millimeter wave radar sensor assembly, a DTC is stored. DTC No. Detection Item DTC Detection Condition Trouble Area C1A8C46 Main Microcomputer in Front Radar Sensor Calibration/Parameter Memory Failure When the engine switc
Removal
REMOVAL PROCEDURE 1. REMOVE REAR FLOOR SIDE MEMBER COVER (a) Remove the bolt and 7 clips. (b) Disengage the 3 clamps (A) and 2 clamps (B) to remove the rear floor side member cover from the vehicle body. 2. REMOVE CANISTER (CHARCOAL CANISTER ASSEMBLY) (a) Disconnect the fuel tank vent
