Lexus ES: Installation
INSTALLATION
PROCEDURE
1. INSTALL WINDSHIELD WIPER SWITCH ASSEMBLY
(a) Engage the claw to install the windshield wiper switch assembly as shown in the illustration.
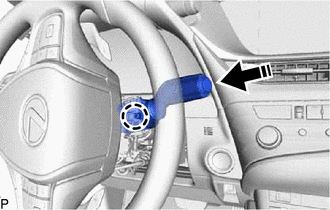
.png) | Install in this Direction |
2. INSTALL UPPER STEERING COLUMN COVER
(a) Engage the claw to install the upper steering column cover as shown in the illustration.
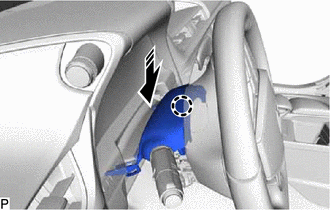
| | Install in this Direction |
(b) Engage the 4 clips and 2 claws to connect the upper steering column cover.
3. INSTALL LOWER STEERING COLUMN COVER SUB-ASSEMBLY
NOTICE:
If the lower steering column cover sub-assembly is installed in the incorrect order, the parts may break.
(a) Engage the 2 claws.
| (b) Engage the 2 claws. |
|

(c) Install the screw.
(d) Turn the steering wheel assembly to the left and install the screw.
(e) Turn the steering wheel assembly to the right and install the lower steering column cover sub-assembly with the screw.
4. CUSTOMIZE POWER TILT AND POWER TELESCOPIC STEERING COLUMN SYSTEM (for Power Tilt and Power Telescopic Steering Column)
Click here .gif)