Lexus ES: Hybrid Transaxle System
On-vehicle Inspection
ON-VEHICLE INSPECTION
CAUTION / NOTICE / HINT
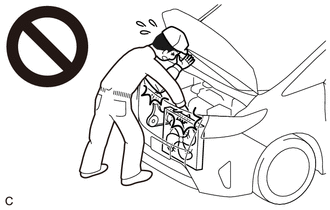
CAUTION:
To prevent injury due to contact with an operating V-ribbed belt or cooling fan, keep your hands and clothing away from the V-ribbed belt and cooling fans when working in the engine compartment with the engine running or the power switch on (IG).
PROCEDURE
1. REMOVE FRONT FENDER APRON SEAL LH
Click here .gif)
2. REMOVE AUTOMATIC TRANSMISSION CASE COVER
| (a) Remove the 2 bolts. |
|
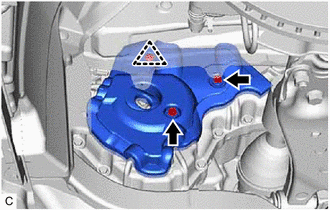
(b) Remove the clip and automatic transmission case cover from the hybrid vehicle transaxle assembly.
3. INSPECT TRANSAXLE FLUID PRESSURE
NOTICE:
Make sure to perform the following inspection after inspecting and adjusting the engine.
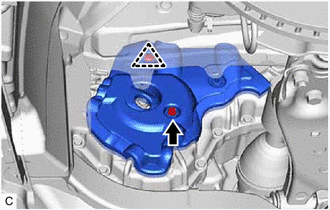
| (a) Remove the transmission oil pump cover plug from the hybrid vehicle transaxle assembly. |
|
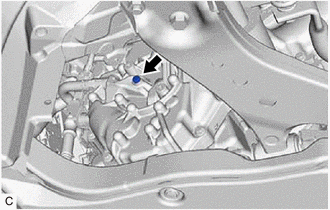
(b) Remove the O-ring from the transmission oil pump cover plug.
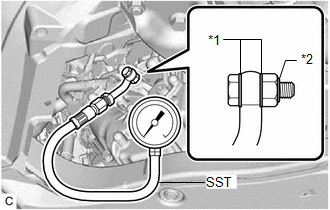
| (c) Install SST to the hybrid vehicle transaxle assembly. SST: 09993-19015 09993-00020 09993-00040 |
|
(d) Put the engine in Inspection Mode (Maintenance Mode).
Click here
(e) Measure the hybrid transaxle fluid pressure.
Reference:
| Maintenance Mode Engine Idle Speed | Hybrid Transaxle Fluid Temperature | Hybrid Transaxle Fluid Pressure |
|---|---|---|
| 900 to 1000 rpm | 20 to 50°C (68 to 122°F) | 9.8 kPa (0.1 kgf/cm2, 1 psi) or more |
NOTICE:
Be sure to cancel maintenance mode immediately after the hybrid transaxle fluid pressure check is completed.
(f) Remove SST from the hybrid vehicle transaxle assembly.
(g) Coat a new O-ring with ATF and install it to transmission oil pump cover plug.
(h) Install the transmission oil pump cover plug to the hybrid vehicle transaxle assembly.
Torque:
8.0 N·m {82 kgf·cm, 71 in·lbf}
4. INSTALL AUTOMATIC TRANSMISSION CASE COVER
| (a) Install the automatic transmission case cover to the hybrid vehicle transaxle assembly with the clip. |
|
(b) Install the bolt.
Torque:
10 N·m {102 kgf·cm, 7 ft·lbf}
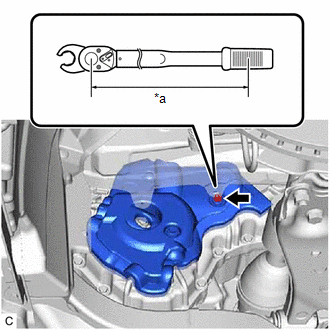
| (c) Using a 10 mm union nut wrench, install the bolt. Torque: Specified Tightening Torque : 10 N·m {102 kgf·cm, 7 ft·lbf} HINT:
|
|
5. INSTALL FRONT FENDER APRON SEAL LH
Click here
READ NEXT:
 Components
COMPONENTS ILLUSTRATION *1 ENGINE WIRE *2 HV AIR CONDITIONING WIRE *3 STARTER HOLE INSULATOR *4 FLYWHEEL HOUSING SIDE COVER *5 FUEL DELIVERY GUARD *6 STEERING GEAR HEAT I
Installation
INSTALLATION CAUTION / NOTICE / HINT CAUTION: The engine assembly with hybrid vehicle transaxle assembly is very heavy. Be sure to follow the procedure described in the repair manual, or the engine li
SEE MORE:
Inspection
INSPECTION PROCEDURE 1. INSPECT FUEL PUMP ASSEMBLY (a) Measure the resistance according to the value(s) in the table below. Standard Resistance: Tester Connection Condition Specified Condition 1 - 2 20°C (68°F) 0.45 to 0.55 Ω If the result is not as specified, replace the fu
Key-off Operation Function Operates even if Operating Conditions are not Satisfied
DESCRIPTION According to the panoramic moon roof switch (map light sub-assembly) operation, the sliding roof ECU (sliding roof drive gear assembly) or roof sunshade ECU (sliding roof drive gear assembly) operates its built-in motor. Using the panoramic moon roof switch (map light sub-assembly), if t
