Lexus ES: Disassembly
DISASSEMBLY
CAUTION / NOTICE / HINT
The necessary procedures (adjustment, calibration, initialization, or registration) that must be performed after parts are removed and installed, or replaced during luggage compartment door removal/installation are shown below.
Necessary Procedure After Parts Removed/Installed/Replaced (for HV Model)| Replaced Part or Performed Procedure | Necessary Procedure | Effect/Inoperative Function When Necessary Procedures are not Performed | Link |
|---|---|---|---|
| Rear television camera assembly | w/ Parking Assist Monitor System
| Parking Assist Monitor System | |
| w/ Panoramic View Monitor System
| Panoramic View Monitor System | |
| Replaced Part or Performed Procedure | Necessary Procedure | Effect/Inoperative Function When Necessary Procedures are not Performed | Link |
|---|---|---|---|
| Rear television camera assembly | w/ Parking Assist Monitor System
| Parking Assist Monitor System | |
| w/ Panoramic View Monitor System
| Panoramic View Monitor System | |
PROCEDURE
1. REMOVE LUGGAGE LOCK CONTROL CABLE PLATE
(a) Disengage the 2 claws and remove the luggage lock control cable plate as shown in the illustration.
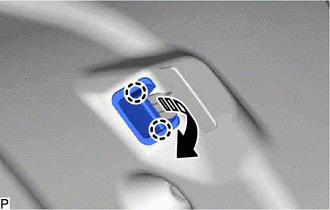
.png) | Remove in this Direction |
2. REMOVE SWITCH BEZEL (w/ Power Trunk Lid System)
(a) Disengage the 2 claws and remove the switch bezel as shown in the illustration.
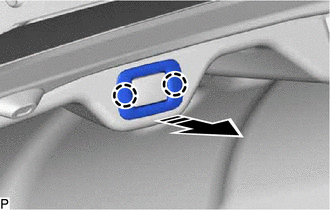
| | Remove in this Direction |
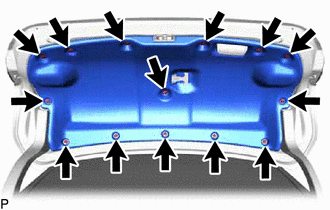
3. REMOVE LUGGAGE COMPARTMENT DOOR COVER
| (a) Using a clip remover, remove the 14 clips and luggage compartment door cover. |
|
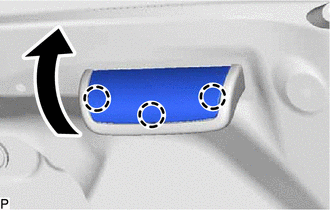
4. REMOVE LUGGAGE COMPARTMENT DOOR ASSIST GRIP
| (a) Disengage the 3 claws as shown in the illustration. |
|
| (b) Remove the 2 screws and luggage compartment door assist grip. |
|

5. REMOVE LUGGAGE COMPARTMENT DOOR HINGE COVER LH
| (a) Disengage the 3 clips and remove the luggage compartment door hinge cover LH. |
|

6. REMOVE LUGGAGE COMPARTMENT DOOR HINGE COVER RH
HINT:
Use the same procedure as for the LH side.
7. REMOVE DOOR CONTROL SWITCH (w/ Power Trunk Lid System)
Click here .gif)
8. REMOVE LUGGAGE COMPARTMENT DOOR INSIDE HANDLE
Click here
9. REMOVE LUGGAGE COMPARTMENT KEY CYLINDER PROTECTOR
Click here
10. REMOVE LUGGAGE COMPARTMENT DOOR LOCK ASSEMBLY (w/o Power Trunk Lid System)
Click here
11. REMOVE LUGGAGE DOOR CLOSER ASSEMBLY (w/ Power Trunk Lid System)
Click here
12. REMOVE LUGGAGE LOCK CONTROL CABLE CLAMP
| (a) Disengage the 2 claws and guide to remove the luggage lock control cable clamp. |
|
13. REMOVE LUGGAGE COMPARTMENT DOOR LOCK CYLINDER ASSEMBLY
| (a) Remove the 2 nuts and luggage compartment door lock cylinder assembly. |
|
14. REMOVE LUGGAGE COMPARTMENT DOOR CUSHION
| (a) Disengage the 8 claws to remove the 2 luggage compartment door cushions. |
|
15. REMOVE HOLE PLUG
| (a) Remove the 2 hole plugs. |
|
16. REMOVE REAR LIGHT ASSEMBLY LH
Click here
17. REMOVE REAR LIGHT ASSEMBLY RH
HINT:
Use the same procedure as for the LH side.
18. REMOVE LUGGAGE COMPARTMENT DOOR OUTSIDE GARNISH SUB-ASSEMBLY
Click here
19. REMOVE LUGGAGE ELECTRICAL KEY SWITCH
Click here
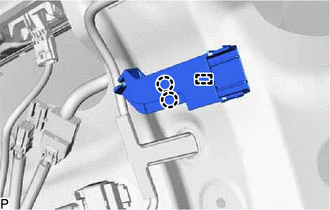
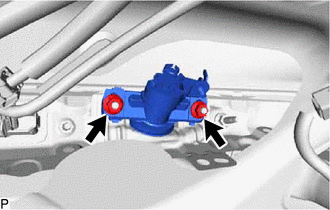
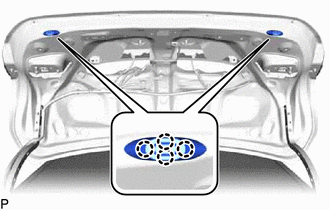
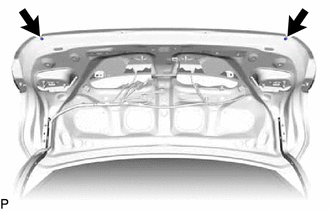
20. REMOVE TELEVISION CAMERA ASSEMBLY WITH WIRE
Click here
21. REMOVE LICENSE PLATE LIGHT ASSEMBLY LH
Click here
22. REMOVE LICENSE PLATE LIGHT ASSEMBLY RH
HINT:
Use the same procedure as for the LH side.
23. REMOVE REAR SPOILER SUB-ASSEMBLY (w/ Rear Spoiler)
Click here
READ NEXT:
 Adjustment
ADJUSTMENT CAUTION / NOTICE / HINT *a Centering Bolt *b Standard Bolt HINT:
Centering bolts are used to mount the door hinge to the door. The door cannot be adjusted with the centeri
Reassembly
REASSEMBLY PROCEDURE 1. INSTALL REAR SPOILER SUB-ASSEMBLY (w/ Rear Spoiler) Click here 2. INSTALL LICENSE PLATE LIGHT ASSEMBLY LH Click here 3. INSTALL LICENSE PLATE LIGHT ASSEMBLY RH HINT: Use th
Luggage Compartment Door Closer Switch
ComponentsCOMPONENTS ILLUSTRATION *1 DOOR CONTROL SWITCH *2 LUGGAGE COMPARTMENT DOOR COVER *3 LUGGAGE LOCK CONTROL CABLE PLATE *4 SWITCH BEZEL RemovalREMOVAL PROCEDURE 1. REMO
SEE MORE:
BSM Buzzer Malfunction (C2A5D)
DESCRIPTION This DTC is stored when the rear television camera assembly receives an RCTA buzzer circuit malfunction signal from the blind spot monitor sensor RH. DTC No. Detection Item DTC Detection Condition Trouble Area C2A5D BSM Buzzer Malfunction The RCTA buzzer circuit is abnor
System Diagram
SYSTEM DIAGRAM Communication Table Transmitting ECU Receiving ECU Signal Communication Method Multiplex Network Master Switch Assembly Power Window Regulator Motor Assembly (for Driver Door) Power window auto up and down signal LIN
Power Window Regulator Motor Assembly (
