Lexus ES: Disassembly
DISASSEMBLY
PROCEDURE
1. REMOVE HOOD CUSHION CENTER
| (a) Using a clip remover, disengage the 10 hood to cowl top seal clips to remove the hood cushion center. |
|
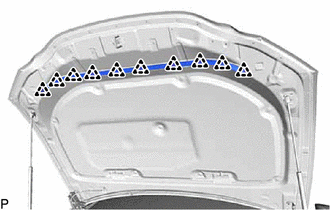
(b) Remove the 10 hood to cowl top seal clips from the hood cushion center.
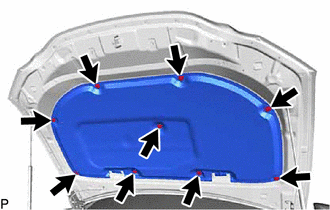
2. REMOVE HOOD INSULATOR
(a) for TMK Made:
| (1) Using a clip remover, remove the 9 hood insulator clips. |
|
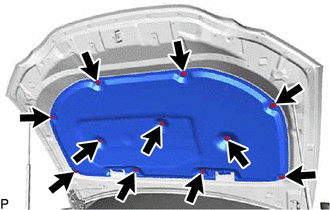
(b) for TMMK Made:
| (1) Using a clip remover, remove the 11 hood insulator clips. |
|
(c) Disengage the 2 guides to remove the hood insulator as shown in the illustration.
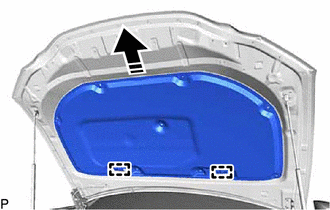
.png) | Remove in this Direction |
3. REMOVE WASHER NOZZLE SUB-ASSEMBLY
Click here .gif)
HINT:
Use the same procedure as for the LH side.
4. DISCONNECT WASHER HOSE ASSEMBLY
| (a) Disengage the 5 clamps. |
|
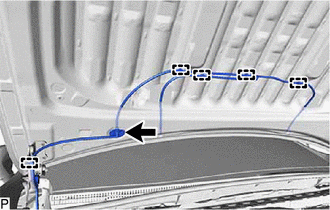
(b) Disengage the grommet to disconnect the washer hose assembly.
5. REMOVE HOOD SUPPORT ASSEMBLY LH
Click here
6. REMOVE HOOD SUPPORT ASSEMBLY RH
HINT:
Use the same procedure as for the LH side.
7. REMOVE HOOD STAY BRACKET LH
Click here
8. REMOVE HOOD STAY BRACKET RH
HINT:
Use the same procedure as for the LH side.
READ NEXT:
 Adjustment
ADJUSTMENT CAUTION / NOTICE / HINT *a Centering Bolt *b Standard Bolt HINT:
Centering bolts are used to install the hood hinges and hood lock. The hood and hood lock cannot be adjust
Reassembly
REASSEMBLY PROCEDURE 1. INSTALL HOOD STAY BRACKET LH Click here 2. INSTALL HOOD STAY BRACKET RH HINT: Use the same procedure as for the LH side. 3. INSTALL HOOD SUPPORT ASSEMBLY LH Click here 4. I
SEE MORE:
Battery
ComponentsCOMPONENTS ILLUSTRATION *1 BATTERY *2 NEGATIVE BATTERY TERMINAL *3 POSITIVE BATTERY TERMINAL *4 NO. 2 BATTERY CLAMP *5 BATTERY TERMINAL CAP *6 BATTERY INSULATOR Tightening torque for "Major areas involving basic vehicle performance such as moving/turni
Touch Pad Memory Module Malfunction (B155B)
DESCRIPTION This DTC is stored if the remote touch (remote operation controller assembly) detects a malfunction in itself, such as internal hardware failure or remote touch screen memory module malfunction. DTC No. Detection Item DTC Detection Condition Trouble Area B155B Touch Pad Me
