
Lexus ES: Cooling System
On-vehicle Inspection
ON-VEHICLE INSPECTION
CAUTION / NOTICE / HINT
CAUTION:
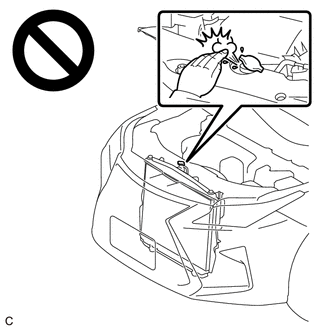
Do not remove the radiator cap sub-assembly while the engine and radiator assembly are still hot. Pressurized, hot engine coolant and steam may be released and cause serious burns.
PROCEDURE
1. INSPECT FOR COOLANT LEAK
CAUTION:
Do not remove the radiator cap sub-assembly while the engine and radiator assembly are still hot. Pressurized, hot engine coolant and steam may be released and cause serious burns.
(a) Remove the radiator cap sub-assembly.
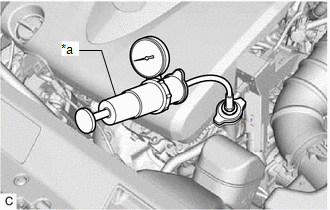
| (b) Fill the radiator assembly with engine coolant, and then install a radiator cap tester. |
|
(c) Warm up the engine.
(d) Pump the radiator cap tester to 122 kPa (1.2 kgf/cm2, 18 psi), and then check that the pressure does not drop.
- If the pressure drops, check the hoses, radiator assembly and engine water pump assembly for leaks.
- If there are no signs of external engine coolant leaks, check the heater core, cylinder block sub-assembly and cylinder head sub-assembly.
(e) Remove the radiator cap tester.
(f) Install the radiator cap sub-assembly.
2. INSPECT ENGINE COOLANT LEVEL IN RESERVOIR TANK
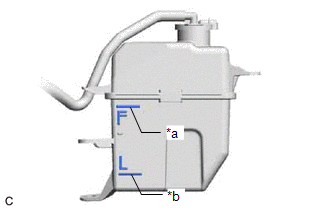
| (a) Check that the engine coolant level is between the L line and F line when the engine is cold. If the engine coolant level is low, check for leaks and add engine coolant to the F line. NOTICE: Do not substitute plain water for engine coolant. |
|
3. INSPECT ENGINE COOLANT QUALITY
CAUTION:
Do not remove the radiator cap sub-assembly while the engine and radiator assembly are still hot. Pressurized, hot engine coolant and steam may be released and cause serious burns.
(a) Remove the radiator cap sub-assembly.
(b) Check if there are any excessive deposits of rust or scale around the radiator cap sub-assembly and water filler hole. Also, the engine coolant should be free of oil.
If excessively dirty, replace the engine coolant.
(c) Install the radiator cap sub-assembly.
READ NEXT:
 Components
COMPONENTS ILLUSTRATION *A Type A *B Type B *1 FRONT WHEEL OPENING EXTENSION PAD LH *2 FRONT WHEEL OPENING EXTENSION PAD RH *3 NO. 1 ENGINE UNDER COVER - - N*m (kg
On-vehicle Inspection
ON-VEHICLE INSPECTION CAUTION / NOTICE / HINT CAUTION: Do not remove the radiator cap sub-assembly while the engine and radiator assembly are still hot. Pressurized, hot engine coolant and steam may b
SEE MORE:
On-vehicle Inspection
ON-VEHICLE INSPECTION PROCEDURE 1. INSPECT HOOD SUB-ASSEMBLY (a) Check that the clearance measurements of areas a through d are within each standard range. Standard Clearance Area Measurement Area Measurement a 2.85 to 5.85 mm (0.112 to 0.230 in.) b 1.85 to 5.85 mm (0.0728 to 0.2
Problem Symptoms Table
PROBLEM SYMPTOMS TABLE HINT:
Use the table below to help determine the cause of problem symptoms. If multiple suspected areas are listed, the potential causes of the symptoms are listed in order of probability in the "Suspected Area" column of the table. Check each symptom by checking the suspect
