Lexus ES: Components
Lexus ES (XZ10) Service Manual / Vehicle Interior / Wiper / Washer / Washer Level Warning Switch / Components
COMPONENTS
ILLUSTRATION
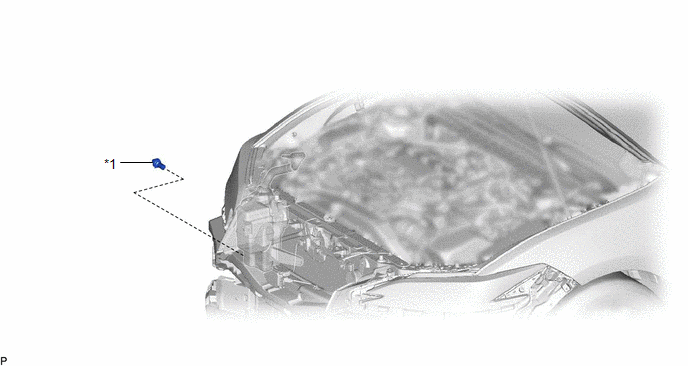
| *1 | LEVEL WARNING SWITCH ASSEMBLY | - | - |
READ NEXT:
 Removal
REMOVAL CAUTION / NOTICE / HINT The necessary procedures (adjustment, calibration, initialization or registration) that must be performed after parts are removed and installed, or replaced during leve
Inspection
INSPECTION PROCEDURE 1. INSPECT LEVEL WARNING SWITCH ASSEMBLY HINT: This check should be performed with the level warning switch assembly installed to the washer jar. (a) Fill the washer jar with w
Installation
INSTALLATION PROCEDURE 1. INSTALL LEVEL WARNING SWITCH ASSEMBLY (a) Install the level warning switch assembly as shown in the illustration. *a Protrusion *b Marking Install in this
SEE MORE:
Maintenance requirements
To ensure safe and economical driving,
day-to-day care and regular
maintenance are essential. It is the
owner's responsibility to perform
regular checks. Lexus recommends
the following maintenance:
■Repair and replacement
It is recommended that genuine Lexus parts
be used for repairs to en
Knock Sensor 1 Bank 1 or Single Sensor Circuit Short to Ground (P032511)
DESCRIPTION A flat-type knock control sensor (non-resonant type) has a structure that can detect vibrations between approximately 5 and 23 kHz. The knock control sensor is fitted onto the engine block to detect engine knocking. The knock control sensor contains a piezoelectric element which generate
© 2016-2026 Copyright www.lexguide.net
