Lexus ES: Components
COMPONENTS
ILLUSTRATION
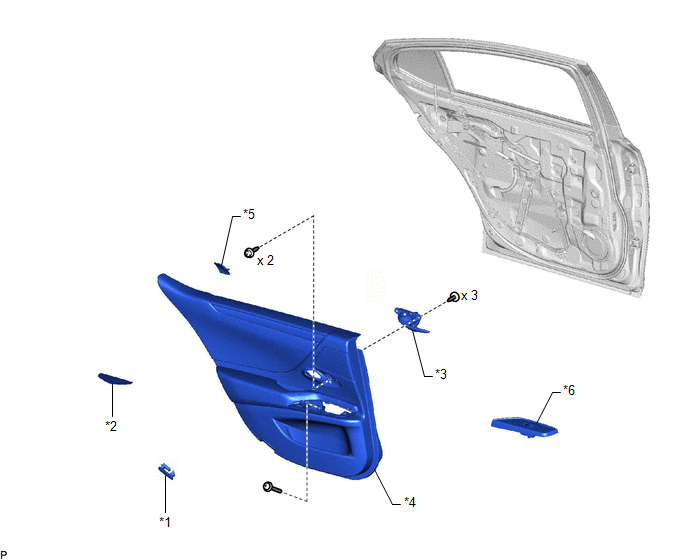
| *1 | COURTESY LIGHT ASSEMBLY | *2 | REAR DOOR ARMREST COVER |
| *3 | REAR DOOR INSIDE HANDLE SUB-ASSEMBLY | *4 | REAR DOOR TRIM BOARD SUB-ASSEMBLY |
| *5 | REAR DOOR TRIM UPPER PAD | *6 | REAR POWER WINDOW REGULATOR SWITCH ASSEMBLY WITH REAR DOOR UPPER ARMREST BASE PANEL |
ILLUSTRATION
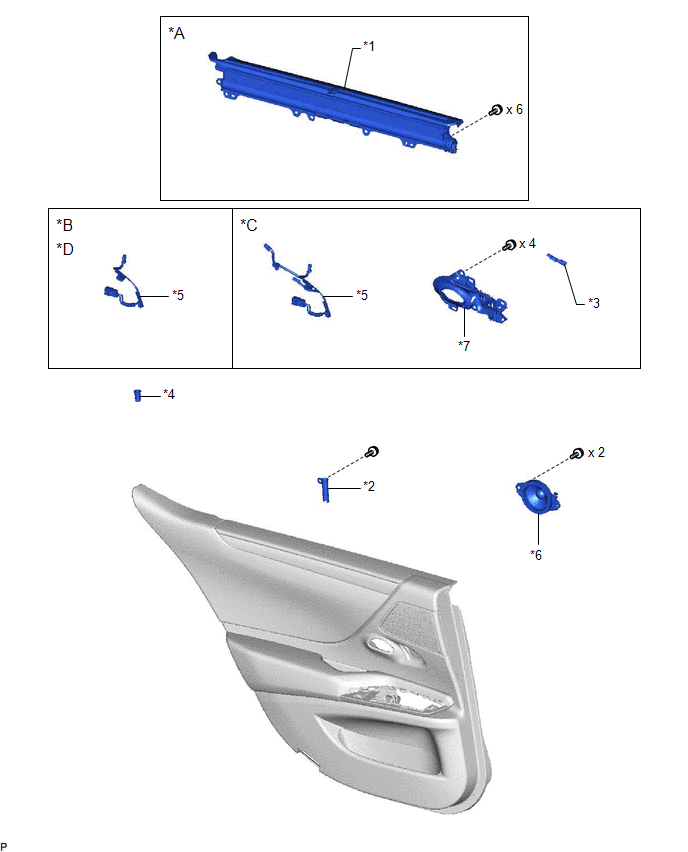
| *A | w/ Rear Door Sunshade | *B | w/o Illumination |
| *C | w/ Illumination | *D | w/ Sub Wire Harness |
| *1 | REAR CURTAIN SUB-ASSEMBLY | *2 | REAR DOOR DOOR LOCKING HOLDER |
| *3 | REAR DOOR INSIDE HANDLE ILLUMINATION LIGHT ASSEMBLY | *4 | REAR DOOR LOCK CONTROL KNOB BEZEL |
| *5 | REAR DOOR WIRE | *6 | REAR SPEAKER ASSEMBLY |
| *7 | REAR DOOR INSIDE HANDLE BEZEL | - | - |
ILLUSTRATION
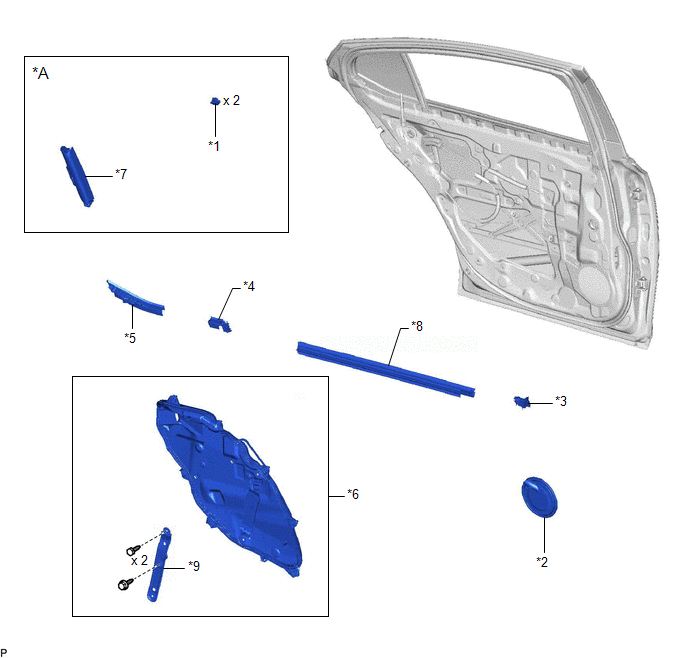
| *A | w/ Rear Door Sunshade | - | - |
| *1 | CURTAIN HOOK | *2 | REAR DOOR NO. 1 SERVICE HOLE COVER |
| *3 | REAR DOOR NO. 2 SERVICE HOLE COVER | *4 | REAR DOOR NO. 2 VENT SEAL |
| *5 | REAR DOOR PANEL PROTECTOR | *6 | REAR DOOR SERVICE HOLE COVER |
| *7 | REAR SIDE CURTAIN ASSEMBLY | *8 | REAR DOOR INNER GLASS WEATHERSTRIP |
| *9 | BRACKET | - | - |
ILLUSTRATION
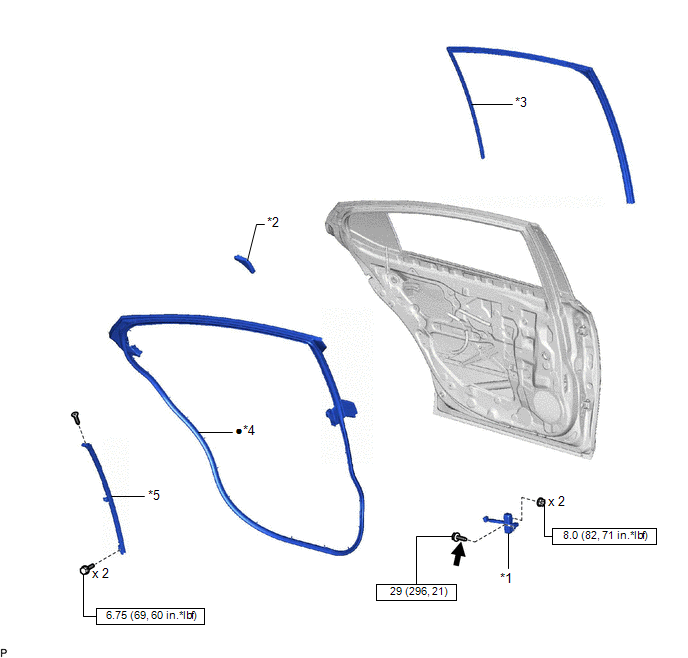
| *1 | REAR DOOR CHECK ASSEMBLY | *2 | REAR DOOR FRAME GARNISH |
| *3 | REAR DOOR GLASS RUN | *4 | REAR DOOR WEATHERSTRIP |
| *5 | REAR DOOR WINDOW DIVISION BAR SUB-ASSEMBLY | - | - |
.png) | N*m (kgf*cm, ft.*lbf): Specified torque | ● | Non-reusable part |
.png) | Toyota Genuine Adhesive 1324, Three Bond 1324 or equivalent | ★ | Precoated part |
ILLUSTRATION
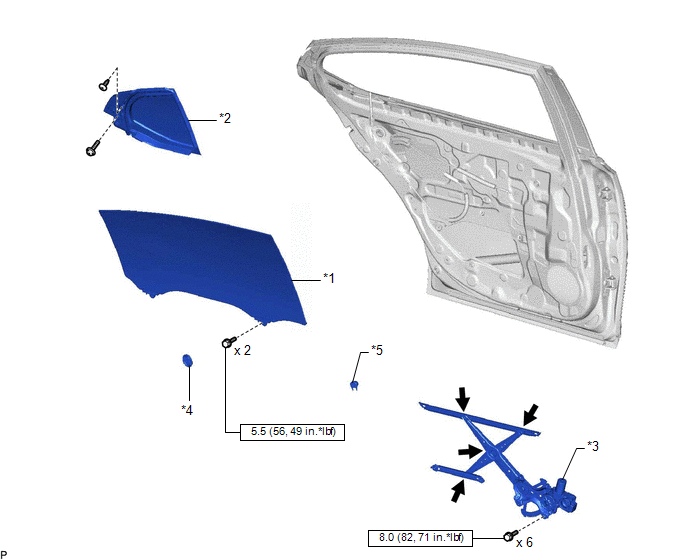
| *1 | REAR DOOR GLASS SUB-ASSEMBLY | *2 | REAR DOOR QUARTER WINDOW GLASS SUB-ASSEMBLY |
| *3 | REAR DOOR WINDOW REGULATOR ASSEMBLY | *4 | HOLE PLUG |
| *5 | REAR DOOR NO. 3 SERVICE HOLE COVER | - | - |
| | N*m (kgf*cm, ft.*lbf): Specified torque | | MP grease |
ILLUSTRATION
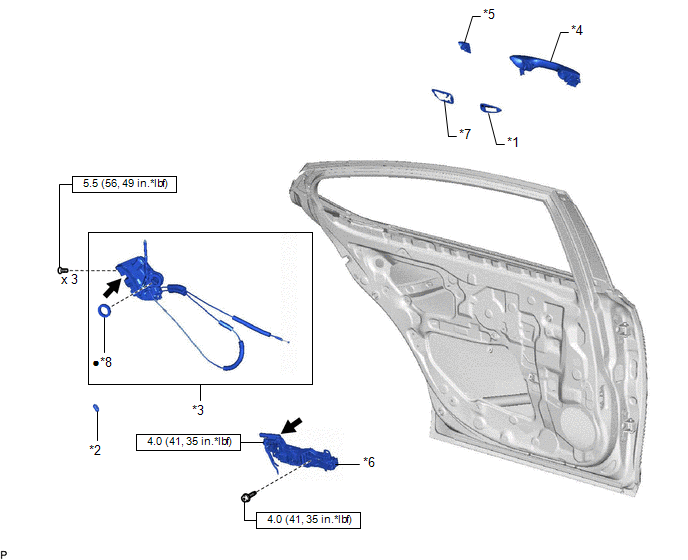
| *1 | REAR DOOR FRONT OUTSIDE HANDLE PAD | *2 | REAR DOOR LOCK CHILD PROTECTION COVER |
| *3 | REAR DOOR LOCK WITH MOTOR ASSEMBLY | *4 | REAR DOOR OUTSIDE HANDLE ASSEMBLY |
| *5 | REAR DOOR OUTSIDE HANDLE COVER | *6 | REAR DOOR OUTSIDE HANDLE FRAME SUB-ASSEMBLY |
| *7 | REAR DOOR REAR OUTSIDE HANDLE PAD | *8 | DOOR LOCK WIRING HARNESS SEAL |
| | N*m (kgf*cm, ft.*lbf): Specified torque | ● | Non-reusable part |
| | MP grease | - | - |
ILLUSTRATION
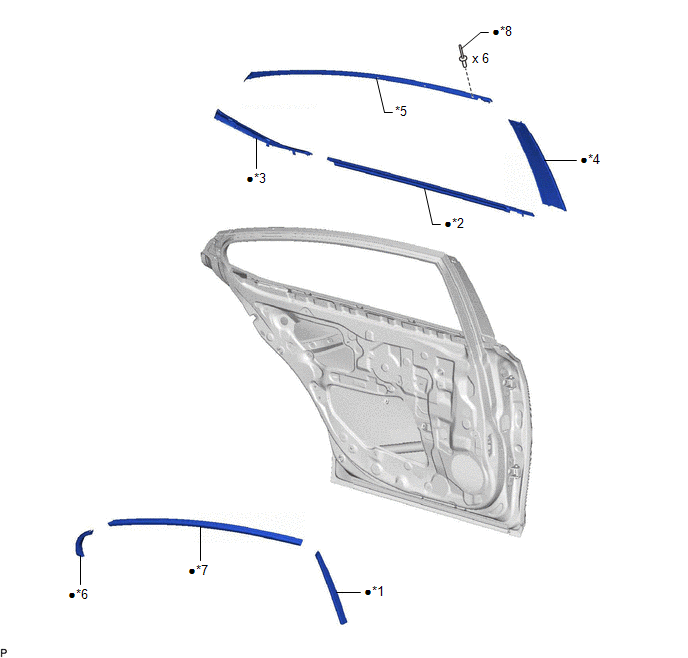
| *1 | FRONT INNER BLACK OUT TAPE | *2 | REAR DOOR BELT MOULDING ASSEMBLY |
| *3 | REAR DOOR BELT MOULDING SUB-ASSEMBLY | *4 | REAR DOOR FRONT WINDOW FRAME MOULDING |
| *5 | REAR DOOR WINDOW FRAME MOULDING SUB-ASSEMBLY | *6 | REAR INNER BLACK OUT TAPE |
| *7 | UPPER INNER BLACK OUT TAPE | *8 | RIVET |
| ● | Non-reusable part | - | - |
ILLUSTRATION

| *1 | REAR DOOR NO. 2 WEATHERSTRIP | *2 | REAR DOOR NO. 3 WEATHERSTRIP |
| *3 | REAR DOOR PANEL CUSHION | - | - |
| ● | Non-reusable part | - | - |
READ NEXT:
 Disassembly
DISASSEMBLY CAUTION / NOTICE / HINT The necessary procedures (adjustment, calibration, initialization, or registration) that must be performed after parts are removed and installed, or replaced during
Adjustment
ADJUSTMENT CAUTION / NOTICE / HINT *a Centering Bolt *b Standard Bolt HINT:
Use the same procedure for the RH side and LH side.
The following procedure is for the LH side.
Center
Reassembly
REASSEMBLY CAUTION / NOTICE / HINT HINT:
Use the same procedure for the RH side and LH side.
The following procedure is for the LH side.
PROCEDURE 1. PRECAUTION NOTICE: After turning the engin
SEE MORE:
Components
COMPONENTS ILLUSTRATION *A for HV Model *B for Gasoline Model *1 REAR DOOR SCUFF PLATE LH *2 REAR DOOR SCUFF PLATE RH *3 REAR SEAT SIDE GARNISH LH *4 REAR SEAT SIDE GARNISH RH *5 ROOF SIDE INNER GARNISH ASSEMBLY LH *6 ROOF SIDE INNER GARNISH ASSEMBLY RH *7
TRAC does not Operate
DESCRIPTION When ABS, TRAC or VSC is operating, the skid control ECU (brake booster with master cylinder assembly) blinks the slip indicator light to inform the driver that slippage occurred. When in VSC off mode, or TRAC and VSC are disabled, the multi-information display in the combination meter a
