
Lexus ES: Components
COMPONENTS
ILLUSTRATION
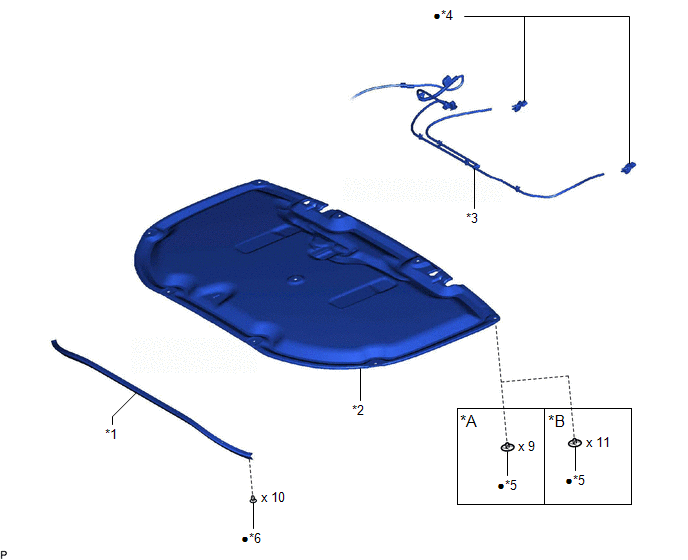
| *A | for TMK Made | *B | for TMMK Made |
| *1 | HOOD CUSHION CENTER | *2 | HOOD INSULATOR |
| *3 | WASHER HOSE ASSEMBLY | *4 | WASHER NOZZLE SUB-ASSEMBLY |
| *5 | HOOD INSULATOR CLIP | *6 | HOOD TO COWL TOP SEAL CLIP |
| ● | Non-reusable part | - | - |
ILLUSTRATION
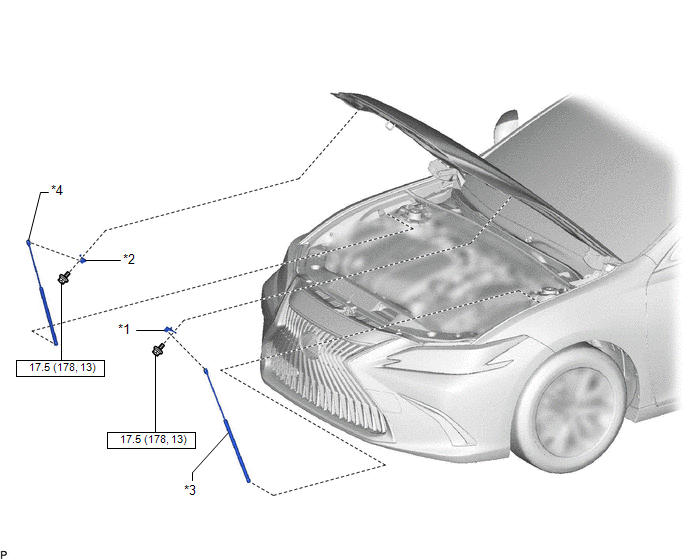
| *1 | HOOD STAY BRACKET LH | *2 | HOOD STAY BRACKET RH |
| *3 | HOOD SUPPORT ASSEMBLY LH | *4 | HOOD SUPPORT ASSEMBLY RH |
.png) | N*m (kgf*cm, ft.*lbf): Specified torque | - | - |
READ NEXT:
 On-vehicle Inspection
ON-VEHICLE INSPECTION PROCEDURE 1. INSPECT HOOD SUB-ASSEMBLY (a) Check that the clearance measurements of areas a through d are within each standard range. Standard Clearance Area Measurement
Disassembly
DISASSEMBLY PROCEDURE 1. REMOVE HOOD CUSHION CENTER (a) Using a clip remover, disengage the 10 hood to cowl top seal clips to remove the hood cushion center. (b) Remove the 10 hood to c
Adjustment
ADJUSTMENT CAUTION / NOTICE / HINT *a Centering Bolt *b Standard Bolt HINT:
Centering bolts are used to install the hood hinges and hood lock. The hood and hood lock cannot be adjust
SEE MORE:
Actuator Malfunction (C13A7)
DESCRIPTION DTC No. Detection Item DTC Detection Condition Trouble Area Memory Note C13A7 Actuator Malfunction Both of following conditions are met:
Electric parking brake is operating
One of following is detected: Motor lock, gear lock, motor spinning or repeated slipping
Removal
REMOVAL CAUTION / NOTICE / HINT The necessary procedures (adjustment, calibration, initialization, or registration) that must be performed after parts are removed and installed, or replaced during rear bumper assembly removal/installation are shown below. Necessary Procedure After Parts Removed/Inst
© 2016-2026 Copyright www.lexguide.net
