
Lexus ES: Components
COMPONENTS
ILLUSTRATION
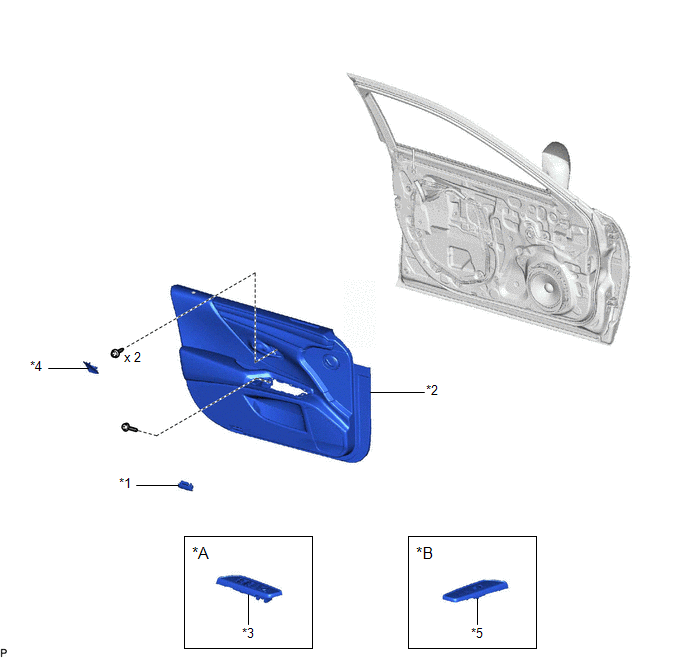
| *A | for Driver Side | *B | for Front Passenger Side |
| *1 | COURTESY LIGHT ASSEMBLY | *2 | FRONT DOOR TRIM BOARD SUB-ASSEMBLY |
| *3 | MULTIPLEX NETWORK MASTER SWITCH ASSEMBLY WITH FRONT DOOR UPPER ARMREST BASE PANEL | *4 | NO. 2 DOOR TRIM PAD |
| *5 | POWER WINDOW REGULATOR SWITCH ASSEMBLY WITH FRONT DOOR UPPER ARMREST BASE PANEL | - | - |
ILLUSTRATION
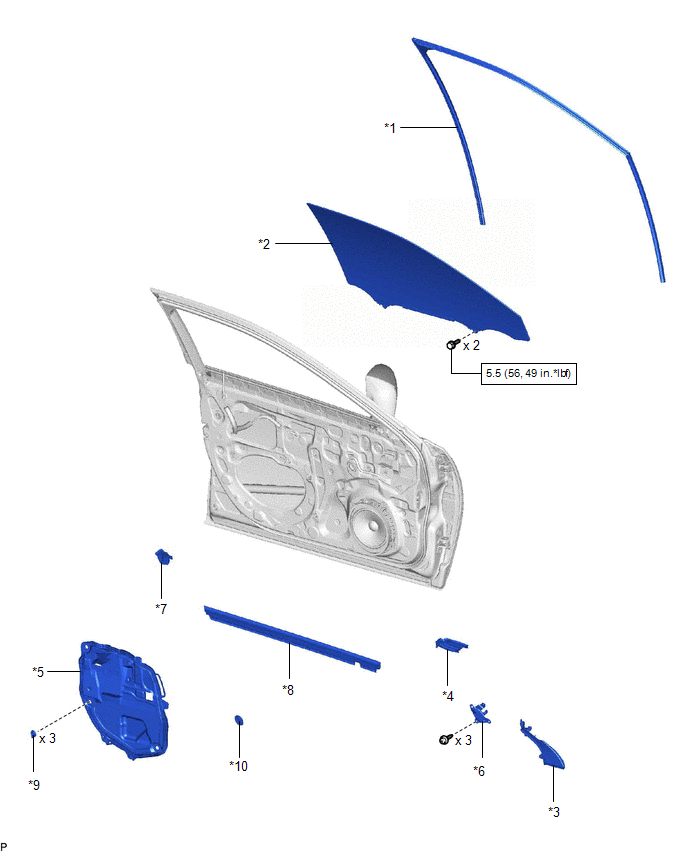
| *1 | FRONT DOOR GLASS RUN | *2 | FRONT DOOR GLASS SUB-ASSEMBLY |
| *3 | FRONT DOOR LOWER FRAME BRACKET GARNISH | *4 | FRONT DOOR PANEL PROTECTOR |
| *5 | FRONT DOOR SERVICE HOLE COVER | *6 | FRONT DOOR TRIM BRACKET |
| *7 | FRONT DOOR VENT SEAL | *8 | FRONT DOOR INNER GLASS WEATHERSTRIP |
| *9 | FRONT DOOR WEATHERSTRIP CLIP | *10 | HOLE PLUG |
.png) | N*m (kgf*cm, ft.*lbf): Specified torque | - | - |
ILLUSTRATION
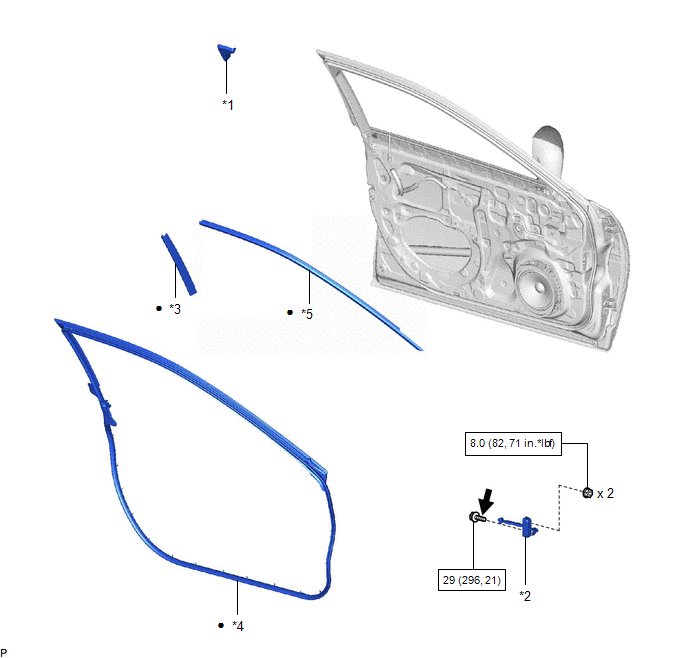
| *1 | DOOR UPPER FRAME GARNISH | *2 | FRONT DOOR CHECK ASSEMBLY |
| *3 | FRONT DOOR REAR INNER BLACK OUT TAPE | *4 | FRONT DOOR WEATHERSTRIP |
| *5 | FRONT INNER BLACK OUT TAPE | - | - |
| | N*m (kgf*cm, ft.*lbf): Specified torque | ● | Non-reusable part |
.png) | Toyota Genuine Adhesive 1324, Three Bond 1324 or equivalent | ★ | Precoated part |
READ NEXT:
 Removal
REMOVAL CAUTION / NOTICE / HINT The necessary procedures (adjustment, calibration, initialization, or registration) that must be performed after parts are removed and installed, or replaced during bla
Installation
INSTALLATION CAUTION / NOTICE / HINT HINT:
Use the same procedure for the RH side and LH side.
The following procedure is for the LH side.
PROCEDURE 1. PRECAUTION NOTICE: After turning the eng
SEE MORE:
Certification ECU Vehicle Information Reading/Writing Process Malfunction (B15F7)
DESCRIPTION This DTC is stored when items controlled by the certification ECU (smart key ECU assembly) cannot be customized via the navigation system vehicle customization screen. HINT: The certification ECU (smart key ECU assembly) controls the smart access system with push-button start (for Entry
Data List / Active Test
DATA LIST / ACTIVE TEST DATA LIST HINT: Using the Techstream to read the Data List allows the values or states of switches, sensors, actuators and other items to be read without removing any parts. This non-intrusive inspection can be very useful because intermittent conditions or signals may be dis
