Lexus ES: Components
COMPONENTS
ILLUSTRATION
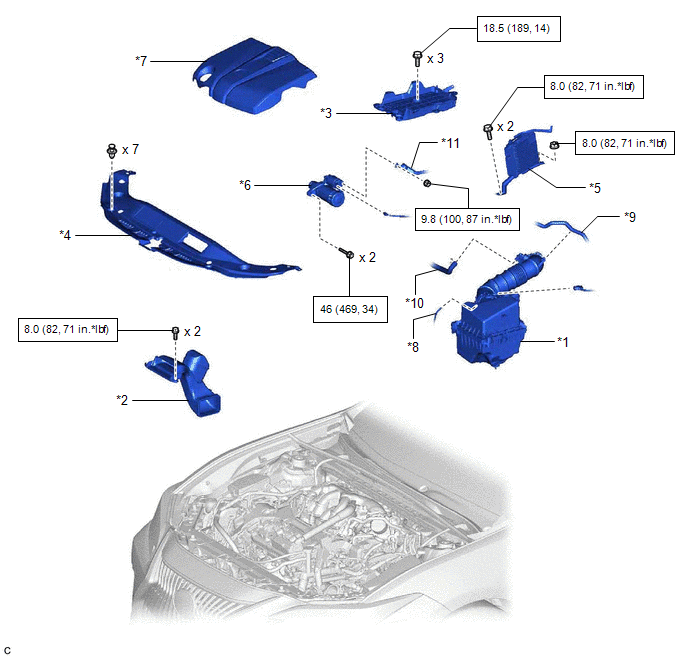
| *1 | AIR CLEANER ASSEMBLY WITH AIR CLEANER HOSE | *2 | INLET AIR CLEANER ASSEMBLY |
| *3 | BATTERY CLAMP SUB-ASSEMBLY | *4 | COOL AIR INTAKE DUCT SEAL |
| *5 | ECM | *6 | STARTER ASSEMBLY |
| *7 | V-BANK COVER SUB-ASSEMBLY | *8 | VACUUM HOSE |
| *9 | NO. 1 FUEL VAPOR FEED HOSE | *10 | NO. 2 VENTILATION HOSE |
| *11 | ENGINE WIRE | - | - |
.png) | Tightening torque for "Major areas involving basic vehicle performance such as moving/turning/stopping": N*m (kgf*cm, ft.*lbf) | .png) | N*m (kgf*cm, ft.*lbf): Specified torque |
ILLUSTRATION
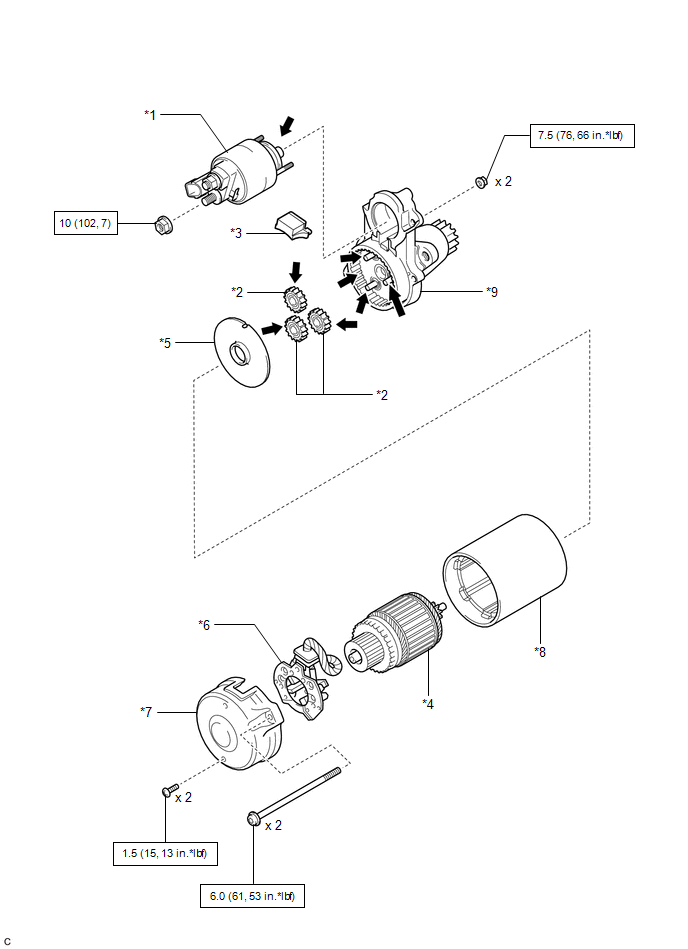
| *1 | MAGNET STARTER SWITCH ASSEMBLY | *2 | PLANETARY GEAR |
| *3 | RUBBER SEAL | *4 | STARTER ARMATURE ASSEMBLY |
| *5 | STARTER ARMATURE PLATE | *6 | STARTER BRUSH HOLDER ASSEMBLY |
| *7 | STARTER COMMUTATOR END FRAME ASSEMBLY | *8 | STARTER YOKE ASSEMBLY |
| *9 | REPAIR SERVICE STARTER KIT | - | - |
| | N*m (kgf*cm, ft.*lbf): Specified torque | .png) | High-temperature Grease |
READ NEXT:
 Removal
REMOVAL CAUTION / NOTICE / HINT The necessary procedures (adjustment, calibration, initialization or registration) that must be performed after parts are removed and installed, or replaced during star
Inspection
INSPECTION PROCEDURE 1. INSPECT STARTER ASSEMBLY CAUTION: As a large electric current passes through the cable during this inspection, a thick cable must be used. If not, the cable may become hot and
Reassembly
REASSEMBLY PROCEDURE 1. INSTALL PLANETARY GEAR (a) Apply high-temperature grease to the 3 planetary gears, 3 planetary gear shafts and repair service starter kit. High-temperature Grease (b)
SEE MORE:
Data List / Active Test
DATA LIST / ACTIVE TEST NOTICE: In the table below, the values listed under "Normal Condition" are reference values. Do not depend solely on these reference values when deciding whether a part is faulty or not. The actual values may differ from the values listed in the chart under "Reference Value"
No. 2 Clearance Warning Buzzer Circuit
DESCRIPTION This circuit consists of the No. 2 clearance warning buzzer and clearance warning ECU assembly. An ECU-excited type buzzer is used. The ECU operates the buzzers using a sound pattern that changes depending on the distance to the obstacle. WIRING DIAGRAM PROCEDURE 1. PERFORM ACTIVE
