Lexus ES: Components
COMPONENTS
ILLUSTRATION
.png)
| *A | Type A | *B | Type B |
| *1 | FRONT FENDER APRON SEAL LH | *2 | FRONT WHEEL OPENING EXTENSION PAD LH |
| *3 | FRONT WHEEL OPENING EXTENSION PAD RH | *4 | NO. 1 ENGINE UNDER COVER |
| *5 | NO. 3 ENGINE UNDER COVER | - | - |
.png) | N*m (kgf*cm, ft.*lbf): Specified torque | - | - |
ILLUSTRATION
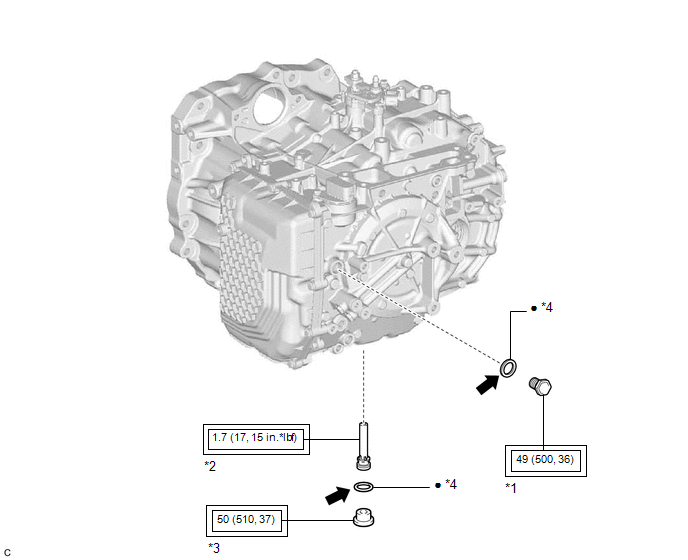
| *1 | REFILL PLUG | *2 | NO. 1 TRANSMISSION OIL FILLER TUBE |
| *3 | OVERFLOW PLUG | *4 | GASKET |
.png) | Tightening torque for "Major areas involving basic vehicle performance such as moving/turning/stopping": N*m (kgf*cm, ft.*lbf) | ● | Non-reusable part |
.png) | Toyota Genuine ATF WS | - | - |
ILLUSTRATION
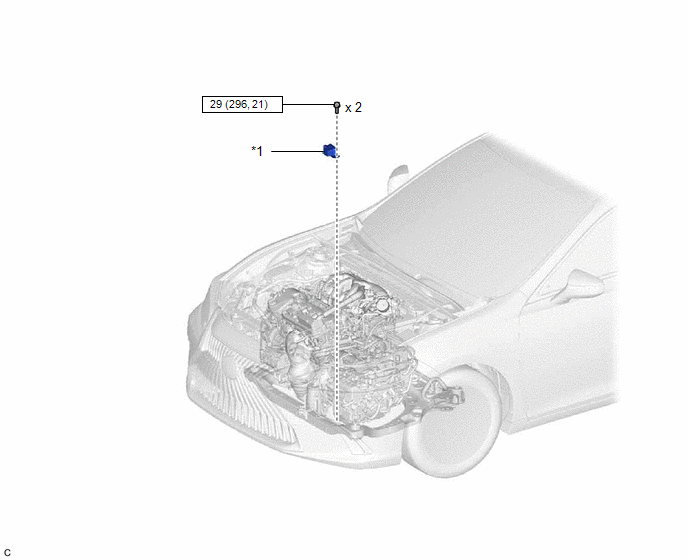
| *1 | FRONT SUSPENSION MEMBER DYNAMIC DAMPER | - | - |
| | N*m (kgf*cm, ft.*lbf): Specified torque | - | - |
ILLUSTRATION
.png)
| *A | for TMC Made | *B | for TMMWV Made |
| *C | for AISIN AW Made | - | - |
| *1 | TRANSMISSION CASE SIDE COVER | - | - |
| | Tightening torque for "Major areas involving basic vehicle performance such as moving/turning/stopping": N*m (kgf*cm, ft.*lbf) | ● | Non-reusable part |
| | Toyota Genuine Adhesive 1324, Three Bond 1324 or equivalent | ★ | Precoated part |
ILLUSTRATION
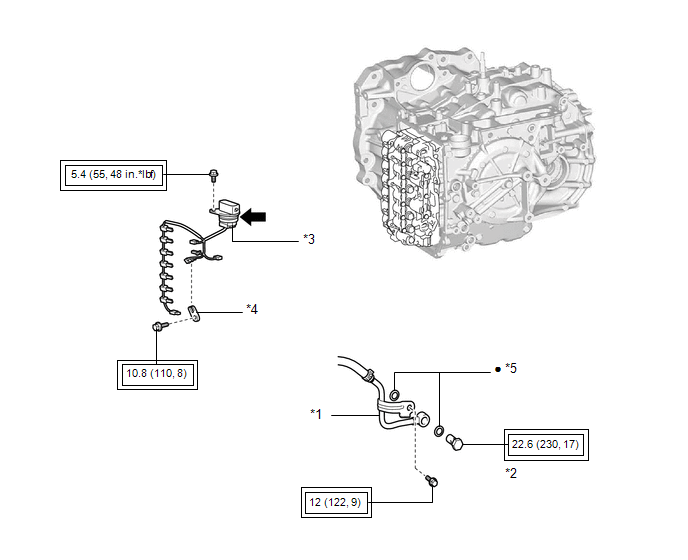
| *1 | OIL COOLER UNION SUB-ASSEMBLY | *2 | OIL COOLER UNION BOLT |
| *3 | TRANSMISSION WIRE | *4 | TEMPERATURE SENSOR CLAMP |
| *5 | GASKET | - | - |
| | Tightening torque for "Major areas involving basic vehicle performance such as moving/turning/stopping": N*m (kgf*cm, ft.*lbf) | ● | Non-reusable part |
| | Toyota Genuine ATF WS | - | - |
READ NEXT:
 Installation
INSTALLATION PROCEDURE 1. INSTALL TRANSMISSION WIRE (a) Coat the O-ring of the transmission wire with Toyota Genuine ATF WS. (b) Install the transmission wire to the automatic transaxle
Removal
REMOVAL CAUTION / NOTICE / HINT The necessary procedures (adjustment, calibration, initialization or registration) that must be performed after parts are removed and installed, or replaced during tran
SEE MORE:
Terminals Of Ecu
TERMINALS OF ECU *a Hybrid Vehicle Control ECU - - HINT: The standard normal voltage between each pair of hybrid vehicle control ECU terminals is shown in the table below. The appropriate conditions for checking each pair of terminals are also indicated. The result of checks should be c
Problem Symptoms Table
PROBLEM SYMPTOMS TABLE HINT:
Use the table below to help determine the cause of problem symptoms. If multiple suspected areas are listed, the potential causes of the symptoms are listed in order of probability in the "Suspected Area" column of the table. Check each symptom by checking the suspect
