Lexus ES: Reassembly
REASSEMBLY
PROCEDURE
1. INSTALL HOOD STAY BRACKET LH
Click here .gif)
2. INSTALL HOOD STAY BRACKET RH
HINT:
Use the same procedure as for the LH side.
3. INSTALL HOOD SUPPORT ASSEMBLY LH
Click here
4. INSTALL HOOD SUPPORT ASSEMBLY RH
HINT:
Use the same procedure as for the LH side.
5. CONNECT WASHER HOSE ASSEMBLY
| (a) Engage the grommet. |
|
.png)
(b) Engage the 5 clamps to connect the washer hose assembly.
6. INSTALL WASHER NOZZLE SUB-ASSEMBLY
Click here
HINT:
Use the same procedure as for the LH side.
7. INSPECT WASHER NOZZLE SUB-ASSEMBLY
Click here
8. ADJUST WASHER NOZZLE SUB-ASSEMBLY
Click here
9. INSTALL HOOD INSULATOR
(a) Engage the 2 guides as shown in the illustration.
.png) | Install in this Direction |
(b) for TMK Made:
| (1) Install the hood insulator with 9 new hood insulator clips. |
|
.png)
(c) for TMMK Made:
| (1) Install the hood insulator with 11 new hood insulator clips. |
|
.png)
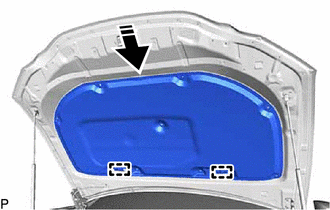
10. INSTALL HOOD CUSHION CENTER
| (a) Install the hood cushion center with 10 new hood to cowl top seal clips. |
|
.png)
READ NEXT:
 Components
COMPONENTS ILLUSTRATION *A for HV Model - - *1 COOL AIR INTAKE DUCT SEAL *2 FRONT FENDER LINER RETAINER *3 FRONT WHEEL OPENING EXTENSION PAD LH *4 HOOD LOCK ASSEMBLY
Components
COMPONENTS ILLUSTRATION *1 COOL AIR INTAKE DUCT SEAL *2 FRONT FENDER LINER RETAINER *3 FRONT WHEEL OPENING EXTENSION PAD LH *4 HOOD LOCK ASSEMBLY *5 PIN HOLD CLIP *6 REAR
SEE MORE:
Components
COMPONENTS ILLUSTRATION *1 FRONT WHEEL OPENING EXTENSION PAD RH *2 FRONT WHEEL OPENING EXTENSION PAD LH *3 NO. 1 ENGINE UNDER COVER *4 NO. 2 ENGINE UNDER COVER ASSEMBLY N*m (kgf*cm, ft.*lbf): Specified torque - - ILLUSTRATION *1 TRANSFER FILLER PLUG *2 TRA
High Voltage Power Resource Circuit Voltage Sensor after Boosting Malfunction (P1C8349)
DTC SUMMARY MALFUNCTION DESCRIPTION The hybrid vehicle control ECU monitors the high-voltage wiring between the HV battery and inverter with converter assembly and detects a power supply malfunction. The cause of this malfunction may be one of the following: Inverter voltage sensor (VH) internal ci
