
Lexus ES: Parts Location
Lexus ES (XZ10) Service Manual / Vehicle Interior / Sliding Roof / Convertible / Panoramic Moon Roof System / Parts Location
PARTS LOCATION
ILLUSTRATION
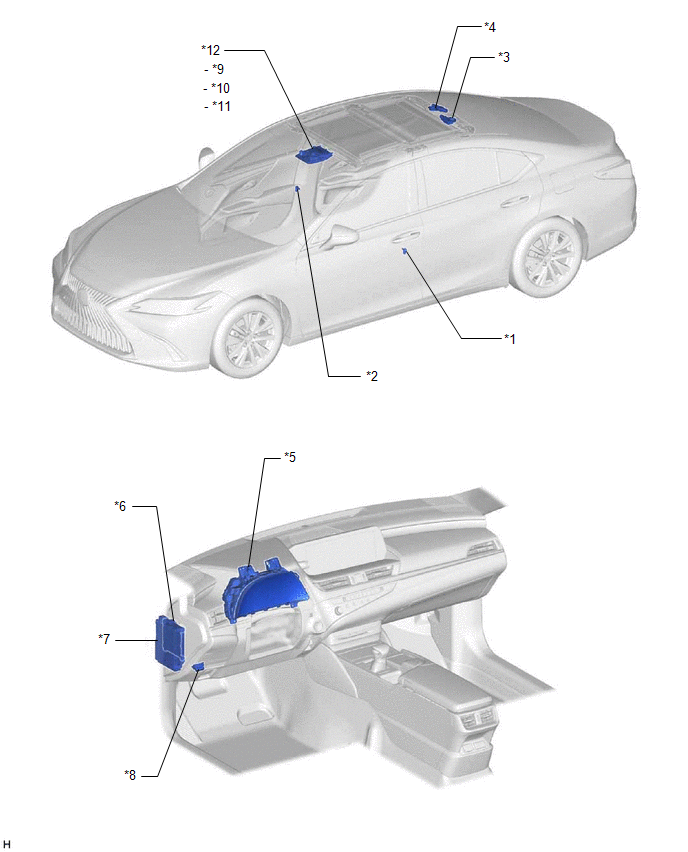
| *1 | FRONT DOOR COURTESY LIGHT SWITCH ASSEMBLY (for LH) | *2 | FRONT DOOR COURTESY LIGHT SWITCH ASSEMBLY (for RH) |
| *3 | ROOF SUNSHADE ECU (SLIDING ROOF DRIVE GEAR ASSEMBLY) | *4 | SLIDING ROOF ECU (SLIDING ROOF DRIVE GEAR ASSEMBLY) |
| *5 | COMBINATION METER ASSEMBLY | *6 | MAIN BODY ECU (MULTIPLEX NETWORK BODY ECU) |
| *7 | INSTRUMENT PANEL JUNCTION BLOCK ASSEMBLY - S/ROOF FUSE | *8 | DLC3 |
| *9 | SLIDING ROOF SWITCH | *10 | ROOF SUNSHADE SWITCH |
| *11 | TILT SWITCH | *12 | PANORAMIC MOON ROOF SWITCH (MAP LIGHT SUB-ASSEMBLY) |
READ NEXT:
 System Diagram
SYSTEM DIAGRAM Communication Table Sender Receiver Signal Line Main Body ECU (Multiplex Network Body ECU) Sliding Roof ECU (Sliding Roof Drive Gear Assembly)
Sliding roof operati
System Description
SYSTEM DESCRIPTION PANORAMIC MOON ROOF SYSTEM DESCRIPTION (a) The panoramic moon roof system controls the sliding roof operation using the sliding roof ECU (sliding roof drive gear assembly) and roof
How To Proceed With Troubleshooting
CAUTION / NOTICE / HINT HINT:
Use the following procedure to troubleshoot the panoramic moon roof system.
*: Use the Techstream.
PROCEDURE 1. VEHICLE BROUGHT TO WORKSHOP
NEXT
SEE MORE:
Components
COMPONENTS ILLUSTRATION *A Type A - - *1 EXHAUST MANIFOLD (TWC: Front Catalyst) *2 NO. 1 EXHAUST MANIFOLD HEAT INSULATOR *3 MANIFOLD STAY *4 EXHAUST MANIFOLD TO HEAD GASKET N*m (kgf*cm, ft.*lbf): Specified torque ● Non-reusable part ILLUSTRATION *A
Disassembly
DISASSEMBLY PROCEDURE 1. REMOVE SLIDING ROOF DRIVE GEAR SUB-ASSEMBLY (a) Remove the bolt. Remove in this Direction (b) Disengage the claw and guide as shown in the illustration to remove the map light bracket. (c) Remove the 2 bolts and sliding roof drive gear sub-assembly.
© 2016-2026 Copyright www.lexguide.net
