Lexus ES: Installation
INSTALLATION
PROCEDURE
1. INSTALL ACTIVE NOISE CONTROL MICROPHONE (for Front Side)
HINT:
- Use the same procedure for the RH side and LH side.
- The following procedure is for the LH side.
(a) Connect the connector.
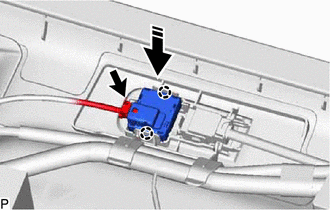
 | Install in this Direction |
(b) Engage the 2 claws to install the active noise control microphone as shown in the illustration.
2. INSTALL ACTIVE NOISE CONTROL MICROPHONE (for Rear Side)
(a) Connect the connector.
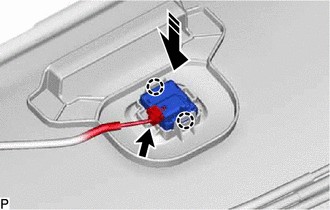
| | Install in this Direction |
(b) Engage the 2 claws to install the active noise control microphone as shown in the illustration.
3. INSTALL ROOF HEADLINING ASSEMBLY
Click here .gif)
READ NEXT:
 Removal
REMOVAL CAUTION / NOTICE / HINT The necessary procedures (adjustment, calibration, initialization, or registration) that must be performed after parts are removed and installed, or replaced during act
ANC ECU EEPROM Data Memory Failure (B1AA044)
DESCRIPTION This DTC is stored when a malfunction occurs in the stereo component equalizer assembly. DTC No. Detection Item DTC Detection Condition Trouble Area B1AA044 ANC ECU EEPROM D
SEE MORE:
Multi-axis Acceleration Sensor Module "A" Missing Calibration (C051D54)
DESCRIPTION The airbag ECU assembly has a built-in yaw rate and acceleration sensor and detects the vehicle condition. The skid control ECU (brake actuator assembly) receives signals from the yaw rate and acceleration sensor (airbag ECU assembly) via CAN communication. HINT: If a communication error
Disposal
DISPOSAL PROCEDURE 1. DISPOSE OF HOOD SUPPORT ASSEMBLY (a) Secure the hood support assembly horizontally in a vise with the piston rod pulled out. (b) Wearing safety glasses, gradually cut a part within the area (a) shown in the illustration using a metal saw to release the gas. Specification:
© 2016-2026 Copyright www.lexguide.net
