Lexus ES: Components
COMPONENTS
ILLUSTRATION
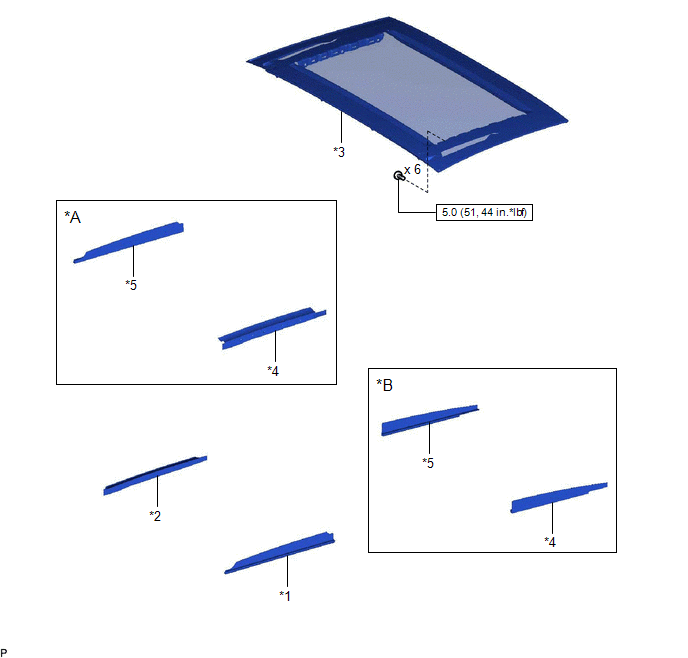
| *A | for Front Side | *B | for Rear Side |
| *1 | FRONT SLIDING ROOF GARNISH LH | *2 | FRONT SLIDING ROOF GARNISH RH |
| *3 | SLIDING ROOF GLASS SUB-ASSEMBLY | *4 | SLIDING ROOF SIDE GARNISH LH |
| *5 | SLIDING ROOF SIDE GARNISH RH | - | - |
.png) | N*m (kgf*cm, ft.*lbf): Specified torque | - | - |
ILLUSTRATION
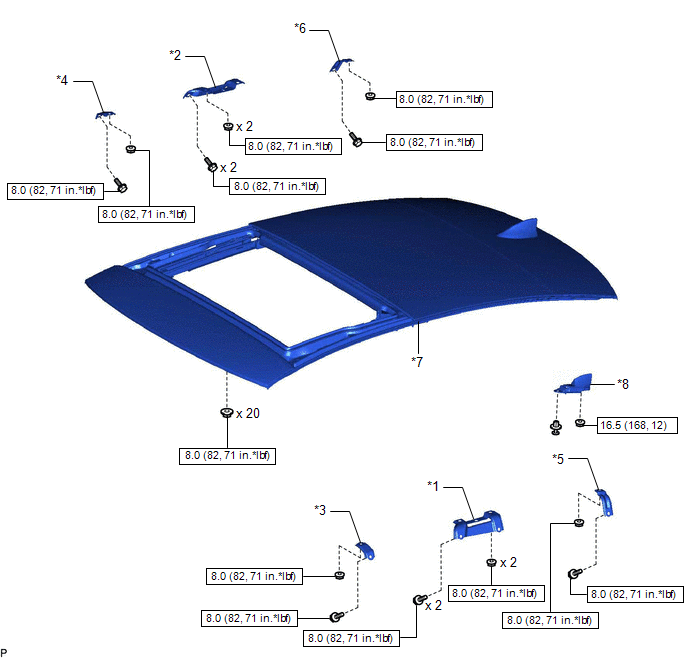
| *1 | CENTER SLIDING ROOF HOUSING MOUNTING BRACKET LH | *2 | CENTER SLIDING ROOF HOUSING MOUNTING BRACKET RH |
| *3 | FRONT SLIDING ROOF HOUSING MOUNTING BRACKET LH | *4 | FRONT SLIDING ROOF HOUSING MOUNTING BRACKET RH |
| *5 | REAR SLIDING ROOF HOUSING MOUNTING BRACKET LH | *6 | REAR SLIDING ROOF HOUSING MOUNTING BRACKET RH |
| *7 | SLIDING ROOF OR REMOVABLE ROOF HOUSING SUB-ASSEMBLY | *8 | TELEPHONE ANTENNA ASSEMBLY |
| | N*m (kgf*cm, ft.*lbf): Specified torque | - | - |
ILLUSTRATION
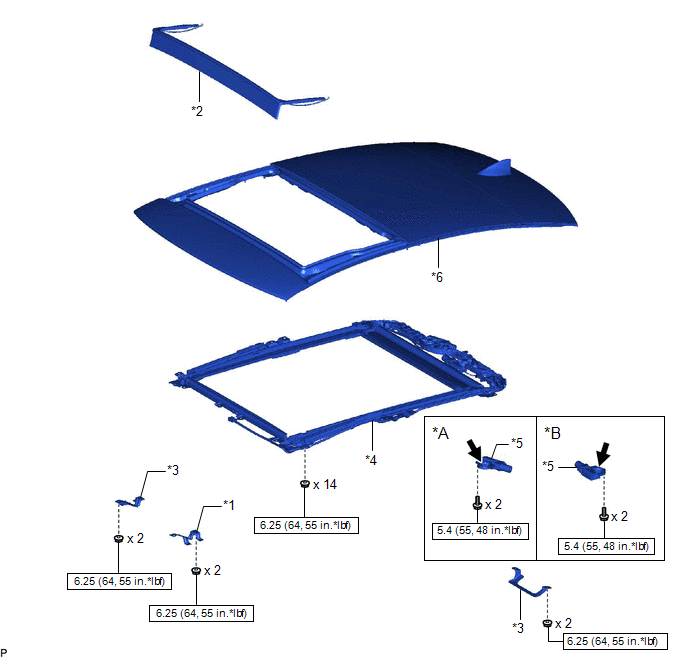
| *A | for Sliding Roof Glass | *B | for Roof Sunshade |
| *1 | NO. 2 ROOM LIGHT BRACKET | *2 | ROOF WIND DEFLECTOR PANEL SUB-ASSEMBLY |
| *3 | ROOM LIGHT BRACKET | *4 | SLIDE ROOF RAIL SUB-ASSEMBLY |
| *5 | SLIDING ROOF DRIVE GEAR ASSEMBLY | *6 | SLIDING ROOF HOUSING PANEL |
| | N*m (kgf*cm, ft.*lbf): Specified torque | .png) | MP grease |
ILLUSTRATION
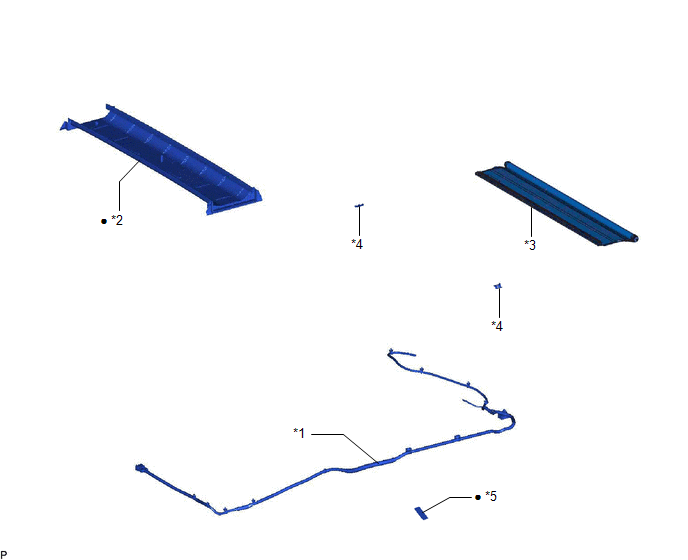
| *1 | NO. 2 ROOF WIRE | *2 | REAR SLIDING ROOF GARNISH |
| *3 | SUNSHADE TRIM SUB-ASSEMBLY | *4 | SLIDING ROOF SUNSHADE PLATE |
| *5 | Tape | - | - |
| ● | Non-reusable part | - | - |
READ NEXT:
 Removal
REMOVAL CAUTION / NOTICE / HINT The necessary procedures (adjustment, calibration, initialization or registration) that must be performed after parts are removed and installed, or replaced during slid
Disassembly
DISASSEMBLY PROCEDURE 1. REMOVE ROOF WIND DEFLECTOR PANEL SUB-ASSEMBLY (a) Disengage the 3 claws and 2 pins. (b) Move the roof wind deflector panel sub-assembly in the direction indicated by the arro
Reassembly
REASSEMBLY PROCEDURE 1. INSTALL SUNSHADE TRIM SUB-ASSEMBLY (a) Make sure that the No. 1 sliding roof shoe sub-assembly is positioned as shown in the illustration. HINT: Use the same procedure for t
SEE MORE:
System Voltage (BATT) Circuit Short to Ground or Open (P056014)
DESCRIPTION Auxiliary battery power is supplied to the BATT terminal of the hybrid vehicle control ECU in order to store DTCs and freeze frame data. Even if the power switch is turned off, back-up power is supplied. DTC No. Detection Item DTC Detection Condition Trouble Area MIL Warning
Refueling
Opening the fuel tank cap
The fuel tank of your vehicle has a
special structure, which requires a
reduction in fuel tank pressure
before refueling. After the opener
switch has been pressed, it will take
several seconds until the vehicle is
ready for refueling.
Before refueling the vehicle
