Lexus ES: Disassembly
DISASSEMBLY
PROCEDURE
1. REMOVE ROOF WIND DEFLECTOR PANEL SUB-ASSEMBLY
(a) Disengage the 3 claws and 2 pins.
(b) Move the roof wind deflector panel sub-assembly in the direction indicated by the arrow (1) shown in the illustration.
.png) | Remove in this Direction (1) |
.png) | Remove in this Direction (2) |
(c) Move the roof wind deflector panel sub-assembly in the direction indicated by the arrow (2) shown in the illustration to disengage the 2 guides and remove the roof wind deflector panel sub-assembly.
2. REMOVE ROOM LIGHT BRACKET
| (a) Remove the 2 nuts and room light bracket. |
|

3. REMOVE NO. 2 ROOM LIGHT BRACKET
| (a) Remove the 2 nuts and No. 2 room light bracket. |
|
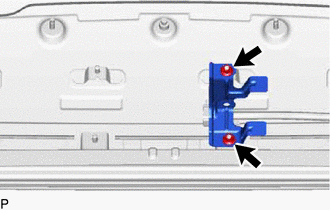
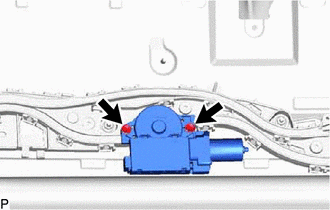
4. REMOVE SLIDING ROOF DRIVE GEAR ASSEMBLY (for Roof Sunshade)
| (a) Remove the 2 nuts and room light bracket. |
|
(b) Disconnect the connector.
| (c) Remove the 2 bolts and sliding roof drive gear assembly. |
|
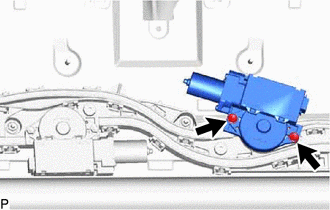
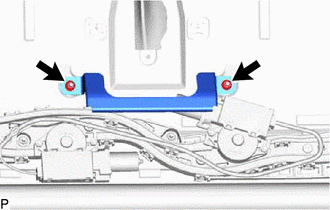
5. REMOVE SLIDING ROOF DRIVE GEAR ASSEMBLY (for Sliding Roof Glass)
(a) Disconnect the connector.
| (b) Remove the 2 bolts and sliding roof drive gear assembly. |
|
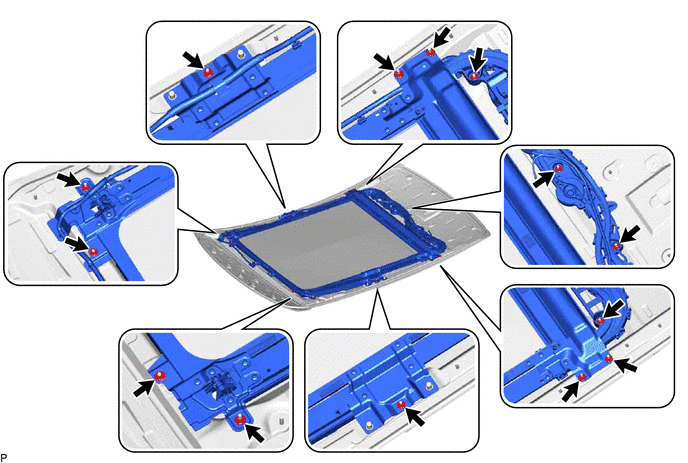
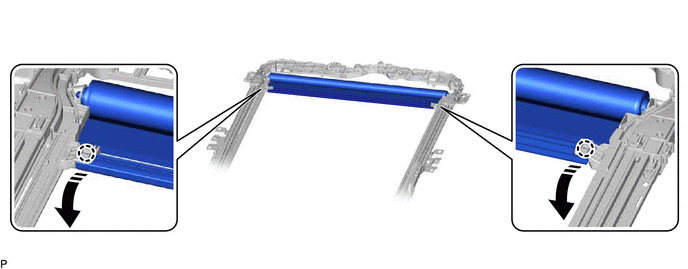
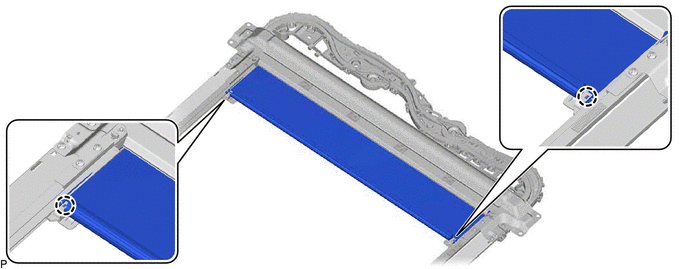
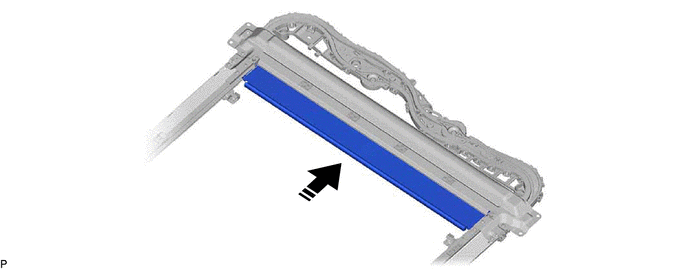
6. REMOVE SLIDE ROOF RAIL SUB-ASSEMBLY
(a) Remove the 14 nuts and slide roof rail sub-assembly from the sliding roof housing panel.
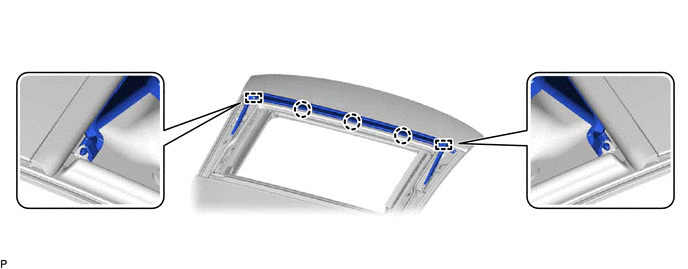
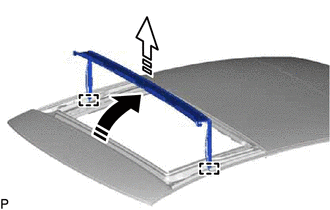
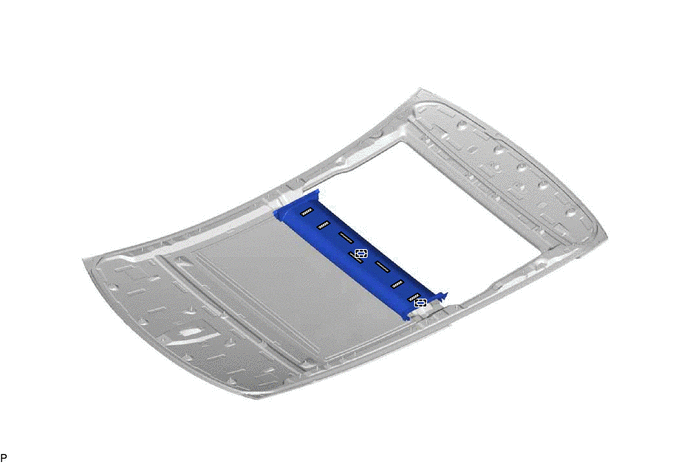
7. REMOVE REAR SLIDING ROOF GARNISH
(a) Using a heat light, heat the rear sliding roof garnish.
Heating Temperature| Item | Temperature |
|---|---|
| Rear Sliding Roof Garnish | 20 to 30°C (68 to 86°F) |
CAUTION:
- Do not touch the heat light and heated parts, touching the heat light may result in burns.
- Touching heated parts for a long time may result in burns.
.png)
| *a | Heated Part |
| *b | Heat Light |
NOTICE:
Do not heat the rear sliding roof garnish excessively.
(b) Disengage the 2 guides to remove the rear sliding roof garnish.
.png) | Double-sided Tape | - | - |
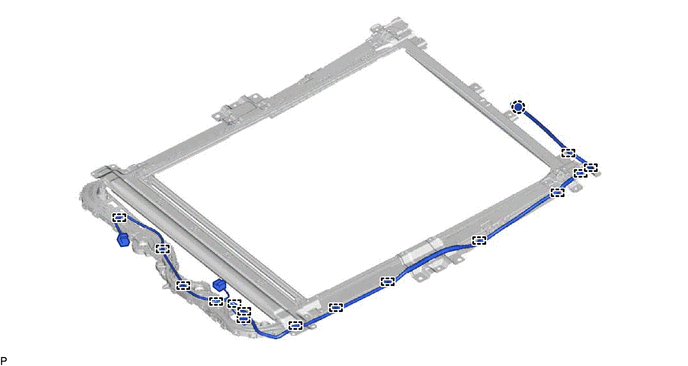
8. REMOVE NO. 2 ROOF WIRE
(a) Cut the tape at the position shown in the illustration.
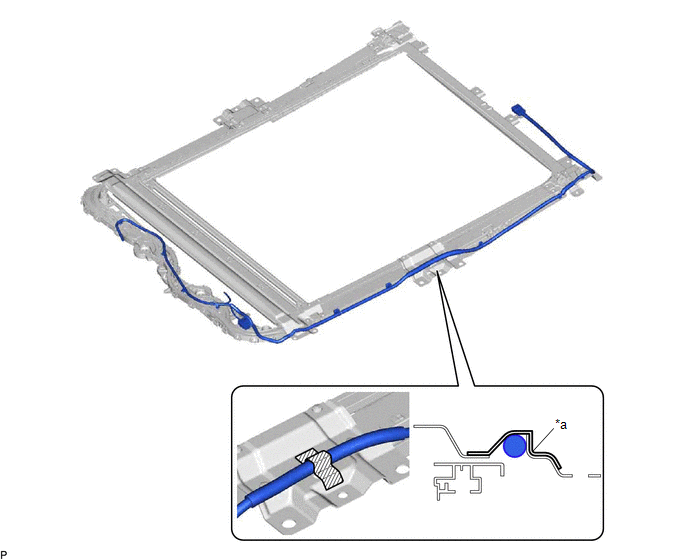
| *a | Cut | - | - |
| | Tape | - | - |
(b) When reusing the No. 2 roof wire:
(1) Wrap the tape around the No. 2 roof wire.
HINT:
Make sure to remove the remaining tape from the bracket.
(c) Disengage the claw and 15 clamps to remove the No. 2 roof wire.
9. REMOVE SUNSHADE TRIM SUB-ASSEMBLY
(a) Move the sunshade trim sub-assembly as shown in the illustration to disengage the 2 claws.
| | Remove in this Direction | - | - |
(b) Disengage the 2 claws.
(c) Slide the sunshade trim sub-assembly as shown in the illustration.
| | Remove in this Direction | - | - |
| (d) Remove the sliding roof sunshade plate. HINT: Use the same procedure for the RH side and LH side. |
|
(e) Remove the sunshade trim sub-assembly as shown in the illustration.
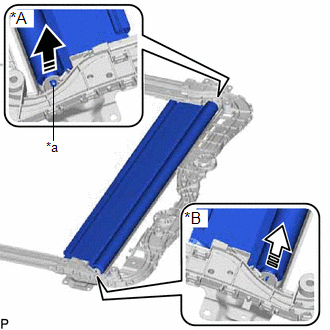
| *A | RH Side |
| *B | LH side |
| *a | Retractor Cap |
| | Remove in this Direction (1) |
| | Remove in this Direction (2) |
NOTICE:
To prevent the sunshade trim sub-assembly from being damaged, fully push in the RH side retractor cap before lifting the sunshade trim sub-assembly to separate it from the slide roof rail sub-assembly.
HINT:
Separate the RH side first.
READ NEXT:
 Reassembly
REASSEMBLY PROCEDURE 1. INSTALL SUNSHADE TRIM SUB-ASSEMBLY (a) Make sure that the No. 1 sliding roof shoe sub-assembly is positioned as shown in the illustration. HINT: Use the same procedure for t
Installation
INSTALLATION PROCEDURE 1. INSTALL SLIDING ROOF OR REMOVABLE ROOF HOUSING SUB-ASSEMBLY (a) Pass a string under the windshield outside moulding as shown in the illustration. *1 Windshield Outside
SEE MORE:
Diagnostic Trouble Code Chart
DIAGNOSTIC TROUBLE CODE CHART Power Trunk Lid System DTC No. Detection Item Link B2205 Kick Sensor Circuit B2222 PBD/PTL Pulse Sensor B2225 PBD/PTL Motor Clutch Malfunction B2250 PBD/PTL Closer Operation B2251 PBD/PTL Closer Switch U0
Indicator Circuit
DESCRIPTION The forward recognition camera sends indicator illumination request signals to the combination meter assembly via CAN communication. CAUTION / NOTICE / HINT NOTICE:
When replacing the forward recognition camera, always replace it with a new one. If a forward recognition camera which w
