Lexus ES: Components
COMPONENTS
ILLUSTRATION
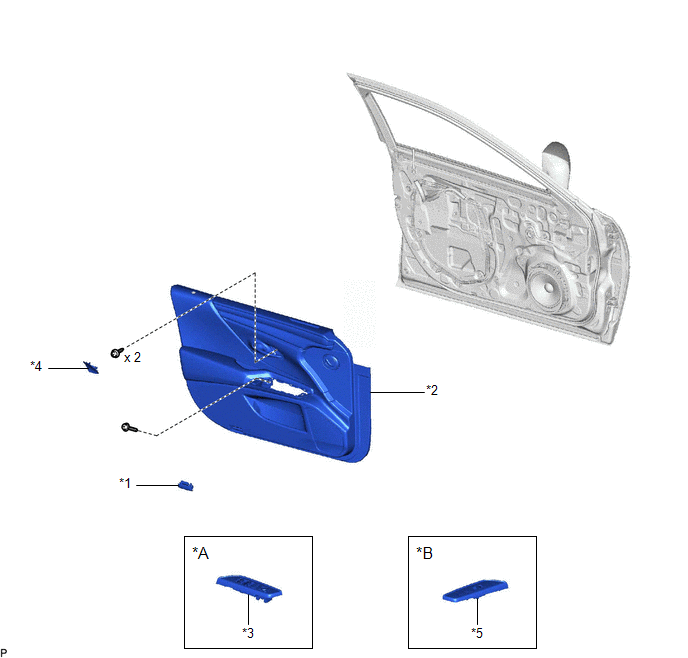
| *A | for Driver Side | *B | for Front Passenger Side |
| *1 | COURTESY LIGHT ASSEMBLY | *2 | FRONT DOOR TRIM BOARD SUB-ASSEMBLY |
| *3 | MULTIPLEX NETWORK MASTER SWITCH ASSEMBLY WITH FRONT DOOR UPPER ARMREST BASE PANEL | *4 | NO. 2 DOOR TRIM PAD |
| *5 | POWER WINDOW REGULATOR SWITCH ASSEMBLY WITH FRONT DOOR UPPER ARMREST BASE PANEL | - | - |
ILLUSTRATION
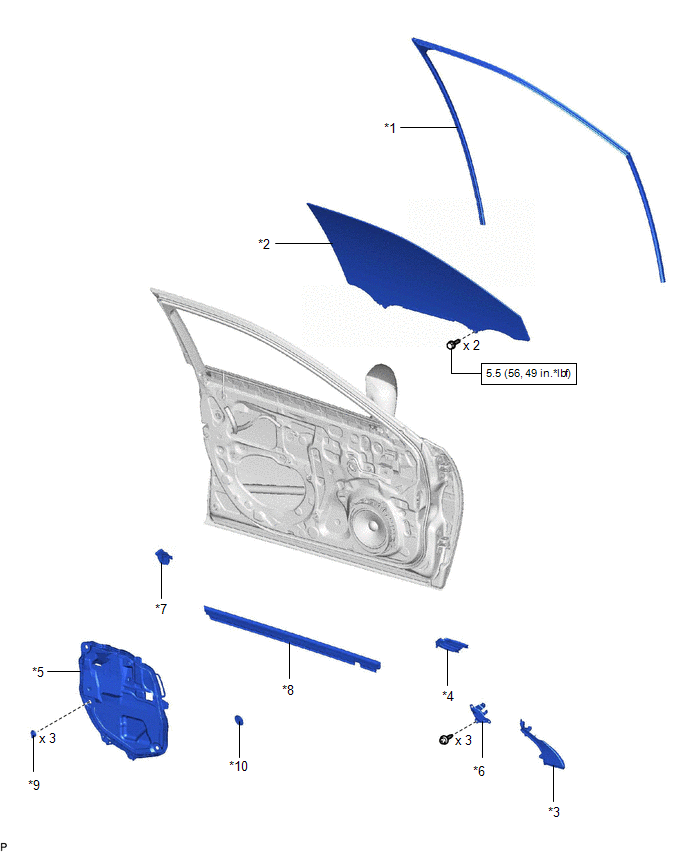
| *1 | FRONT DOOR GLASS RUN | *2 | FRONT DOOR GLASS SUB-ASSEMBLY |
| *3 | FRONT DOOR LOWER FRAME BRACKET GARNISH | *4 | FRONT DOOR PANEL PROTECTOR |
| *5 | FRONT DOOR SERVICE HOLE COVER | *6 | FRONT DOOR TRIM BRACKET |
| *7 | FRONT DOOR VENT SEAL | *8 | FRONT DOOR INNER GLASS WEATHERSTRIP |
| *9 | FRONT DOOR WEATHERSTRIP CLIP | *10 | HOLE PLUG |
.png) | N*m (kgf*cm, ft.*lbf): Specified torque | - | - |
ILLUSTRATION
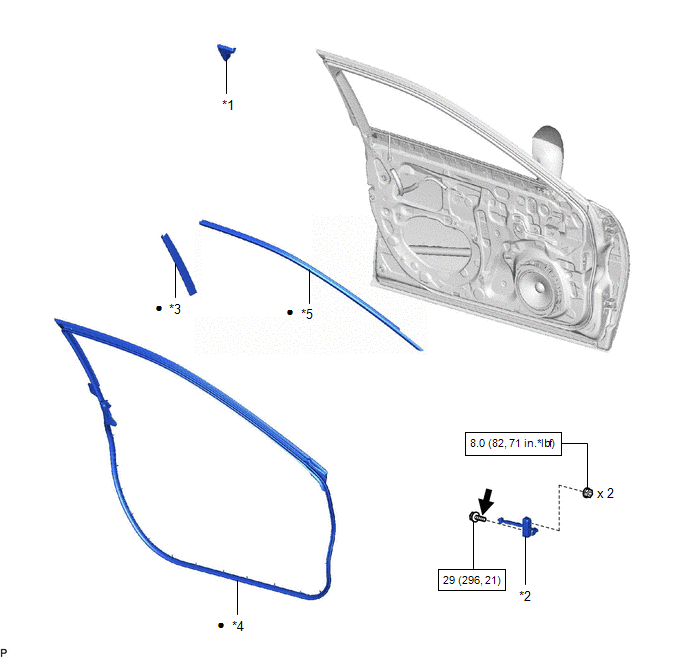
| *1 | DOOR UPPER FRAME GARNISH | *2 | FRONT DOOR CHECK ASSEMBLY |
| *3 | FRONT DOOR REAR INNER BLACK OUT TAPE | *4 | FRONT DOOR WEATHERSTRIP |
| *5 | FRONT INNER BLACK OUT TAPE | - | - |
| | N*m (kgf*cm, ft.*lbf): Specified torque | ● | Non-reusable part |
.png) | Toyota Genuine Adhesive 1324, Three Bond 1324 or equivalent | ★ | Precoated part |
READ NEXT:
 Removal
REMOVAL CAUTION / NOTICE / HINT The necessary procedures (adjustment, calibration, initialization, or registration) that must be performed after parts are removed and installed, or replaced during bla
Installation
INSTALLATION CAUTION / NOTICE / HINT HINT:
Use the same procedure for the RH side and LH side.
The following procedure is for the LH side.
PROCEDURE 1. PRECAUTION NOTICE: After turning the eng
SEE MORE:
Installation
INSTALLATION PROCEDURE 1. INSTALL HAZARD WARNING SIGNAL SWITCH ASSEMBLY (a) Engage the 2 claws to install the hazard warning signal switch assembly. Install in this Direction 2. INSTALL NO. 2 INSTRUMENT PANEL REGISTER ASSEMBLY Click here 3. INSTALL UPPER INSTRUMENT PANEL FINISH PANEL SUB
Calibration
CALIBRATION ADJUST PARKING ASSIST MONITOR SYSTEM (a) The parking assist monitor system can be adjusted using diagnostic mode. (b) If the following operations are performed, it is necessary to perform adjustments and checks using diagnostic mode. Part Name Operation Adjustment Item Proceed t
